# API Policy
Source: https://docs.greip.io/api-policy
Greip API Updates & Deprecation Policy
## 1. Overview
This policy outlines Greip’s approach to API updates, versioning, and deprecation. It ensures a smooth transition for developers when changes are introduced and provides clear guidelines on how long older versions will be supported before they are phased out.
By using the Greip API, you agree to stay informed about updates and adjust your integration accordingly to maintain compatibility.
## 2. API Versioning & Updates
Greip follows a versioned API approach to maintain stability while introducing improvements. Versions are structured as:
```
v[Major].[Minor].[Patch] (Example: v1.2.3)
```
* Major Updates (vX.0.0)
* Introduce significant changes, including breaking changes that may require code adjustments.
* Announced at least 2 months before deprecation of the previous major version.
* Minor Updates (vX.Y.0)
* Add new features or improvements without breaking existing functionality.
* Recommended but not mandatory for users to upgrade immediately.
* Patch Updates (vX.Y.Z)
* Contain bug fixes, security enhancements, and performance optimizations.
* Automatically applied and require no action unless otherwise stated.
Developers should integrate with the latest stable version to benefit from performance, security, and feature improvements.
## 3. Deprecation & Sunset Policy
To ensure long-term reliability, Greip may deprecate older API versions when necessary. The deprecation process follows these steps:
### 3.1 Deprecation Announcement
* Deprecation notices will be communicated via:
* Greip API Documentation (docs.greip.io)
* Email notifications (for registered users with active API keys)
* Dashboard alerts (if applicable)
* The notice period for deprecation depends on the impact of the change:
* Major version deprecation: Minimum 2 months notice before end-of-life.
* Minor version deprecation: Minimum 2 months notice.
* Patch versions are not deprecated individually unless a security issue arises.
### 3.2 Sunset Phase (End-of-Life)
* After the deprecation period, the API version will be officially sunset and no longer accessible.
* Requests to deprecated versions may return HTTP 410 (Gone) or be redirected to the latest version if possible.
* API keys using outdated versions will not be disabled but will no longer work with the deprecated endpoints.
## 4. Mandatory Migrations
Certain updates may require developers to migrate to a newer API version. This happens when:
* Security vulnerabilities exist in the deprecated version.
* Underlying technology dependencies are no longer supported.
* A major architectural change is introduced.
Developers are expected to proactively update their integrations to avoid disruptions. Greip will provide migration guides and technical support during transitions.
## 5. Backward Compatibility & Grace Periods
* Non-breaking changes (e.g., new parameters, additional fields) will be introduced without affecting existing integrations.
* Breaking changes (e.g., removal of fields, altered response formats) will be announced in advance, and a grace period will be provided.
* Deprecated endpoints may remain operational in “Legacy Mode” for an extended time before final removal.
## 6. Testing New Versions
* Developers can test new versions in a sandbox environment before full migration.
* Greip will provide changelogs and migration documentation for major updates.
## 7. Support for Deprecated Versions
* Once an API version reaches its end-of-life (EOL), it will no longer receive bug fixes, security patches, or support.
* Paid enterprise users may request extended support for deprecated versions under a separate agreement.
## 8. Staying Updated
To ensure a seamless experience, developers should:
* ✅ Subscribe to API update notifications via their Greip dashboard.
* ✅ Regularly check the [API Changelog](https://changelog.greip.io/) for upcoming changes.
* ✅ Follow best practices for version handling in their implementation.
For any questions regarding API updates and deprecation, contact [support@greip.io](mailto:support@greip.io).
# User Data Deletion
Source: https://docs.greip.io/api-reference/endpoint/account/users/delete
DELETE /account/users/delete
In some cases, such as data protection regulations, businesses that process personal data are required to delete it upon request.
Using this method, you'll be able to delete all data related to your user in a single request.
**This action cannot be undone**, all deleted data will be deleted immediately
from our system.
User data can be deleted 2 minutes after its creation in our system.
### Body Parameters
The email address, phone number, or user ID (in your system) of the user whose
data you want to delete.
```json Success
{
"data": {
"transaction_data": 25,
"ips": 4,
"profanity_data": 3,
"emails": 1,
"phone_numbers": 1,
"ibans": 10
},
"status": "success"
}
```
```json Error
{
"status": "error",
"code": 101,
"type": "invalid_key",
"description": "The API Key is missing or invalid."
}
```
### Response properties
Number of transactions or transaction related data deleted.
Number of IP addresses related data deleted.
Number of user data deleted from the usage of Profanity Detection endpint.
Number of user data deleted from the Email Scoring endpoint.
Number of user data deleted from the Phone Scoring endpoint.
Number of user data deleted from the IBAN Lookup endpoint.
The response status.
Expected values: `success`, or `error`.
# ASN Lookup
Source: https://docs.greip.io/api-reference/endpoint/data-lookup/asn
GET /lookup/asn
This API method allows you to look up any given Autonomous System Number (ASN) and retrieve comprehensive data associated with it.
The information returned includes the ASN name, organization name, country, associated domain, contact email, phone number, and more. This functionality is essential for network analysis, troubleshooting, and understanding the infrastructure behind IP addresses.
### Query Parameters
The asn command is used to specify the AS Number you want to lookup.
Sample value: `AS6167` or `6167`
The format command is used to get a response in a specific format.
Expected values: `JSON`, `XML`, `CSV`, or `Newline`
For more information please refer to [Response Format](/options/response-format).
The mode command is used to in the development stage to simulate the integration process before releasing it to the production environment.
Expected values: `live`, or `test`.
For more information please refer to [Development Environment](/options/development-environment).
The callback command can help you make the response as a JSONP format.
Expected values: any name that can be used as a function name in Javascript, e.g: `myFunctionName`.
For more information please refer to [JSONP Callback](/options/jsonp-callback).
```json Success
{
"data": {
"asn": "AS6167",
"name": "CELLCO-PART",
"country": "US",
"org": "Verizon Business",
"phone": "+1-800-900-0241",
"email": "swipper@verizon.com",
"domain": "verizon.net",
"status": null,
"created": "2006-05-30",
"type": null,
"registry": null
},
"status": "success",
"executionTime": 4198
}
```
```json Error
{
"status": "error",
"code": 101,
"type": "invalid_key",
"description": "The API Key is missing or invalid."
}
```
### Response properties
Autonomous System Number you're looking up.
Name of the organization.
Country code of the organization.
Organization name.
Phone number contact for the organization.
Email contact for the organization.
Domain associated with the organization.
Status of the organization.
Date of organization creation.
Type of organization ("isp", "hosting", "business", "education", or
"government").
Registration information of the organization.
Response status (`success`, or `error`).
Time taken to process the data (in milliseconds).
# BIN/IIN Lookup
Source: https://docs.greip.io/api-reference/endpoint/data-lookup/bin
GET /lookup/bin
Utilize this module to effortlessly retrieve comprehensive information associated with a debit or credit card.
The API provides details such as card type (debit or credit), scheme (Visa, Mastercard, etc.), brand (gold, platinum, etc.), and bank information.
This data is invaluable for various applications, including verifying customer payment details, detecting fraudulent transactions, and delivering personalized services to enhance user experiences.
### Overview
The IIN (Issuer Identification Number), also known as the BIN (Bank Identification Number), is the first 6 digits of a debit or credit card number. These unique numbers are used to identify the issuing entity, such as the bank or financial institution that issued the card.
One of the most common and critical use cases of this method is to detect and prevent fraud payments in your app or website. This is an essential task for any business that accepts online payments, as fraud can lead to significant financial losses and reputational damage.
For example, based on of our case studies, if you notice a user from the UK purchasing large amounts of your product, and the card used for payment is issued by a bank located in the US, this could be a red flag. This may indicate that the user is using a stolen or fraudulent card to complete the checkout process. By flagging such transactions for review or rejection, you can prevent fraud and protect your business from financial loss.
### Query Parameters
The BIN/IIN of the card (min: 6 digits).
Sample value: `456789`, `456789XXXXXX1234`, or `4567891234567890`.
The format command is used to get a response in a specific format.
Expected values: `JSON`, `XML`, `CSV`, or `Newline`
For more information please refer to [Response Format](/options/response-format).
The mode command is used to in the development stage to simulate the integration process before releasing it to the production environment.
Expected values: `live`, or `test`.
For more information please refer to [Development Environment](/options/development-environment).
The userID command can be used to identify requests sent by specific users to monitor in the [Events Page](/dashboard-guides/monitoring-capabilities/real-time-threat-monitoring).
Expected values: email address, phone number, user id, name, etc.
For more information please refer to [User Identifier](/options/user-identifier).
The callback command can help you make the response as a JSONP format.
Expected values: any name that can be used as a function name in Javascript, e.g: `myFunctionName`.
For more information please refer to [JSONP Callback](/options/jsonp-callback).
```json Success
{
"data": {
"reason": "",
"isValid": true,
"blacklisted": false,
"bin": "456789",
"info": {
"scheme": {
"name": "Visa",
"coName": "Mada",
"isLuha": true,
"isPrepaid": false,
"isCommercial": false,
"type": "debit",
"brand": "Traditional",
"currency": "SAR"
},
"detected_digits": "4",
"syntax": {
"gaps": [4, 8, 12],
"lengths": [16, 18, 19],
"code": {
"name": "CVV",
"size": 3
}
},
"bank": {
"id": "588847",
"identifier": "80",
"name": "AL RAJHI BANKING AND INVESTMENT CORP.",
"city": "Riyadh",
"url": "https://www.alrajhibank.com.sa",
"phone": "+96611211600",
"logo": "https://greip.io/img/banks/al-rajhi.jpg",
"latitude": "25",
"longitude": "45"
},
"country": {
"alpha2": "SA",
"name": "Saudi Arabia",
"code": "966",
"numeric": "682",
"emoji": "🇸🇦",
"continent": "Asia",
"languageCode": "ar",
"languageNative": "العربية"
}
},
"custom_rules_applied": {
"total": 0,
"rules": []
}
},
"status": "success",
"executionTime": 2
}
```
```json Error
{
"status": "error",
"code": 101,
"type": "invalid_key",
"description": "The API Key is missing or invalid."
}
```
### Response properties
Reason for the validation result.
Validation result (`true` or `false`).
Indicates if the BIN is blacklisted due to applying [custom
rules](/knowledge-base/custom-rules/overview) or were found in one of your
blacklists.
The BIN/IIN of the card you passed in the request.
Card scheme name.
Card company name.
Is the card issued by Luha?
Is the card prepaid?
Is the card commercial?
Card type (`debit`, or `credit`).
Card brand (`Traditional`, `Gold`, `Platinum`, etc.).
Card currency.
The digits used to detect the scheme details.
The gaps variations of the card number.
The possible lengths of the card number.
The name of the code (e.g: CVV).
The number of digits in the code.
Bank ID.
Bank identifier.
The official bank name.
The city where the bank's headquarters are located.
Bank URL of the official website.
Bank phone number for contact.
Bank logo URL (image).
Bank latitude coordinates of the country where the bank is
located.
Bank longitude coordinates of the country where the bank is
located.
Country code (in ISO 3166-1 alpha-2 format).
The Country name.
Country dialing code.
Country numeric code.
Country flag emoji.
Continent where the country is located.
Country language code (in ISO 639-1 format).
Country native language name.
The custom rules applied to this request, [learn
more](/knowledge-base/custom-rules/overview).
The total number of custom rules applied to this request.
The custom rules applied to this request, [learn
more](/knowledge-base/custom-rules/overview).
The rule ID as shown in the dashboard (e.g: `CR104`).
The rule title you set when creating the rule.
Response status (`success`, or `error`).
Time taken to process the data (in milliseconds).
# Bulk IP Lookup
Source: https://docs.greip.io/api-reference/endpoint/data-lookup/bulk-ip
GET /lookup/ip/bulk
This API enables you to retrieve information for multiple IP addresses in a single request.
By using the `/lookup/ip/bulk` method, you can efficiently gather data such as location, ISP, and risk factors for a batch of IPs, saving time and streamlining your workflow for large-scale analysis.
You can lookup upto 10 IP addresses using this method. Otherwise, you will get
an error response (Code: 118).
### Query Parameters
The ips command is used to specify the IP address you want to lookup.
Expected values: comma serarated IP addresses (IPv4 or IPv6)
Sample value: `1.1.1.1,2.2.2.2`
The params command can be used to specify the required modules you want to get
in the response.
Expected values: `security`, `currency`, `timezone`, `location`, and/or `device`
Sample value: `security,timezone,currency`
For more information please refer to [Customize response modules](/options/customize-modules).
The format command is used to get a response in a specific format.
Expected values: `JSON`, `XML`, `CSV`, or `Newline`
For more information please refer to [Response Format](/options/response-format).
The lang command is used to get a response in a specific language.
Expected values: `EN`, `AR`, `DE`, `FR`, `ES`, `JA`, `ZH`, or `RU`
For more information please refer to [Localization](/options/localization).
The mode command is used to in the development stage to simulate the integration process before releasing it to the production environment.
Expected values: `live`, or `test`.
For more information please refer to [Development Environment](/options/development-environment).
The callback command can help you make the response as a JSONP format.
Expected values: any name that can be used as a function name in Javascript, e.g: `myFunctionName`.
For more information please refer to [JSONP Callback](/options/jsonp-callback).
# Country Lookup
Source: https://docs.greip.io/api-reference/endpoint/data-lookup/country
GET /lookup/country
This method allows you to retrieve detailed information about a country by providing its country code in the request.
The API returns valuable data, such as the country’s name, capital, population, region, and other relevant attributes, enabling you to enrich your applications with geographic context and enhance user experiences.
### Query Parameters
The `ISO 3166-1 alpha-2` format of the country code. [Learn more](https://en.wikipedia.org/wiki/ISO_3166-1_alpha-2)
Sample value: `GB`
The params command is used to determine the data you need in the response.
Expected values: `language`, `flag`, `currency`, and/or `timezone`.
Sample value: `language,currency,timezone`
The format command is used to get a response in a specific format.
Expected values: `JSON`, `XML`, `CSV`, or `Newline`
For more information please refer to [Response Format](/options/response-format).
The mode command is used to in the development stage to simulate the integration process before releasing it to the production environment.
Expected values: `live`, or `test`.
For more information please refer to [Development Environment](/options/development-environment).
The callback command can help you make the response as a JSONP format.
Expected values: any name that can be used as a function name in Javascript, e.g: `myFunctionName`.
For more information please refer to [JSONP Callback](/options/jsonp-callback).
```json Success
{
"data": {
"countryCode": "US",
"countryName": "United States",
"countryGeoNameID": 6252001,
"capital": "Washington, D.C.",
"population": 331000000,
"phoneCode": "1",
"currency": {
"currencyName": "United States Dollar",
"currencyCode": "USD",
"currencySymbol": "$"
},
"language": {
"name": "Portuguese",
"code": "pt",
"native": "Português"
},
"timezone": {
"name": "America/Adak",
"abbreviation": "HST",
"offset": -36000,
"currentTime": "11:51:19",
"currentTimestamp": 1643406679,
"isDST": false,
"sunInfo": {
"sunset": "08:17:34",
"sunrise": "20:08:16",
"transit": "02:12:55",
"civilTwilightBegin": "19:47:39",
"civilTwilightEnd": "08:38:10",
"nauticalTwilightBegin": "19:22:22",
"nauticalTwilightEnd": "09:03:28",
"astronomicalTwilightBegin": "18:57:01",
"astronomicalTwilightEnd": "09:28:49",
"dayLength": "11:50:42"
}
},
"flag": {
"emoji": "🇺🇸",
"unicode": "U+1F1FA U+1F1F8",
"png": {
"1000px": "https://www.gredev.io/img/flags/png1000px/us.png",
"250px": "https://www.gredev.io/img/flags/png250px/us.png",
"100px": "https://www.gredev.io/img/flags/png100px/us.png"
},
"svg": "https://www.gredev.io/img/flags/svg/us.svg"
},
"countryIsEU": false,
"countryNeighbours": "CA,MX,CU",
"tld": ".us",
"continentName": "North America",
"continentCode": "NA",
"continentGeoNameID": 6255149
},
"status": "success",
"executionTime": 0
}
```
```json Error
{
"status": "error",
"code": 101,
"type": "invalid_key",
"description": "The API Key is missing or invalid."
}
```
# Domain Lookup
Source: https://docs.greip.io/api-reference/endpoint/data-lookup/domain
GET /lookup/domain
This method allows you to retrieve detailed information about a domain by providing its domain name in the request.
The API returns valuable data, such as the domain’s creation date, with some risk evaluation metrics.
This endpoint still in beta stage, and it may change in the future. Currently,
helps you to look up a domain name that's already available in our automated
database. The domain names that are not available in our database will return
`null` values for all properties, but at the same time it will trigger the
automation system to start collecting data about the domain name, and it will
be available in the next 24 hours after the first request.
### Query Parameters
The fully qualified domain name (FQDN) to look up. [Learn more](https://en.wikipedia.org/wiki/Fully_qualified_domain_name)
Sample value: `example.com`
The format command is used to get a response in a specific format.
Expected values: `JSON`, `XML`, `CSV`, or `Newline`
For more information please refer to [Response Format](/options/response-format).
The mode command is used to in the development stage to simulate the integration process before releasing it to the production environment.
Expected values: `live`, or `test`.
For more information please refer to [Development Environment](/options/development-environment).
The callback command can help you make the response as a JSONP format.
Expected values: any name that can be used as a function name in Javascript, e.g: `myFunctionName`.
For more information please refer to [JSONP Callback](/options/jsonp-callback).
```json Success
{
"data": {
"name": "dangerous-domain.com",
"is_dangerous": true,
"is_spf": false,
"is_dmarc": false,
"is_dkim": false,
"is_mx": false,
"is_bimi": false,
"created_at": "2025-02-05",
"is_new": true
},
"status": "success",
"executionTime": 0
}
```
```json Error
{
"status": "error",
"code": 101,
"type": "invalid_key",
"description": "The API Key is missing or invalid."
}
```
### Response properties
The full domain name associated with the email address (for example, `gmail.com`).
Indicates whether the domain is flagged as dangerous or suspicious, which may suggest a higher risk of fraud or abuse.
If this property is set to `true`, the domain is considered high-risk or potentially malicious. As a result, the `isValid` property will also be `false`, indicating that the email address should not be trusted for critical communications or user registrations. It is strongly recommended to block or flag such email addresses in your application workflow.
Indicates whether the domain has a valid SPF (Sender Policy Framework) record, which helps prevent email spoofing.
Indicates whether the domain has a valid DMARC (Domain-based Message Authentication, Reporting, and Conformance) record, which helps protect against email phishing and spoofing.
Indicates whether the domain has a valid DKIM (DomainKeys Identified Mail) record, which verifies the authenticity of the sender's domain.
Indicates whether the domain has valid MX (Mail Exchange) records, confirming that it is capable of receiving emails.
Indicates whether the domain has a valid BIMI (Brand Indicators for Message Identification) record, which allows brand logos to be displayed in supported email clients.
The date when the domain was first registered or created, if available.
Indicates whether the domain is new or recently registered (registered within 1 year), which may affect its reputation and trustworthiness.
The response status.
Expected values: `success`, or `error`.
Time spent in milliseconds to process the data.
# Free Get-IP
Source: https://docs.greip.io/api-reference/endpoint/data-lookup/free-get-ip-method
This method allows you to retrieve the IP address of your visitors or users without the need for an account or API key in Greip.
It’s a quick and easy way to access IP information, making it ideal for basic integrations or when you need to capture user IPs with minimal setup.
**Usage example**
```
https://greipapi.com/ip
```
```bash cURL
curl --request GET \
--url https://greipapi.com/ip
```
```python Python
import requests
url = "https://greipapi.com/ip"
response = requests.request("GET", url)
print(response.text)
```
```javascript Javascript
const options = { method: "GET" };
fetch("https://greipapi.com/ip", options)
.then((response) => response.json())
.then((response) => console.log(response))
.catch((err) => console.error(err));
```
```php PHP
"https://greipapi.com/ip",
CURLOPT_RETURNTRANSFER => true,
CURLOPT_ENCODING => "",
CURLOPT_MAXREDIRS => 10,
CURLOPT_TIMEOUT => 30,
CURLOPT_HTTP_VERSION => CURL_HTTP_VERSION_1_1,
CURLOPT_CUSTOMREQUEST => "GET",
]);
$response = curl_exec($curl);
$err = curl_error($curl);
curl_close($curl);
if ($err) {
echo "cURL Error #:" . $err;
} else {
echo $response;
}
```
```go Go
package main
import (
"fmt"
"net/http"
"io/ioutil"
)
func main() {
url := "https://greipapi.com/ip"
req, _ := http.NewRequest("GET", url, nil)
res, _ := http.DefaultClient.Do(req)
defer res.Body.Close()
body, _ := ioutil.ReadAll(res.Body)
fmt.Println(res)
fmt.Println(string(body))
}
```
```java Java
HttpResponse response = Unirest.get("https://greipapi.com/ip")
.asString();
```
```json Success
{
"data": "165.227.149.217",
"documentaion": "https://docs.greip.io",
"status": "success",
"executionTime": 0
}
```
# IP Geolocation
Source: https://docs.greip.io/api-reference/endpoint/data-lookup/geoip
GET /geoip
This API allows you to retrieve detailed geolocation information for a visitor’s or user’s IP address.
By using the IP Geolocation method, you can access data such as the user’s country, city, ISP, and more, enabling you to personalize user experiences, enhance security, and make data-driven decisions based on geographic insights.
### Query Parameters
The params command can be used to specify the required modules you want to get
in the response.
Expected values: `security`, `currency`, `timezone`, `location`, and/or `device`
Sample value: `security,timezone,currency`
For more information please refer to [Customize response modules](/options/customize-modules).
The format command is used to get a response in a specific format.
Expected values: `JSON`, `XML`, `CSV`, or `Newline`
For more information please refer to [Response Format](/options/response-format).
The lang command is used to get a response in a specific language.
Expected values: `EN`, `AR`, `DE`, `FR`, `ES`, `JA`, `ZH`, or `RU`
For more information please refer to [Localization](/options/localization).
The mode command is used to in the development stage to simulate the integration process before releasing it to the production environment.
Expected values: `live`, or `test`.
For more information please refer to [Development Environment](/options/development-environment).
The userID command can be used to identify requests sent by specific users to monitor in the [Events Page](/dashboard-guides/monitoring-capabilities/real-time-threat-monitoring).
Expected values: email address, phone number, user id, name, etc.
For more information please refer to [User Identifier](/options/user-identifier).
The callback command can help you make the response as a JSONP format.
Expected values: any name that can be used as a function name in Javascript, e.g: `myFunctionName`.
For more information please refer to [JSONP Callback](/options/jsonp-callback).
```json Success
{
"data": {
"ip": "165.227.149.217",
"ipType": "IPv4",
"IPNumber": 2783155673,
"bogon": false,
"continentName": "Europe",
"continentCode": "EU",
"countryCode": "DE",
"continentGeoNameID": 6255148,
"countryName": "Germany",
"countryGeoNameID": 2921044,
"regionName": "Hessen",
"cityName": "Frankfurt am Main",
"zipCode": "65931",
"latitude": "50.115520",
"longitude": "8.684170",
"location": {
"capital": "Berlin",
"population": 83783942,
"language": { "name": "German", "code": "de", "native": "Deutsch" },
"flag": {
"emoji": "🇩🇪",
"unicode": "U+1F1E9 U+1F1EA",
"png": {
"1000px": "https://www.gredev.io/img/flags/png1000px/de.png",
"250px": "https://www.gredev.io/img/flags/png250px/de.png",
"100px": "https://www.gredev.io/img/flags/png100px/de.png"
},
"svg": "https://www.gredev.io/img/flags/svg/de.svg"
},
"phoneCode": "49",
"countryIsEU": true,
"countryNeighbours": "CH,PL,NL,DK,BE,CZ,LU,FR,AT",
"tld": ".de"
},
"currency": {
"currencyName": "Euro",
"currencyCode": "EUR",
"currencySymbol": "€"
},
"asn": {
"asn": "AS14061",
"name": "DIGITALOCEAN-ASN",
"org": "DigitalOcean, LLC",
"phone": "+1-347-875-6044",
"email": "noc@digitalocean.com",
"domain": "digitalocean.com",
"created": "2012-05-14",
"type": "hosting"
},
"timezone": {
"name": "Europe/Berlin",
"abbreviation": "CET",
"offset": 3600,
"currentTime": "03:33:13",
"currentTimestamp": 1709519593,
"isDST": false,
"sunInfo": {
"sunset": "18:14:11",
"sunrise": "06:59:29",
"transit": "12:36:50",
"civilTwilightBegin": "06:28:47",
"civilTwilightEnd": "18:44:53",
"nauticalTwilightBegin": "05:51:20",
"nauticalTwilightEnd": "19:22:21",
"astronomicalTwilightBegin": "05:13:27",
"astronomicalTwilightEnd": "20:00:13",
"dayLength": "11:14:42"
}
},
"security": {
"isProxy": true,
"proxyType": "VPN",
"isTor": false,
"isBot": false,
"isRelay": false,
"isHosting": true,
"blacklisted": false
},
"device": {
"isMobile": false,
"type": "desktop",
"OS": {
"type": "desktop",
"name": "MacOS",
"family": "macintosh",
"version": "Big Sur",
"title": "MacOS Big Sur",
"64bits_mode": 1
},
"browser": {
"name": "Safari",
"version": 17.2,
"versionMajor": 1,
"title": "Safari 17.2"
}
},
"custom_rules_applied": {
"total": 0,
"rules": []
}
},
"status": "success",
"executionTime": 4
}
```
```json Error
{
"status": "error",
"code": 101,
"type": "invalid_key",
"description": "The API Key is missing or invalid."
}
```
### Response properties
IP address you're looking up.
Type of IP address (`IPv4`, or `IPv6`).
Numeric representation of the IP address.
Indicates if the IP address is a bogon.
Name of the continent where the IP address is.
Code representation of the continent.
Code representation of the country in `ISO-3166` format.
GeoName ID of the continent.
Name of the country.
GeoName ID of the country.
Name of the region.
Name of the city.
ZIP code of the location where the IP address belong.
Latitude coordinate of the location.
Longitude coordinate of the location.
Capital city of the country.
Population of the country.
Official language of the country.
Language code in `ISO-639` format.
Native name of the language.
Flag emoji representation.
Flag Unicode representation.
URL to 1000px PNG flag.
URL to 250px PNG flag.
URL to 100px PNG flag.
URL to SVG flag.
International dialing code for the country.
Indicates if the country is in the EU.
List of neighboring countries' codes.
Top-level domain of the country.
Name of the currency.
Currency code in `ISO-4217` format.
Symbol of the currency.
Autonomous System Number.
Name of the ASN.
Organization associated with the ASN.
Phone contact for the ASN.
Email contact for the ASN.
Domain associated with the ASN.
Date of ASN creation.
Type of organization ("isp", "hosting", "business", "education", or
"government").
Timezone name.
Timezone abbreviation.
Timezone offset from UTC.
Current time in the timezone.
Current timestamp in the timezone.
Indicates if Daylight Saving Time is active.
Sunset time.
Sunrise time.
Solar transit time.
Civil twilight begin time.
Civil twilight end time.
Nautical twilight begin time.
Nautical twilight end time.
Astronomical twilight begin time.
Astronomical twilight end time.
Length of the day.
Indicates if the IP address is a proxy service.
Type of proxy used.
Indicates if accessed through Tor network.
Indicates if the user is a bot.
Indicates if it's a Apple's Private Relay connection.
Indicates if the IP address belong to a hosting provider.
Indicates if the IP address is blacklisted due to applying [custom
rules](/knowledge-base/custom-rules/overview) or were found in one of
your blacklists.
Indicates if the device is a mobile device.
Type of device.
Type of operating system.
Name of the operating system.
Family of the operating system.
Version of the operating system.
Title of the operating system.
Indicates 64-bit mode (1 for true, 0 for false).
Name of the browser.
Version of the browser.
Major version of the browser.
Title of the browser.
The user-agent of the browser.
The custom rules applied to this request, [learn
more](/knowledge-base/custom-rules/overview).
The total number of custom rules applied to this request.
The custom rules applied to this request, [learn
more](/knowledge-base/custom-rules/overview).
The rule ID as shown in the dashboard (e.g: `CR104`).
The rule title you set when creating the rule.
Response status (success/error).
Time taken to process the data (in milliseconds).
# IBAN Lookup
Source: https://docs.greip.io/api-reference/endpoint/data-lookup/iban
GET /lookup/iban
This method enables you to validate International Bank Account Numbers (IBANs) and obtain essential information about the country associated with each IBAN.
By using this API, you can ensure that the IBANs are formatted correctly and gain insights into the banking institution, enhancing security and accuracy in financial transactions.
### Overview
The IIN (Issuer Identification Number), also known as the BIN (Bank Identification Number), is the first 6 digits of a debit or credit card number. These unique numbers are used to identify the issuing entity, such as the bank or financial institution that issued the card.
One of the most common and critical use cases of this method is to detect and prevent fraud payments in your app or website. This is an essential task for any business that accepts online payments, as fraud can lead to significant financial losses and reputational damage.
For example, if you notice a user from the UK purchasing large amounts of your product, and the card used for payment is issued by a bank located in the US, this could be a red flag. This may indicate that the user is using a stolen or fraudulent card to complete the checkout process. By flagging such transactions for review or rejection, you can prevent fraud and protect your business from financial loss.
### Query Parameters
The International Bank Account Number (IBAN) you want to validate.
Sample value: `BE71096123456769`, or `BE71 0961 2345 6769`.
The format command is used to get a response in a specific format.
Expected values: `JSON`, `XML`, `CSV`, or `Newline`
For more information please refer to [Response Format](/options/response-format).
The mode command is used to in the development stage to simulate the integration process before releasing it to the production environment.
Expected values: `live`, or `test`.
For more information please refer to [Development Environment](/options/development-environment).
The userID command can be used to identify requests sent by specific users to monitor in the [Events Page](/dashboard-guides/monitoring-capabilities/real-time-threat-monitoring).
Expected values: email address, phone number, user id, name, etc.
For more information please refer to [User Identifier](/options/user-identifier).
The callback command can help you make the response as a JSONP format.
Expected values: any name that can be used as a function name in Javascript, e.g: `myFunctionName`.
For more information please refer to [JSONP Callback](/options/jsonp-callback).
```json Success
{
"data": {
"isValid": true,
"formats": {
"machine": "BE71096123456769",
"human": "BE71 0961 2345 6769",
"obfuscated": "BE** **** **** 6769"
},
"country": {
"name": "Belgium",
"IANA": "be",
"ISO3166": "BE",
"currency": "EUR",
"centralBank": {
"url": "http://www.nbb.be/",
"name": "National Bank of Belgium"
},
"membership": "eu_member",
"isEU": true,
"length": "16",
"isSEPA": true,
"swiftOfficial": true
},
"custom_rules_applied": {
"total": 0,
"rules": []
}
},
"status": "success",
"executionTime": 1
}
```
```json Error
{
"status": "error",
"code": 101,
"type": "invalid_key",
"description": "The API Key is missing or invalid."
}
```
### Response properties
A boolean value that you can rely on to determine if the IBAN is valid or not.
Machine format of the IBAN.
Human-readable format of the IBAN.
Obfuscated format of the IBAN.
Country name where the issuing bank is located.
The [IANA](https://en.wikipedia.org/wiki/Internet_Assigned_Numbers_Authority) of the country.
Country code in `ISO3166` format.
Currency of the country.
The name of the central bank of the issuing country.
The URL of the central bank of the issuing country.
Membership type of the bank.
Determines whether the user is located within the European Union (EU) and is relevant for processing transactions or validations specific to EU countries.
IBAN length in this country.
Indicates whether the IBAN belongs to a country participating in the Single Euro Payments Area (SEPA)
Typically indicates whether the IBAN corresponds to an official institution or entity that is part of the SWIFT network, which facilitates international financial transactions.
The custom rules applied to this request, [learn
more](/knowledge-base/custom-rules/overview).
The total number of custom rules applied to this request.
The custom rules applied to this request, [learn
more](/knowledge-base/custom-rules/overview).
The rule ID as shown in the dashboard (e.g: `CR104`).
The rule title you set when creating the rule.
The response status.
Expected values: `success`, or `error`.
Time spent in milliseconds to process the data.
# IP Lookup
Source: https://docs.greip.io/api-reference/endpoint/data-lookup/ip
GET /lookup/ip
Use this API to retrieve comprehensive information about a given IP address. It provides details such as location, ISP, and potential risk factors, enabling you to analyze and verify IP data for enhanced security, fraud prevention, and user profiling.
### Query Parameters
The ip command is used to specify the IP address you want to lookup.
Expected values: an IP address (IPv4 or IPv6)
Sample value: `1.1.1.1`
The params command can be used to specify the required modules you want to get
in the response.
Expected values: `security`, `currency`, `timezone`, and/or `location`.
Sample value: `security,timezone,currency`
For more information please refer to [Customize response modules](/options/customize-modules).
The format command is used to get a response in a specific format.
Expected values: `JSON`, `XML`, `CSV`, or `Newline`
For more information please refer to [Response Format](/options/response-format).
The lang command is used to get a response in a specific language.
Expected values: `EN`, `AR`, `DE`, `FR`, `ES`, `JA`, `ZH`, or `RU`
For more information please refer to [Localization](/options/localization).
The mode command is used to in the development stage to simulate the integration process before releasing it to the production environment.
Expected values: `live`, or `test`.
For more information please refer to [Development Environment](/options/development-environment).
The userID command can be used to identify requests sent by specific users to monitor in the [Events Page](/dashboard-guides/monitoring-capabilities/real-time-threat-monitoring).
Expected values: email address, phone number, user id, name, etc.
For more information please refer to [User Identifier](/options/user-identifier).
The callback command can help you make the response as a JSONP format.
Expected values: any name that can be used as a function name in Javascript, e.g: `myFunctionName`.
For more information please refer to [JSONP Callback](/options/jsonp-callback).
```json Success
{
"data": {
"ip": "165.227.149.217",
"ipType": "IPv4",
"IPNumber": 2783155673,
"bogon": false,
"continentName": "Europe",
"continentCode": "EU",
"countryCode": "DE",
"continentGeoNameID": 6255148,
"countryName": "Germany",
"countryGeoNameID": 2921044,
"regionName": "Hessen",
"cityName": "Frankfurt am Main",
"zipCode": "65931",
"latitude": "50.115520",
"longitude": "8.684170",
"location": {
"capital": "Berlin",
"population": 83783942,
"language": { "name": "German", "code": "de", "native": "Deutsch" },
"flag": {
"emoji": "🇩🇪",
"unicode": "U+1F1E9 U+1F1EA",
"png": {
"1000px": "https://www.gredev.io/img/flags/png1000px/de.png",
"250px": "https://www.gredev.io/img/flags/png250px/de.png",
"100px": "https://www.gredev.io/img/flags/png100px/de.png"
},
"svg": "https://www.gredev.io/img/flags/svg/de.svg"
},
"phoneCode": "49",
"countryIsEU": true,
"countryNeighbours": "CH,PL,NL,DK,BE,CZ,LU,FR,AT",
"tld": ".de"
},
"currency": {
"currencyName": "Euro",
"currencyCode": "EUR",
"currencySymbol": "€"
},
"asn": {
"asn": "AS14061",
"name": "DIGITALOCEAN-ASN",
"org": "DigitalOcean, LLC",
"phone": "+1-347-875-6044",
"email": "noc@digitalocean.com",
"domain": "digitalocean.com",
"created": "2012-05-14",
"type": "hosting"
},
"timezone": {
"name": "Europe/Berlin",
"abbreviation": "CET",
"offset": 3600,
"currentTime": "03:33:13",
"currentTimestamp": 1709519593,
"isDST": false,
"sunInfo": {
"sunset": "18:14:11",
"sunrise": "06:59:29",
"transit": "12:36:50",
"civilTwilightBegin": "06:28:47",
"civilTwilightEnd": "18:44:53",
"nauticalTwilightBegin": "05:51:20",
"nauticalTwilightEnd": "19:22:21",
"astronomicalTwilightBegin": "05:13:27",
"astronomicalTwilightEnd": "20:00:13",
"dayLength": "11:14:42"
}
},
"security": {
"isProxy": true,
"proxyType": "VPN",
"isTor": false,
"isBot": false,
"isRelay": false,
"isHosting": true,
"blacklisted": false
},
"custom_rules_applied": {
"total": 0,
"rules": []
}
},
"status": "success",
"executionTime": 4
}
```
```json Error
{
"status": "error",
"code": 101,
"type": "invalid_key",
"description": "The API Key is missing or invalid."
}
```
### Response properties
IP address you're looking up.
Type of IP address (`IPv4`, or `IPv6`).
Numeric representation of the IP address.
Indicates if the IP address is a bogon.
Name of the continent where the IP address is.
Code representation of the continent.
Code representation of the country in `ISO-3166` format.
GeoName ID of the continent.
Name of the country.
GeoName ID of the country.
Name of the region.
Name of the city.
ZIP code of the location where the IP address belong.
Latitude coordinate of the location.
Longitude coordinate of the location.
Capital city of the country.
Population of the country.
Official language of the country.
Language code in `ISO-639` format.
Native name of the language.
Flag emoji representation.
Flag Unicode representation.
URL to 1000px PNG flag.
URL to 250px PNG flag.
URL to 100px PNG flag.
URL to SVG flag.
International dialing code for the country.
Indicates if the country is in the EU.
List of neighboring countries' codes.
Top-level domain of the country.
Name of the currency.
Currency code in `ISO-4217` format.
Symbol of the currency.
Autonomous System Number.
Name of the ASN.
Organization associated with the ASN.
Phone contact for the ASN.
Email contact for the ASN.
Domain associated with the ASN.
Date of ASN creation.
Type of organization ("isp", "hosting", "business", "education", or
"government").
Timezone name.
Timezone abbreviation.
Timezone offset from UTC.
Current time in the timezone.
Current timestamp in the timezone.
Indicates if Daylight Saving Time is active.
Sunset time.
Sunrise time.
Solar transit time.
Civil twilight begin time.
Civil twilight end time.
Nautical twilight begin time.
Nautical twilight end time.
Astronomical twilight begin time.
Astronomical twilight end time.
Length of the day.
Indicates if the IP address is a proxy service.
Type of proxy used.
Indicates if accessed through Tor network.
Indicates if the user is a bot.
Indicates if it's a Apple's Private Relay connection.
Indicates if the IP address belong to a hosting provider.
Indicates if the IP address is blacklisted due to applying [custom
rules](/knowledge-base/custom-rules/overview) or were found in one of
your blacklists.
The custom rules applied to this request, [learn
more](/knowledge-base/custom-rules/overview).
The total number of custom rules applied to this request.
The custom rules applied to this request, [learn
more](/knowledge-base/custom-rules/overview).
The rule ID as shown in the dashboard (e.g: `CR104`).
The rule title you set when creating the rule.
Response status (success/error).
Time taken to process the data (in milliseconds).
# Email Scoring
Source: https://docs.greip.io/api-reference/endpoint/scoring/email
GET /scoring/email
This method provides an additional layer of validation for your system. While validating email syntax is important, it is not sufficient.
This method goes beyond syntax validation by checking the domain's validity, the availability of the Mail Service, detecting Disposable Email (Temporary Emails), etc. By utilising this method, you can ensure a more thorough validation process for email addresses.
### Query Parameters
The email command is used to specify the email you want to validate.
Expected values: an email address
Sample value: `name@domain.com`
The format command is used to get a response in a specific format.
Expected values: `JSON`, `XML`, `CSV`, or `Newline`
For more information please refer to [Response Format](/options/response-format).
The mode command is used to in the development stage to simulate the integration process before releasing it to the production environment.
Expected values: `live`, or `test`.
For more information please refer to [Development Environment](/options/development-environment).
The userID command can be used to identify requests sent by specific users to monitor in the [Events Page](/dashboard-guides/monitoring-capabilities/real-time-threat-monitoring).
Expected values: email address, phone number, user id, name, etc.
For more information please refer to [User Identifier](/options/user-identifier).
The callback command can help you make the response as a JSONP format.
Expected values: any name that can be used as a function name in Javascript, e.g: `myFunctionName`.
For more information please refer to [JSONP Callback](/options/jsonp-callback).
```json Success
{
"data": {
"score": 3,
"reason": "Email domain is considered dangerous.",
"isValid": false,
"isFree": false,
"isRoleBased": true,
"isEducational": false,
"isDisposable": false,
"blacklisted": false,
"email": "test@dangerous-domain.com",
"domain": {
"name": "dangerous-domain.com",
"is_dangerous": true,
"is_spf": false,
"is_dmarc": false,
"is_dkim": false,
"is_mx": false,
"is_bimi": false,
"created_at": "2025-02-05",
"is_new": true
},
"custom_rules_applied": { "total": 0, "rules": [] }
},
"status": "success",
"executionTime": 1
}
```
```json Error
{
"status": "error",
"code": 101,
"type": "invalid_key",
"description": "The API Key is missing or invalid."
}
```
### Response properties
A risk-score from 0 to 3 indicating how risky this email address is
(0=safe, 1=low-risk, 2=high-risk, 3=too-risky).
The reason behind considering this email address as risky.
**Note:** The value of this property will be empty if the `score` is `0`.
Indicates whether the email address is from a free email service provider.
Indicates whether the email address is a role-based email address. Role-based email addresses are those that are associated with a particular role or group, such as `admin`, `support`, `info`, etc.
Indicates whether the email address is an educational email address.
A boolean value that you can rely on to determine if the email address is 100% safe & valid or not.
Indicates whether the email address is a disposable email address (also known as Temporary Email Addresses).
Indicates if the email/domain is blacklisted due to applying [custom
rules](/knowledge-base/custom-rules/overview) or were found in one of your
blacklists.
The information associated with the domain name of the email address.
The full domain name associated with the email address (for example, `gmail.com`).
Indicates whether the domain is flagged as dangerous or suspicious, which may suggest a higher risk of fraud or abuse.
If this property is set to `true`, the domain is considered high-risk or potentially malicious. As a result, the `isValid` property will also be `false`, indicating that the email address should not be trusted for critical communications or user registrations. It is strongly recommended to block or flag such email addresses in your application workflow.
Indicates whether the domain has a valid SPF (Sender Policy Framework) record, which helps prevent email spoofing.
Indicates whether the domain has a valid DMARC (Domain-based Message Authentication, Reporting, and Conformance) record, which helps protect against email phishing and spoofing.
Indicates whether the domain has a valid DKIM (DomainKeys Identified Mail) record, which verifies the authenticity of the sender's domain.
Indicates whether the domain has valid MX (Mail Exchange) records, confirming that it is capable of receiving emails.
Indicates whether the domain has a valid BIMI (Brand Indicators for Message Identification) record, which allows brand logos to be displayed in supported email clients.
The date when the domain was first registered or created, if available.
Indicates whether the domain is new or recently registered (registered within 1 year), which may affect its reputation and trustworthiness.
The custom rules applied to this request, [learn
more](/knowledge-base/custom-rules/overview).
The total number of custom rules applied to this request.
The custom rules applied to this request, [learn
more](/knowledge-base/custom-rules/overview).
The rule ID as shown in the dashboard (e.g: `CR104`).
The rule title you set when creating the rule.
The response status.
Expected values: `success`, or `error`.
Time spent in milliseconds to process the data.
## What can I expect from this API?
* Detection of disposable email addresses (also known as Temporary Email Addresses)
* Detection of free email service providers
* Detection of role-based email addresses
* Testing the email service provider of a given email address
* Validation of email syntax
# IP Reputation
Source: https://docs.greip.io/api-reference/endpoint/scoring/ip-reputation
GET /lookup/ip/threats
Access comprehensive threat intelligence data linked to a specific IP address. This endpoint provides insights into malicious activity, reputation scoring, and potential security risks associated with the IP address.
### Query Parameters
The ip parameter is used to specify the IP address you want to retrieve it's threat intelligence information.
Expected values: an IP address (IPv4 or IPv6)
Sample value: `1.1.1.1`
The format command is used to get a response in a specific format.
Expected values: `JSON`, `XML`, `CSV`, or `Newline`
For more information please refer to [Response Format](/options/response-format).
The mode command is used to in the development stage to simulate the integration process before releasing it to the production environment.
Expected values: `live`, or `test`.
For more information please refer to [Development Environment](/options/development-environment).
The userID command can be used to identify requests sent by specific users to monitor in the [Events Page](/dashboard-guides/monitoring-capabilities/real-time-threat-monitoring).
Expected values: email address, phone number, user id, name, etc.
For more information please refer to [User Identifier](/options/user-identifier).
The callback command can help you make the response as a JSONP format.
Expected values: any name that can be used as a function name in Javascript, e.g: `myFunctionName`.
For more information please refer to [JSONP Callback](/options/jsonp-callback).
```json Success
{
"status": "success",
"data": {
"ip": "12.12.12.12",
"threats": {
"isProxy": true,
"proxyType": "Socks",
"isTor": false,
"isBot": false,
"isRelay": false,
"isHosting": true,
"blacklisted": false
},
"custom_rules_applied": {
"total": 0,
"rules": []
}
},
"executionTime": 90
}
```
```json Error
{
"status": "error",
"code": 101,
"type": "invalid_key",
"description": "The API Key is missing or invalid."
}
```
### Response properties
IP address you're looking up.
Indicates if the IP address is a proxy service.
Type of proxy used.
Indicates if accessed through Tor network.
Indicates if the user is a bot.
Indicates if it's a Apple's Private Relay connection.
Indicates if the IP address belong to a hosting provider.
Indicates if the IP address is blacklisted due to applying [custom
rules](/knowledge-base/custom-rules/overview) or were found in one of
your blacklists.
The custom rules applied to this request, [learn
more](/knowledge-base/custom-rules/overview).
The total number of custom rules applied to this request.
The custom rules applied to this request, [learn
more](/knowledge-base/custom-rules/overview).
The rule ID as shown in the dashboard (e.g: `CR104`).
The rule title you set when creating the rule.
Response status (success/error).
Time taken to process the data (in milliseconds).
# Payment Fraud Detection
Source: https://docs.greip.io/api-reference/endpoint/scoring/payment
POST /scoring/payment
Prevent financial losses and protect your business by deploying AI-powered modules that analyze transaction patterns in real-time.
This method helps identify and block suspicious activities, mitigating the risk of fraudulent payments and ensuring a secure experience for both you and your customers.
## Overview
Detecting and preventing fraudulent payments is a critical task for any business that accepts online payments. This AI-based module is designed to help you do that by analysing a range of data points related to each transaction.
Using sophisticated machine learning algorithms, this method can detect and flag potentially fraudulent transactions by analysing user data, user behaviour, user device, and other factors. For example, if a transaction appears to be coming from an unusual location or device, or if the user's behaviour is inconsistent with their past transactions, this method can flag the transaction for further review or rejection.
One of the key advantages of this AI-based module is its ability to adapt and learn over time. As it analyses more data and detects more fraud, it can improve its accuracy and efficiency, making it a highly effective tool for preventing financial losses due to fraud.
By implementing this method in your payment processing system, you can help protect your business and your customers from fraudulent activity, while providing a seamless and secure payment experience.
"ECOMMERCE LOSSES TO ONLINE PAYMENT FRAUD TO **EXCEED \$48 BILLION** GLOBALLY
IN 2023, AS FRAUD INCURSIONS EVOLVE", according to a recent report by Juniper
Research.
## Integration Workflow

### Body Parameters
The action your customer try to implement.
Accepts: `purchase`, `deposit`, or `withdrawal`.
The domain name of the website the customer trying to purchase from.
Sample value: `domain.com`
The name of the website the customer trying to purchase from.
Sample value: `Nike Store, California`
If your a service provider with "sub-websites" (like Shopify), then provide a unique identification code indicating the website the customer trying to purchase from.
Sample values: `12330098`, `01as-aowq-029jd`, or `abcdefg`.
The identification code of the shipment.
The identification code of the transaction in your system.
The total amount of the transaction.
The currency in which the customer pay with.
Sample value: `GBP`
Set this to true if the customer is purchasing a digital product.
The promo code used by the customer to complete the checkout.
The identification number of the customer in your system.
The first name of the customer.
The last name of the customer (Family Name).
The Place of Birth of the customer.
The IP address of the customer.
The `ISO 3166-1 alpha-2` code format of the country where the customer live. [Learn more](https://en.wikipedia.org/wiki/ISO_3166-1_alpha-2)
The name of the region where the customer live.
The name of the city where the customer live.
The name of the zip code of customer location.
The "address line 1" of the customer.
The "address line 2" of the customer.
The customer latitude on the map (GPS Coordinates).
The customer longitude on the map (GPS Coordinates).
The device identification code of the customer.
The phone number of the customer (international format).
The registration date of the customer (UNIX Timestamp).
If you offer a Wallet feature in your website, then pass the user balance to this pararmeter.
The customer's date of birth.
Sample value: '1985-12-27\`
The email address of the customer.
Set this to true if the customer has 2FA enabled in his/her account.
Pass the [User Agent](https://en.wikipedia.org/wiki/User_agent) of the customer to this parameter.
The shipping country code of the customer (in `ISO 3166-1 alpha-2` format).
The shipping region name of the customer.
The shipping city name of the customer.
The zip code of the customer's shipping address.
The shipping "address 1" of the customer.
The shipping "address 2" of the customer.
The latitude of the customer's shipping address (GPS Coordinates).
The longitude of the customer's shipping address (GPS Coordinates).
The billing country code of the customer (in `ISO 3166-1 alpha-2` format).
The billing region name of the customer.
The billing city name of the customer.
The zip code of the customer's billing address.
The billing "address 1" of the customer.
The billing "address 2" of the customer.
The latitude of the customer's billing address (GPS Coordinates).
The longitude of the customer's billing address (GPS Coordinates).
The payment method used to complete this transaction.
Accepted values: `cards`, `cards_mada`, `applepay`, `stcpay`, `bank`, `crypto`, `wallet`, or `cod`.
The name on the card (Cardholder Name).
The card number (min: 6 digits).
The expiry date of the customer debit/credit card.
Sample value: 29/05
Set this to true if the customer passed the CVV/CSV verification process.
The format command is used to get a response in a specific format.
Expected values: `JSON`, `XML`, `CSV`, or `Newline`
For more information please refer to [Response Format](/options/response-format).
The mode command is used to in the development stage to simulate the integration process before releasing it to the production environment.
Expected values: `live`, or `test`.
For more information please refer to [Development Environment](/options/development-environment).
The userID command can be used to identify requests sent by specific users to monitor in the [Events Page](/dashboard-guides/monitoring-capabilities/real-time-threat-monitoring).
Expected values: email address, phone number, user id, name, etc.
For more information please refer to [User Identifier](/options/user-identifier).
```json Success
{
"data": {
"score": 82,
"rules": [
{
"id": "PF10003",
"description": "Customer IP Address is probably VPN/Proxy/Bot/Hosting/Cloud."
},
{
"id": "PF10004",
"description": "Customer Email Address is probably invalid or spam."
},
{
"id": "PF10001",
"description": "High purchase rate, according to `customer_ip`."
},
{
"id": "PF10002",
"description": "High purchase rate, according to `customer_id`."
},
{
"id": "PF10013",
"description": "Customer device might not be a real device (according to `customer_useragent`)."
},
{
"id": "PF10014",
"description": "Customer device is registered as a high-risk device (according to `customer_useragent`)."
}
],
"rulesChecked": 21,
"rulesDetected": 6,
"custom_rules_applied": {
"total": 0,
"rules": []
}
},
"status": "success",
"executionTime": 5
}
```
```json Error
{
"status": "error",
"code": 101,
"type": "invalid_key",
"description": "The API Key is missing or invalid."
}
```
### Response properties
A risk-score from 0 to 100 indicating how risky this transaction is
(`10.5` means it's `10.5% risky` to pass this transaction).
The Id of the detected rule. (`10.5` means it's `10.5% risky` to pass
this transaction).
Sample value: `PF10003`
The full description of the detected rule.
Sample value: `High purchase rate, according to "customer_id".`
Total rules checked against the transaction.
Total rules detected in the transaction.
The custom rules applied to this request, [learn
more](/knowledge-base/custom-rules/overview).
The total number of custom rules applied to this request.
The custom rules applied to this request, [learn
more](/knowledge-base/custom-rules/overview).
The rule ID as shown in the dashboard (e.g: `CR104`).
The rule title you set when creating the rule.
The response status.
Expected values: `success`, or `error`.
Time spent in milliseconds to process the data.
## Possible Rules
| Id | Description |
| ------- | --------------------------------------------------------------------------------------------------------------------------------------- |
| PF1001 | High purchase rate, according to `customer_ip`. |
| PF1002 | High purchase rate, according to `customer_id`. |
| PF1003 | Customer IP Address is probably VPN/Proxy/Bot/Hosting/Cloud. |
| PF1004 | Customer Email Address is probably invalid, disposable or spam. |
| PF1005 | Customer Phone Number is probably invalid or spam. |
| PF1006 | Customer Latitude/Longitude is invalid. |
| PF1007 | Customer card number (BIN/IIN) is invalid. |
| PF1008 | Customer debit/credit card issued by a brand different from the one exist in `payment_type` parameter. |
| PF1009 | Customer country is a high-fraud country. |
| PF1010 | Customer debit/credit card issued in a high-risk country. |
| PF1011 | Customer is purchasing multiple times from multiple locations within the past 30 days. |
| PF1012 | Customer debit/credit card is being used multiple times from multiple customer accounts (according to `customer_id` and `card_number`). |
| PF1013 | Customer device might not be a real device (according to `customer_useragent`). |
| PF1014 | Customer device is registered as a high-risk device (according to `customer_useragent`). |
| PF1015 | AI flagged the transaction as potentially fraudulent. |
| PF1016 | AI flagged the transaction as potentially fraudulent due to high transaction amount. |
| PF1017 | Mismatch between billing address and IP geolocation. |
| PF1018 | Customer has multiple fraudulent transactions in the past 30 days. |
| PF1019 | Unusual purchase amount compared to customer’s history. |
| PF1020 | Transaction initiated from a newly created account. |
| PF10021 | Multiple payment cards used by a single account within a short timeframe. |
| PF10022 | Customer IP address were found in one of your blacklists. |
| PF10023 | Customer email address were found in one of your blacklists. |
| PF10024 | Customer phone number were found in one of your blacklists. |
| PF10025 | Customer card number were found in one of your blacklists. |
| PF10026 | Customer Id were found in one of your blacklists. |
# Phone Number Scoring
Source: https://docs.greip.io/api-reference/endpoint/scoring/phone
GET /scoring/phone
This method serves as an additional layer of protection in your system for validating phone numbers. It not only checks the syntax but also assesses the likelihood of the phone number being valid and operational.
By incorporating this scoring into your workflow, you can enhance fraud detection, reduce invalid inputs, and improve the overall quality of data captured.
### Query Parameters
The phone command is used to specify the phone number you want to validate.
Expected values: a phone number
Sample value: `+12121234567`, `0012121234567`, `12121234567`, or `2121234567`
The `ISO 3166-1 alpha-2` format of the country code of the phone number. [Learn more](https://en.wikipedia.org/wiki/ISO_3166-1_alpha-2)
Sample value: `US`
The format command is used to get a response in a specific format.
Expected values: `JSON`, `XML`, `CSV`, or `Newline`
For more information please refer to [Response Format](/options/response-format).
The mode command is used to in the development stage to simulate the integration process before releasing it to the production environment.
Expected values: `live`, or `test`.
For more information please refer to [Development Environment](/options/development-environment).
The userID command can be used to identify requests sent by specific users to monitor in the [Events Page](/dashboard-guides/monitoring-capabilities/real-time-threat-monitoring).
Expected values: email address, phone number, user id, name, etc.
For more information please refer to [User Identifier](/options/user-identifier).
The callback command can help you make the response as a JSONP format.
Expected values: any name that can be used as a function name in Javascript, e.g: `myFunctionName`.
For more information please refer to [JSONP Callback](/options/jsonp-callback).
```json Success
{
"data": {
"carrier": "",
"reason": "Invalid phone number structure.",
"isValid": false,
"custom_rules_applied": {
"total": 0,
"rules": []
}
},
"status": "success",
"executionTime": 1
}
```
```json Error
{
"status": "error",
"code": 101,
"type": "invalid_key",
"description": "The API Key is missing or invalid."
}
```
### Response properties
Carrier name of the phone number.
The reason behind considering this phone number as risky.
**Note:** The value of this property will be empty if the `isValid` is `true`.
A boolean value that you can rely on to determine if the phone number is 100% safe & valid or not.
The custom rules applied to this request, [learn
more](/knowledge-base/custom-rules/overview).
The total number of custom rules applied to this request.
The custom rules applied to this request, [learn
more](/knowledge-base/custom-rules/overview).
The rule ID as shown in the dashboard (e.g: `CR104`).
The rule title you set when creating the rule.
The response status.
Expected values: `success`, or `error`.
Time spent in milliseconds to process the data.
## What can I expect from this API?
* Detection of disposable email addresses (also known as Temporary Email Addresses)
* Testing the email service provider of a given email address
* Validation of email syntax
# Profanity Detection
Source: https://docs.greip.io/api-reference/endpoint/scoring/profanity
GET /scoring/profanity
This method helps safeguard your website or app by detecting offensive or inappropriate language in user inputs. By screening for profanity and other harmful content before it’s made public, you can maintain a positive user environment, protect your brand, and prevent abusive behavior on your platform.
This method uses Machine Learning (ML) to analyze text and determine whether it contains profanity. It returns a score for the text you pass, classifying it as safe or risky.
### Query Parameters
The text you want to filter
Sample value: `This is a sample text without profanity!`
Returns only the score of the text and whether it's safe or not.
Expected values: `yes`, or `no`.
Used to list the bad words in an array.
Expected values: `yes`, or `no`.
The format command is used to get a response in a specific format.
Expected values: `JSON`, `XML`, or `CSV`
For more information please refer to [Response Format](/options/response-format).
The mode command is used to in the development stage to simulate the integration process before releasing it to the production environment.
Expected values: `live`, or `test`.
For more information please refer to [Development Environment](/options/development-environment).
The callback command can help you make the response as a JSONP format.
Expected values: any name that can be used as a function name in Javascript, e.g: `myFunctionName`.
For more information please refer to [JSONP Callback](/options/jsonp-callback).
```json Success
{
"data": {
"isML": true,
"text": "This is just a normal text",
"totalBadWords": null,
"riskScore": 0,
"isSafe": true,
"status": "success",
"executionTime": 120
}
}
```
```json Error
{
"status": "error",
"code": 101,
"type": "invalid_key",
"description": "The API Key is missing or invalid."
}
```
### Response properties
A boolean value that indicates whether the detection is done by Machine Learning or not.
The text you passed to the API.
The total number of profane words found in the text.
**Note:** This field is only available when `isML` is `true`, otherwise you'll get `null`.
The risk score of the text you passed.
A boolean value that indicates whether the text is safe or not.
The response status.
Expected values: `success`, or `error`.
Time spent in milliseconds to process the data.
This method returns a score for the text you pass.
We classify profanity into 4 different level. The first level contains the most risky words and phrases (risky). The second level contains the medium-risk words and phrases. Whereas, the third level contains the low-risk words.
When you use the API, the response will the determine the score of the text you passed as follows:
* `riskScore = 0` means that this text is completely safe.
* `riskScode = 1` means that this is a high-risk text.
* `riskScode = 2` means that this is a medium-risk text.
* `riskScode = 3` means that this is a low-risk text.
# Authentication
Source: https://docs.greip.io/authentication
Authentication to Greip API made easy!
To access our API and take advantage of all the available methods, you will need to authenticate your requests using your unique API Key. This key is a secure authentication mechanism that ensures only authorized users can access the API.
To obtain your API Key, simply navigate to your [account dashboard](https://dashboard.greip.io/home). Once you have your API Key, you can begin authenticating your requests.
To authenticate your requests, append the key parameter to the request URL, along with your API Key. Here is an example of how to do this:
Add your API Key to the key parameter just like this:
```bash
https://greipapi.com/geoip?key=1234567890
```
Or, you can use the API Key as a Bearer Token as follows:
```bash cURL
curl --request GET \
--url https://greipapi.com/geoip \
--header 'Authorization: Bearer '
```
## Securing your API Key
For more information about how to secure your API Key, please refer to [Protecting your API Key]()
# Error Codes
Source: https://docs.greip.io/error-codes
List of any error you might get while using Greip API
Although we strive to provide a seamless and reliable experience, sometimes things can go wrong. In the event of an error, our API provides an error response that contains helpful information to assist you in resolving the issue.
The error response includes the `status`, `code`, `type`, and `description` of the error. The status indicates the general category of the error, while the `code` and `type` provide more specific information about the error.
The `description` property provides a detailed explanation of the error and may include suggestions for resolving the issue.
Here is an example of an error response:
```json
{
"status": "error",
"code": 101,
"type": "invalid_key",
"description": "The API Key is missing or invalid."
}
```
## Error codes
| Code | Type | Description |
| ---- | ----------------------------- | ------------------------------------------------------------------------------------------------------------------------------ |
| 101 | `invalid_key` | The API Key is missing or invalid. |
| 102 | `inactive_user` | The API Key owner (the account) is inactive right now. Please contact the support team for more information. |
| 103 | `limit_reached` | You reached the usage limit of your account. Please upgrade your subscription or pay any unpaid invoices. |
| 104 | `invalid_params` | Please check out the parms parameter's value. |
| 105 | `plan_expired` | Your plan has expired. Renew the subscription to enable using the API. |
| 106 | `flood_detected` | Our system has detected too many requests at the same time. Kindly please try to slow down. |
| 107 | `invalid_callback_name` | The value of the callback parameter cannot be a function name. |
| 108 | `invalid_format` | The value of the format parameter is not a valid format. Use `JSON`, `XML` or `Newline`. |
| 109 | `callback_not_allowed` | You can use the callback feature only with the JSON format. |
| 110 | `invalid_language` | The value of the lang parameter is not a valid format. Use `EN`, `AR`, `FR`, `DE`, `ES`, `JA`, `ZH` or `RU`. |
| 111 | `invalid_mode` | The value of the mode parameter is not a valid format. Use test or live. |
| 112 | `invalid_ip` | The IP Address is not valid or empty. |
| 113 | `domain_not_whitelisted` | You are sending the request from a domain that is not the domain name you set in the API settings of your account's dashboard. |
| 114 | `security_module_not_allowed` | You cannot use the security module in the free plan. Please upgrade your API plan to unlock this feature. |
| 115 | `generic_error` | An error occurred while processing your request. Please try again later. |
| 116 | `invalid_country_code` | The Country Code is invalid or not found. |
| 117 | `feature_not_available` | This feature is not available for your plan, please upgrade your plan first. |
| 118 | `invalid_phone_number` | The Phone Number is invalid or missing. |
| 119 | `invalid_email_address` | The Email Address is invalid or missing. |
| 120 | `invalid_bin_number` | The BIN number is invalid or missing. |
| 121 | `invalid_asn` | The AS Number you provided is empty or invalid. |
| 122 | `invalid_iban` | The IBAN is invalid or missing. |
| 123 | `invalid_userid` | The user identifier is invalid or too long. |
| 124 | `invalid_user_type` | The user type is invalid or missing. Use `email`, `phone` or `user_id`. |
| 125 | `invalid_user_value` | The user value is invalid or missing (`value` parameter). |
| 126 | `too_many_deletions` | You have reached the limit of deletions for this day. Please wait until the next day to delete more user data. |
# HTTPS Support
Source: https://docs.greip.io/https-support
Keep everything secure and protected
Our API supports HTTPS requests. No matter which plan you choose (even the free one), the HTTPS protocol will always be available for you.
# About Greip
Source: https://docs.greip.io/integration-guide/about-greip
Know more about Greip and the advanced fraud prevention solutoins we offer
## Overview
Fraud became a major concern for businesses in the digital age. It is a growing problem that affects businesses of all sizes and industries. Fraudsters are constantly evolving their tactics to bypass traditional fraud prevention measures. This is where Greip comes in. Greip is an advanced fraud prevention solution that helps businesses detect and prevent fraud in real-time.
## What is Greip?
Greip is a fraud prevention solution that uses advanced machine learning algorithms to detect and prevent fraud in real-time. It analyzes user behavior and transaction data to identify suspicious activity and stop fraud before it happens. Greip is designed to be easy to integrate into your existing systems and can be customized to meet the specific needs of your business.
We offer a range of fraud prevention solutions to help businesses protect themselves from fraud. From account takeover prevention to payment fraud detection and IP reputation monitoring, Greip has you covered. Our solutions are designed to be flexible and scalable, so you can easily adapt them to your business needs as they grow and evolve.
## Custom Rules & Blacklists
Greip allows you to create custom rules and blacklists to help you detect and prevent fraud. You can define rules based on a wide range of criteria, such as transaction amount, user location, device type, user IP address, etc. Greip also allows you to create blacklists of known fraudsters and suspicious IP addresses, user accounts, email addresses, and much more, so you can block them from accessing your systems.
You can learn more by visiting [Custom
Rules](/knowledge-base/custom-rules/overview) and
[Blacklists](/knowledge-base/blacklists/overview) pages.
## Real-Time Events & Alerts
We also provides real-time event monitoring and alerts to help you stay on top of fraud. You can monitor critical events in real-time, such as fake accounts, suspicious transactions, and suspecious IP addresses.
You can learn more by visiting the [Events &
Alerts](/knowledge-base/events-and-alerts/overview) page.
# Timeline
Source: https://docs.greip.io/integration-guide/timeline
Get started with Greip and advanced fraud prevention solutions
Know more about Greip and the advanced fraud prevention solutoins we offer.
Here are some of ideas to get you started:
Integrate Greip into your system and start protecting your business from fraud and abuse.
Use case based integration guides:
Greip offers a wide range of customization options that allow you to tailor the solution to your needs.
Keep an eye on critical metrics and events to ensure that everything is running smoothly.
# Account Takeover
Source: https://docs.greip.io/integration-guide/use-cases/account-takeover
Learn how Greip can help you detect and prevent account takeover fraud in real-time
## Overview
Account takeover fraud is a type of fraud that involves a fraudster gaining unauthorized access to a user's account. Once the fraudster has access to the account, they can make unauthorized transactions, steal personal information, and cause other types of harm. Account takeover fraud is a serious problem that can have significant financial and reputational consequences for businesses.
## What is Account Takeover Fraud?
Account takeover fraud occurs when a fraudster gains access to a user's account by stealing their login credentials. This can happen through a variety of methods, such as phishing attacks, malware, and social engineering. Once the fraudster has access to the account, they can use it to make unauthorized transactions, steal personal information, and cause other types of harm.
Greip uses advanced machine learning algorithms to detect and prevent account takeover fraud in real-time. It analyzes user behavior and account activity to identify suspicious activity and stop fraud before it happens. Greip is designed to be easy to integrate into your existing systems and can be customized to meet the specific needs of your business.
## The Integration Logic
Greip provides multiple approaches to empower you to detect and prevent account takeover fraud in real-time. Which approach you choose depends on your business needs and the level of fraud prevention you require. Here are some of the key features of Greip:
* **Pre-purchase Fraud Detection**: Greip can analyze user behavior and account activity to identify suspicious activity before an account takeover occurs. This can help prevent fraudsters from gaining unauthorized access to user accounts in the first place. It can be done through the following endpoints:
1. [IP Geolocation](/api-reference/endpoint/data-lookup/geoip): This endpoint allows you to determine the geolocation of an IP address to identify suspicious activity by comparing the user's location with the IP address location or by checking if the IP address is different from the user's usual location.
2. [IP Reputation](/api-reference/endpoint/scoring/ip-reputation): This endpoint allows you to check the reputation of an IP address to determine whether it is associated with fraudulent activity.
* **Post-purchase Fraud Detection**: Greip can also analyze transaction data after a purchase is made to identify suspicious activity. This can help you detect and prevent fraud in real-time. These can be done through our [BIN/IIN Lookup](/api-reference/endpoint/data-lookup/bin) endpoint.
{" "}
A common approuch is to use the BIN/IIN Lookup endpoint to check the card
issuer country and compare it with the user's IP address country. If the two
countries do not match, it could be a sign of fraud.
# Chargeback Fraud
Source: https://docs.greip.io/integration-guide/use-cases/chargeback-fraud
Learn how Greip can help you detect and prevent chargeback fraud in real-time
## Overview
Chargeback fraud is a type of fraud that occurs when a customer disputes a legitimate transaction and requests a chargeback from their bank or credit card company. Chargeback fraud can have serious financial consequences for businesses, as it can result in lost revenue, increased chargeback fees, and damage to the business's reputation. Chargeback fraud is a common problem for online merchants, as it can be difficult to detect and prevent.
## What is Chargeback Fraud?
Chargeback fraud occurs when a customer disputes a legitimate transaction and requests a chargeback from their bank or credit card company. This can happen for a variety of reasons, such as the customer claiming that they did not receive the goods or services they paid for, that the goods or services were defective, or that the transaction was unauthorized. Chargeback fraud can be difficult to detect and prevent, as fraudsters often use stolen credit card information or other fraudulent means to make the transaction appear legitimate.
Greip uses advanced machine learning algorithms to detect and prevent chargeback fraud in real-time. It analyzes transaction data and customer behavior to identify suspicious activity and stop fraud before it happens. Greip is designed to be easy to integrate into your existing systems and can be customized to meet the specific needs of your business.
## The Integration Logic
Greip provides multiple approaches to empower you to detect and prevent chargeback fraud in real-time. Which approach you choose depends on your business needs and the level of fraud prevention you require. Here are some of the key features of Greip:
* **Pre-purchase Fraud Detection**: Greip can analyze user behavior and transaction data to identify suspicious activity before a purchase is made. This can help prevent fraudulent transactions from occurring in the first place and it can be done through the following endpoints:
1. [Payment Fraud Detection](/api-reference/endpoint/scoring/payment): This endpoint allows you to score a transaction based on the likelihood of fraud. You can use this score to determine whether to accept or reject the transaction. When using this endpoint, try to provide as much information as possible about the transaction, so Greip can provide a comprehensive scoring result.
2. [IP Reputation](/api-reference/endpoint/scoring/ip-reputation): This endpoint allows you to check the reputation of an IP address to determine whether it is associated with fraudulent activity.
3. [IBAN Lookup](/api-reference/endpoint/data-lookup/iban): This endpoint allows you to validate an IBAN number to ensure that it is valid.
4. [Email Risk Scoring](/api-reference/endpoint/scoring/email): This endpoint allows you to score the user email address based on the likelihood of fraud.
5. [Phone Risk Scoring](/api-reference/endpoint/scoring/phone): This endpoint allows you to score the user phone number based on the likelihood of fraud.
* **Post-purchase Fraud Detection**: Greip can also analyze transaction data after a purchase is made to identify suspicious activity. This can help you detect and prevent fraud in real-time. These can be done through our [BIN/IIN Lookup](/api-reference/endpoint/data-lookup/bin) endpoint.
{" "}
A common approuch is to use the BIN/IIN Lookup endpoint to check the card
issuer country and compare it with the user's IP address country. If the two
countries do not match, it could be a sign of fraud.
# Content Moderation
Source: https://docs.greip.io/integration-guide/use-cases/content-moderation
Learn how Greip can help you automate content moderation and protect your platform from harmful content.
## Overview
Content moderation is the process of monitoring and filtering user-generated content to ensure it complies with community guidelines and legal requirements. It is essential for protecting users from harmful content, maintaining a positive user experience, and complying with regulations.
Greip provides advanced content moderation tools that use machine learning (ML) algorithms to automate the process and help you protect your platform from harmful content.
## The Integration Logic
### 1. Profanity Detection
Endpoint: [`/scoring/profanity`](/api-reference/endpoint/scoring/profanity)
**How it helps:**
Detect offensive, inappropriate, or harmful language in user-generated content (e.g., comments, posts, messages).
Identify and flag content containing profanity, hate speech, or other prohibited terms.
Customize the response to either block the content, flag it for review, or notify moderators.
**Key Parameters:**
* `text`: The text to analyze.
* `listBadWords`: Set to `yes` to return a list of detected bad words.
* `scoreOnly`: Set to `yes` to return only the risk score (useful for quick filtering).
**Example Use Case:**
A user submits a comment: "This is a terrible product, and I hate it!"
Use the [`/scoring/profanity`](/api-reference/endpoint/scoring/profanity) endpoint to analyze the text.
If the text contains profanity or exceeds a risk threshold, flag it for review or automatically reject it.
### 2. IP Reputation and Threat Intelligence
Endpoints: `/lookup/ip`, `/lookup/ip/threats`
**How it helps:**
Identify users with high-risk IP addresses (e.g., VPNs, proxies, Tor nodes, Bots, Hosting) who may be attempting to bypass content moderation filters.
Detect IPs associated with malicious activity or spamming.
**Example Use Case:**
A user with a high-risk IP submits multiple posts in a short time frame.
Use Greip to check the IP’s reputation and flag the user for further review.
### 3. Email and Phone Validation
Endpoints: [`/scoring/email`](/api-reference/endpoint/scoring/email), [`/scoring/phone`](/api-reference/endpoint/scoring/phone)
**How it helps:**
Detect disposable or temporary email addresses often used by spammers or trolls.
Validate phone numbers to ensure they are legitimate and not associated with fraudulent activity.
**Example Use Case:**
A user signs up with a disposable email address (e.g., `temp@mailinator.com`).
Use the [`/scoring/email`](/api-reference/endpoint/scoring/email) endpoint to flag the account for manual review or block it automatically.
### 4. User Behavior Monitoring
**How it helps:**
Use the [User Identifier](/options/user-identifier) to track user activity and identify patterns of abusive behavior (e.g., repeated posting of inappropriate content).
Combine Greip’s data with your application’s logic to detect and block repeat offenders.
### 5. Customizable Response Formats
**How it helps:**
Use the format parameter to receive responses in your preferred format (e.g., JSON, XML).
Integrate Greip’s content moderation features seamlessly into your application.
# Fake Accounts
Source: https://docs.greip.io/integration-guide/use-cases/fake-accounts
Learn how Greip can help you detect and prevent fake accounts in real-time
## Overview
Fake accounts are a type of fraud that involves a fraudster creating an account using false or stolen information. Once the fake account is created, the fraudster can use it to make unauthorized transactions, steal personal information, and cause other types of harm. Fake accounts are a serious problem that can have significant financial and reputational consequences for businesses.
## What are Fake Accounts?
Fake accounts occur when a fraudster creates an account using false or stolen information. This can happen through a variety of methods, such as using fake email addresses, phone numbers, and other personal information. Once the fake account is created, the fraudster can use it to make unauthorized transactions, steal personal information, and cause other types of harm.
Greip uses advanced machine learning algorithms to detect and prevent fake accounts in real-time. It analyzes user behavior and account activity to identify suspicious activity and stop fraud before it happens. Greip is designed to be easy to integrate into your existing systems and can be customized to meet the specific needs of your business.
## The Integration Logic
Greip provides multiple approaches to empower you to detect and prevent fake accounts in real-time. Which approach you choose depends on your business needs and the level of fraud prevention you require. Here are some of the key features of Greip:
1. [Email Verification](/api-reference/endpoint/data-lookup/email-verification): This endpoint allows you to verify the validity of an email address to ensure that it is not associated with fraudulent activity.
2. [Phone Verification](/api-reference/endpoint/data-lookup/phone-verification): This endpoint allows you to verify the validity of a phone number to ensure that it is not associated with fraudulent activity.
3. [IP Reputation](/api-reference/endpoint/scoring/ip-reputation): This endpoint allows you to check the reputation of an IP address to determine whether it is associated with fraudulent activity.
# Multi-Accounting
Source: https://docs.greip.io/integration-guide/use-cases/multi-accounting
Learn how Greip can help you prevent multi-accounting in your application.
## Ovewview
Multi-accounting is a common problem in applications where users can create multiple accounts to gain an unfair advantage. Greip can help you prevent multi-accounting by identifying users who have multiple accounts and taking appropriate action.
## The Integration Logic
### 1. IP Geolocation and Threat Intelligence
Endpoint: [`/geoip`](/api-reference/endpoint/data-lookup/geoip), [`/lookup/ip`](/api-reference/endpoint/data-lookup/ip), [`/lookup/ip/threats`](/api-reference/endpoint/scoring/ip-reputation)
**How it helps:**
Detect if multiple accounts are being created from the same IP address or a suspicious IP range.
Identify high-risk IPs (e.g., VPNs, proxies, Tor nodes) that are commonly used for multi-accounting.
Use the security module to check if the IP is associated with malicious activity.
### 2. Device Fingerprinting
Endpoint: [`/geoip`](/api-reference/endpoint/data-lookup/geoip) (with the device module)
**How it helps:**
Greip can provide device-related information (e.g., browser, OS, device type) that can be used to fingerprint devices.
If multiple accounts are being created from the same device, it could indicate multi-accounting.
### 3. Email and Phone Validation
Endpoints: [`/scoring/email`](/api-reference/endpoint/scoring/email), [`/scoring/phone`](/api-reference/endpoint/scoring/phone)
**How it helps:**
Detect disposable or temporary email addresses (common in multi-accounting).
Validate phone numbers to ensure they are legitimate and not reused across multiple accounts.
Flag suspicious email domains or phone numbers associated with fraud.
### 4. Payment Fraud Detection
Endpoint: [`/scoring/payment`](/api-reference/endpoint/scoring/payment)
**How it helps:**
Analyze payment details (e.g., credit card, billing address) to detect patterns of multi-accounting.
Identify if the same payment method is being used across multiple accounts.
### 5. ASN and BIN Lookup
Endpoints: [`/lookup/asn`](/api-reference/endpoint/data-lookup/asn), [/lookup/bin](/api-reference/endpoint/data-lookup/bin)
**How it helps:**
Detect if multiple accounts are being created from the same Autonomous System (ASN), which could indicate coordinated multi-accounting.
Validate credit card BINs to ensure they are not being reused fraudulently.
### 6. Profanity Detection
Endpoint: [`/scoring/profanity`](/api-reference/endpoint/scoring/profanity)
**How it helps:**
Detect if users are creating accounts with offensive or suspicious usernames, which could indicate multi-accounting for abusive purposes.
### 7. User Behavior Monitoring
**How it helps:**
Use the userID parameter to track requests and monitor user behavior across your platform.
Combine Greip data with your application’s logic to detect patterns of multi-accounting (e.g., multiple accounts created in a short time frame).
### Example Use Case: Multi-Accounting Detection
When a user creates an account, collect their IP address, email, phone
number, and device information.
Use Greip’s [`/geoip`](/api-reference/endpoint/data-lookup/geoip) and
[`/lookup/ip/threats`](/api-reference/endpoint/scoring/ip-reputation)
endpoints to check if the IP is high-risk (e.g., VPN, proxy, or Tor).
Validate the email using
[`/scoring/email`](/api-reference/endpoint/scoring/email) to ensure it’s
valid, correct, and not disposable.
Validate the phone number using
[`/scoring/phone`](/api-reference/endpoint/scoring/phone) to ensure it’s
legitimate and not disposable.
Check if the same IP, email, or phone number has been used for other
accounts in your system.
Use [`/scoring/payment`](/api-reference/endpoint/scoring/payment) to analyze
payment details for signs of fraud.
Flag or block accounts that exhibit suspicious patterns (e.g., multiple
accounts from the same IP or device).
# Payment Fraud
Source: https://docs.greip.io/integration-guide/use-cases/payment-fraud
Learn how Greip can help you detect and prevent payment fraud in real-time
## Overview
Payment fraud is a growing problem that affects businesses of all sizes and industries. Fraudsters are constantly evolving their tactics to bypass traditional fraud prevention measures. This is where Greip comes in. Greip is an advanced fraud prevention solution that helps businesses detect and prevent payment fraud in real-time.
## What is Payment Fraud?
Payment fraud is a type of fraud that involves the use of stolen payment information to make unauthorized transactions. It can take many forms, such as credit card fraud, account takeover fraud, and identity theft. Payment fraud can have serious consequences for businesses, including financial losses, damage to reputation, and legal liabilities.
Greip uses advanced machine learning algorithms to detect and prevent payment fraud in real-time. It analyzes user behavior and transaction data to identify suspicious activity and stop fraud before it happens. Greip is designed to be easy to integrate into your existing systems and can be customized to meet the specific needs of your business.
## The Integration Logic
Greip provide multiple approaches to empower you to detect and prevent payment fraud in real-time. Which approach you choose depends on your business needs and the level of fraud prevention you require. Here are some of the key features of Greip:
* **Pre-purchase Fraud Detection**: Greip can analyze user behavior and transaction data to identify suspicious activity before a purchase is made. This can help prevent fraudulent transactions from occurring in the first place and it can be done through the following endpoints:
1. [Payment Fraud Detection](/api-reference/endpoint/scoring/payment): This endpoint allows you to score a transaction based on the likelihood of fraud. You can use this score to determine whether to accept or reject the transaction. When using this endpoint, try to provide as much information as possible about the transaction, so Greip can provide a comprehensive scoring result.
2. [IP Reputation](/api-reference/endpoint/scoring/ip-reputation): This endpoint allows you to check the reputation of an IP address to determine whether it is associated with fraudulent activity.
3. [IBAN Lookup](/api-reference/endpoint/data-lookup/iban): This endpoint allows you to validate an IBAN number to ensure that it is valid.
4. [Email Risk Scoring](/api-reference/endpoint/scoring/email): This endpoint allows you to score the user email address based on the likelihood of fraud.
5. [Phone Risk Scoring](/api-reference/endpoint/scoring/phone): This endpoint allows you to score the user phone number based on the likelihood of fraud.
* **Post-purchase Fraud Detection**: Greip can also analyze transaction data after a purchase is made to identify suspicious activity. This can help you detect and prevent fraud in real-time. These can be done through our [BIN/IIN Lookup](/api-reference/endpoint/data-lookup/bin) endpoint.
{" "}
A common approuch is to use the BIN/IIN Lookup endpoint to check the card
issuer country and compare it with the user's IP address country. If the two
countries do not match, it could be a sign of fraud.
# SMS Fraud
Source: https://docs.greip.io/integration-guide/use-cases/sms-fraud
Learn how Greip can help you detect and prevent SMS fraud.
## Overview
SMS fraud is a type of fraud that involves sending unsolicited text messages to deceive users into providing sensitive information or making payments. SMS fraud can be used to steal personal information, commit identity theft, or spread malware.
## How Greip Can Help
Greip can help you detect and prevent SMS fraud by analyzing the content of incoming messages and identifying suspicious patterns. Greip uses machine learning algorithms to analyze the text of messages and detect fraudulent activity. Greip can also block messages from known fraudsters and alert you to potential threats.
## The Integration Logic
Greip provides multiple approaches to empower you to detect and prevent SMS fraud in real-time. Which approach you choose depends on your business needs and the level of fraud prevention you require. Here are some of the key features of Greip:
1. [Phone Risk Scoring](/api-reference/endpoint/scoring/phone-risk-scoring): This endpoint allows you to score the risk associated with a phone number to determine whether it is likely to be associated with fraudulent activity or invalid behavior.
2. [IP Reputation](/api-reference/endpoint/scoring/ip-reputation): This endpoint allows you to check the reputation of an IP address to determine whether it is associated with fraudulent activity.
# Web Personalization
Source: https://docs.greip.io/integration-guide/use-cases/web-personalization
Learn how Greip can help you personalize your website content to improve user engagement and conversion rates
## Overview
Web personalization is the process of customizing website content to meet the needs and preferences of individual users. By personalizing your website content, you can create a more engaging and relevant experience for your visitors, which can lead to increased user engagement, higher conversion rates, and improved customer satisfaction.
## How Greip Can Help
Greip can help you personalize your website content by analyzing user behavior and preferences to deliver personalized recommendations and content. Greip uses advanced machine learning algorithms to analyze user data and identify patterns and trends that can be used to personalize website content.
## The Integration Logic
Greip provides multiple approaches to empower you to personalize your website content and improve user engagement and conversion rates. Which approach you choose depends on your business needs and the level of personalization you require.
Using our [IP Data](/api-reference/endpoint/data-lookup/geoip) endpoint, you can identify the location of your website visitors and deliver personalized content based on their geographic location. For example, you can display different content to users based on their country, city, or region.
## Common Use Cases
* Automatically fill in sign-up forms using location information
* Present location-specific promotions and ads
* Show prices in the visitor's local currency
* Display testimonials relevant to the visitor's location
* Notify users when they are close to a physical store
* Interpret traffic patterns in a significant manner
# Introduction
Source: https://docs.greip.io/introduction
Welcome to Greip documentation
Greip's Fraud Prevention API is a powerful tool that can help you detect and prevent various types of fraud in your website or app. By using this API, you can gain more insight into your users and provide a better user experience and more importantly protecting your business from financial losses that rising each year due to fraudulent activities. In this documentation, we'll show you how to use the API by highlighting its methods, options, and other features.
Our API also offers a "development environment," which allows you to test and integrate the API with your website or app without affecting your subscription. Please note that while the development environment simulates live mode exactly, it will retrieve random (fake) information. This feature can be helpful for developers who want to test the API's functionality before going live.
## Quick Start
The Greip Fraud Prevention API can be used for both personal and commercial use cases, and you'll receive the same level of accuracy, speed, and security regardless of whether you have a paid plan or not. To get started, you'll need to [create account](https://dashboard.greip.io/register) and obtain a unique API key. Once you have your key, you can use it to access the API's functions and start detecting and preventing fraud in your website or app.
## Key Sections in This Documentation
Learn how to use the Greip Fraud Prevention API to detect and prevent fraud
Find the right package or library for your programming language
Find helpful resources and guides on using Greip's dashboard
Integrate Greip with other services and platforms
{" "}
A step by step guide to integrate Greip API with your website or app based on
your use case
# Account Deletion
Source: https://docs.greip.io/knowledge-base/account-management/account-deletion
Steps to delete your account
In order to delete your account, please send an email to [support@greip.io](mailto:support@greip.io) with the subject "Greip Account Deletion Request". We will process your request within 24 hours.
In case you need leave the account for later use, you can simply log out and
stop using the account. We will not delete any account that is not requested
to be deleted.
# Downloading Invoices
Source: https://docs.greip.io/knowledge-base/account-management/downloading-invoices
Download your invoices from the dashboard
In order to download your invoices, you need to follow these steps:
Go to the [Subscription page](https://dashboard.greip.io/subscription) from
the account dashboard.
Under the 'Invoices' section, click on the 'Download' button as shown below:
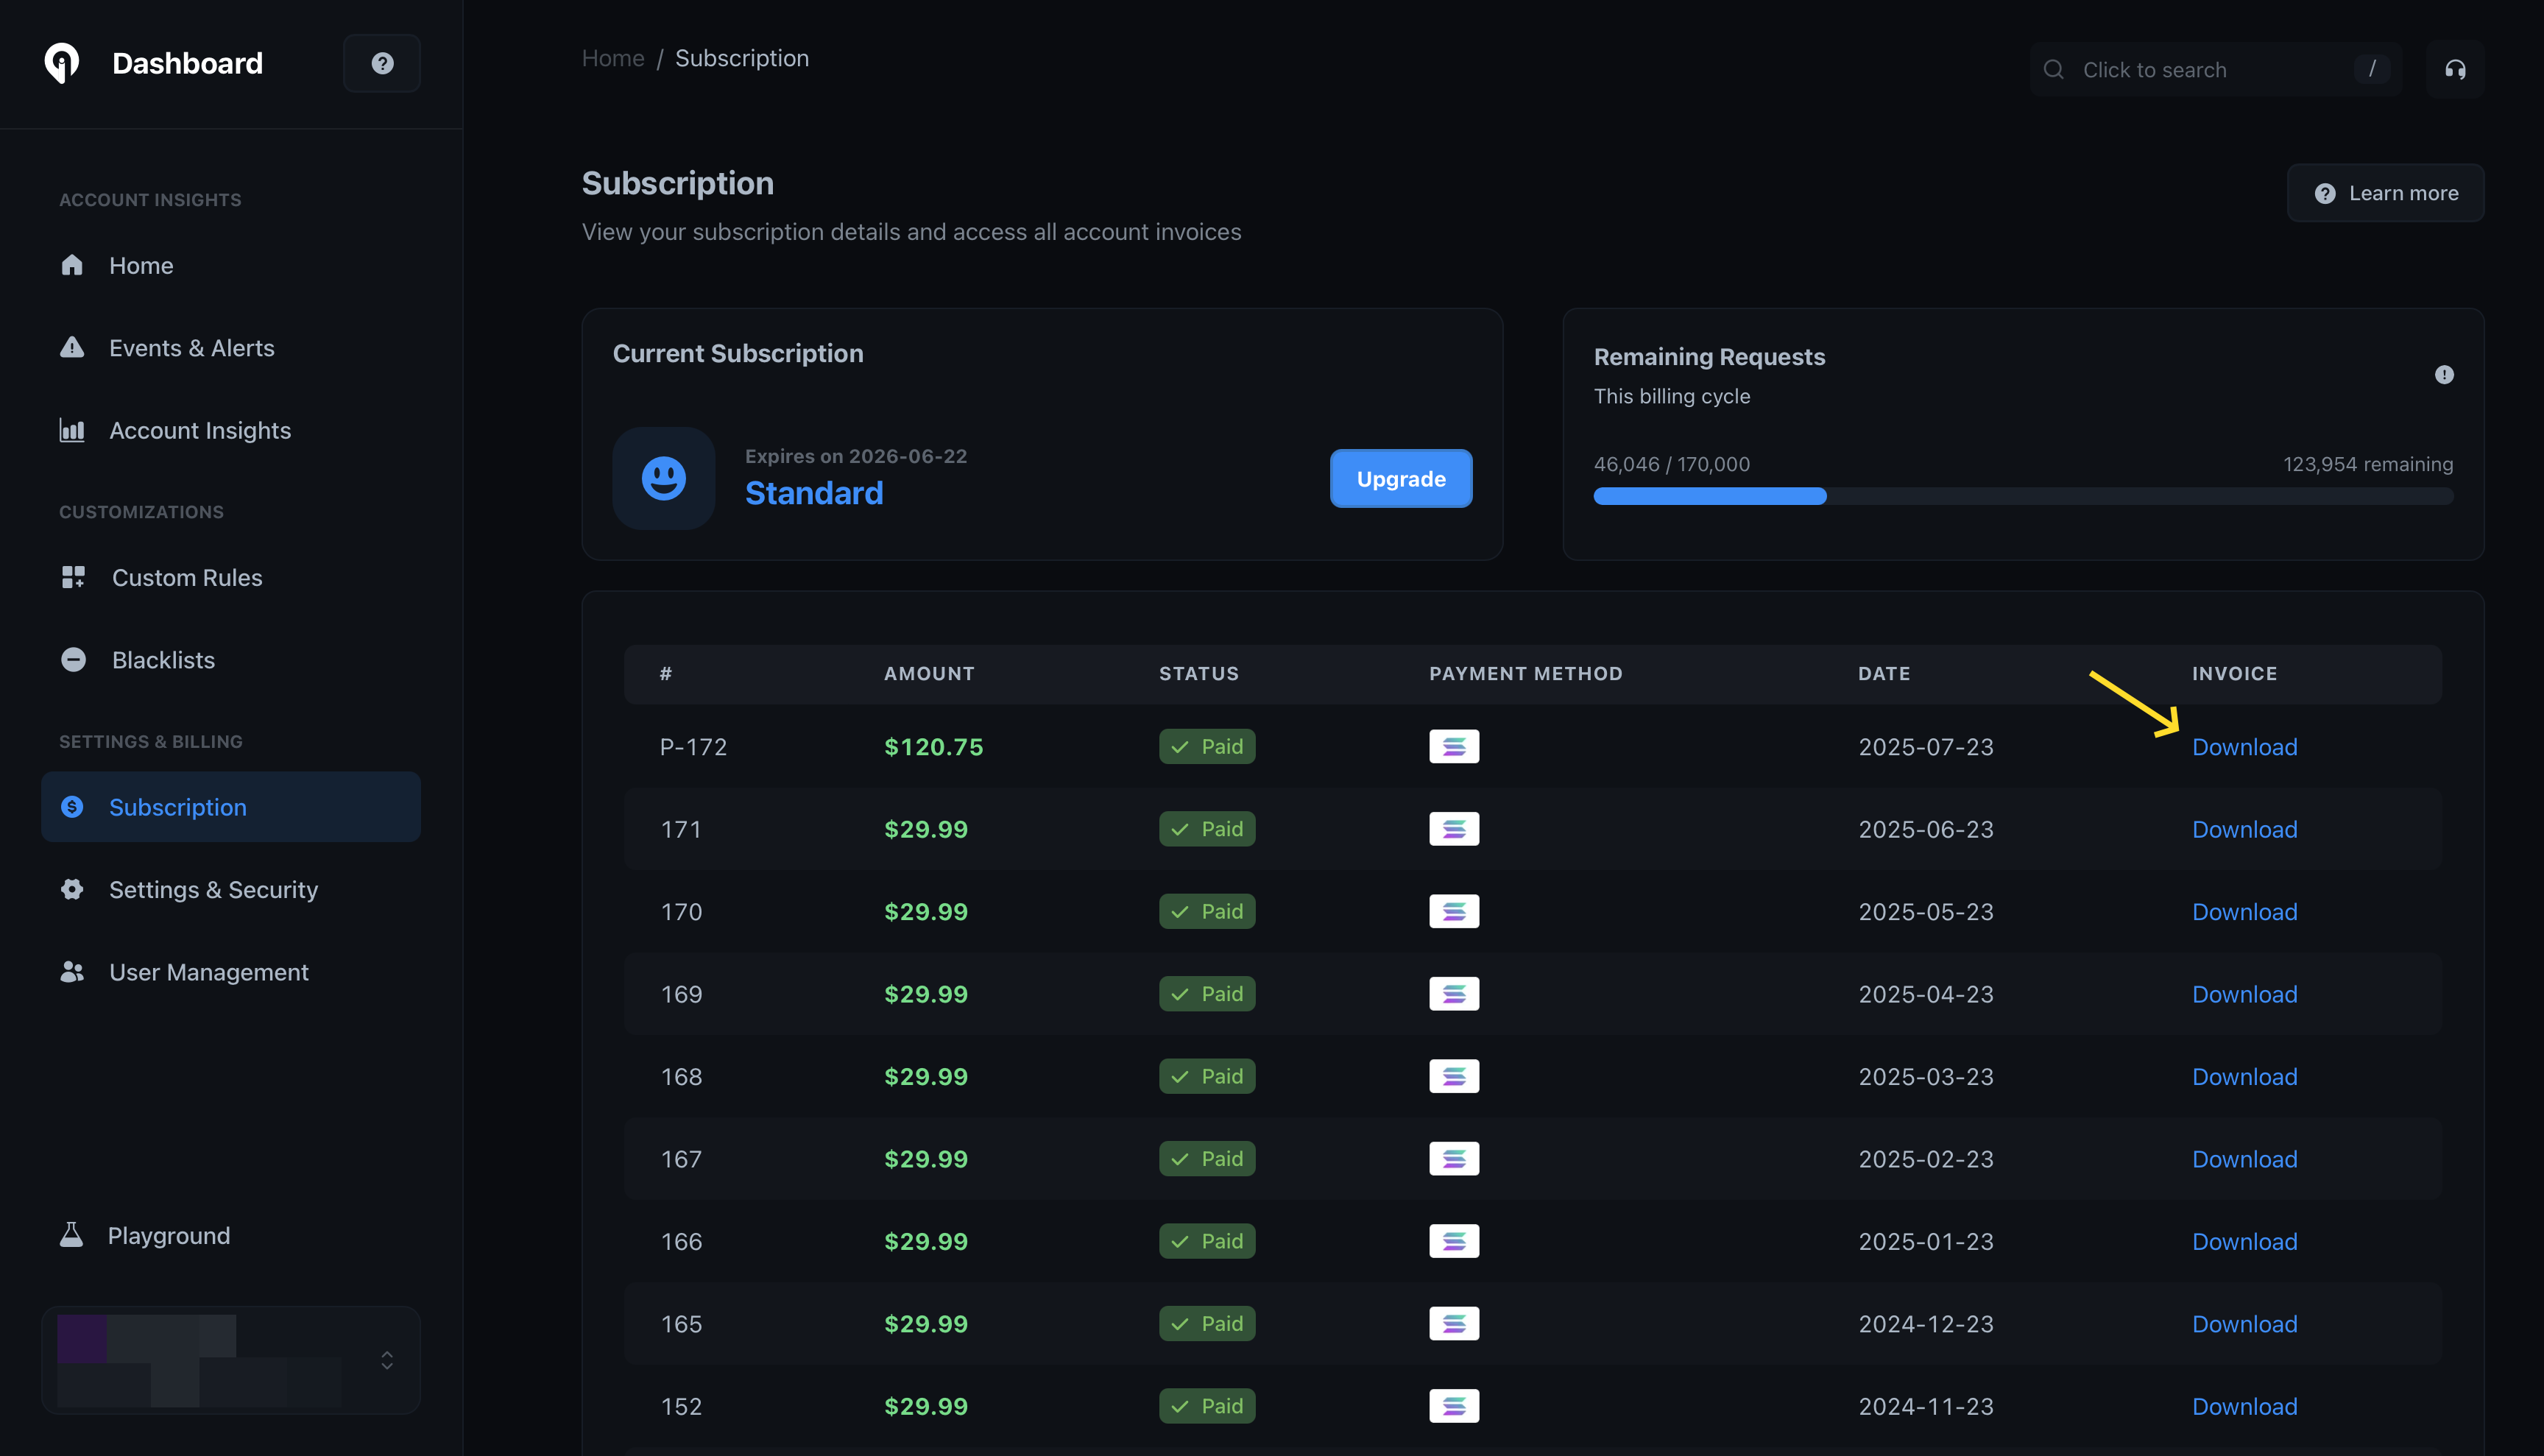
# Enabling 2FA
Source: https://docs.greip.io/knowledge-base/account-management/enabling-2fa
Enable two-factor authentication for your account
Two-factor authentication (2FA) adds an extra layer of security to your account. When you enable 2FA, you will be required to provide a verification code in addition to your password when logging in.
To enable 2FA, follow these steps:
Go to the [Account Settings page](https://dashboard.greip.io/settings) from
the account dashboard.
Under the 'Security settings' section, click on the 'Manage' button on the
right side of the "2-Factor authentication" setting as shown below:
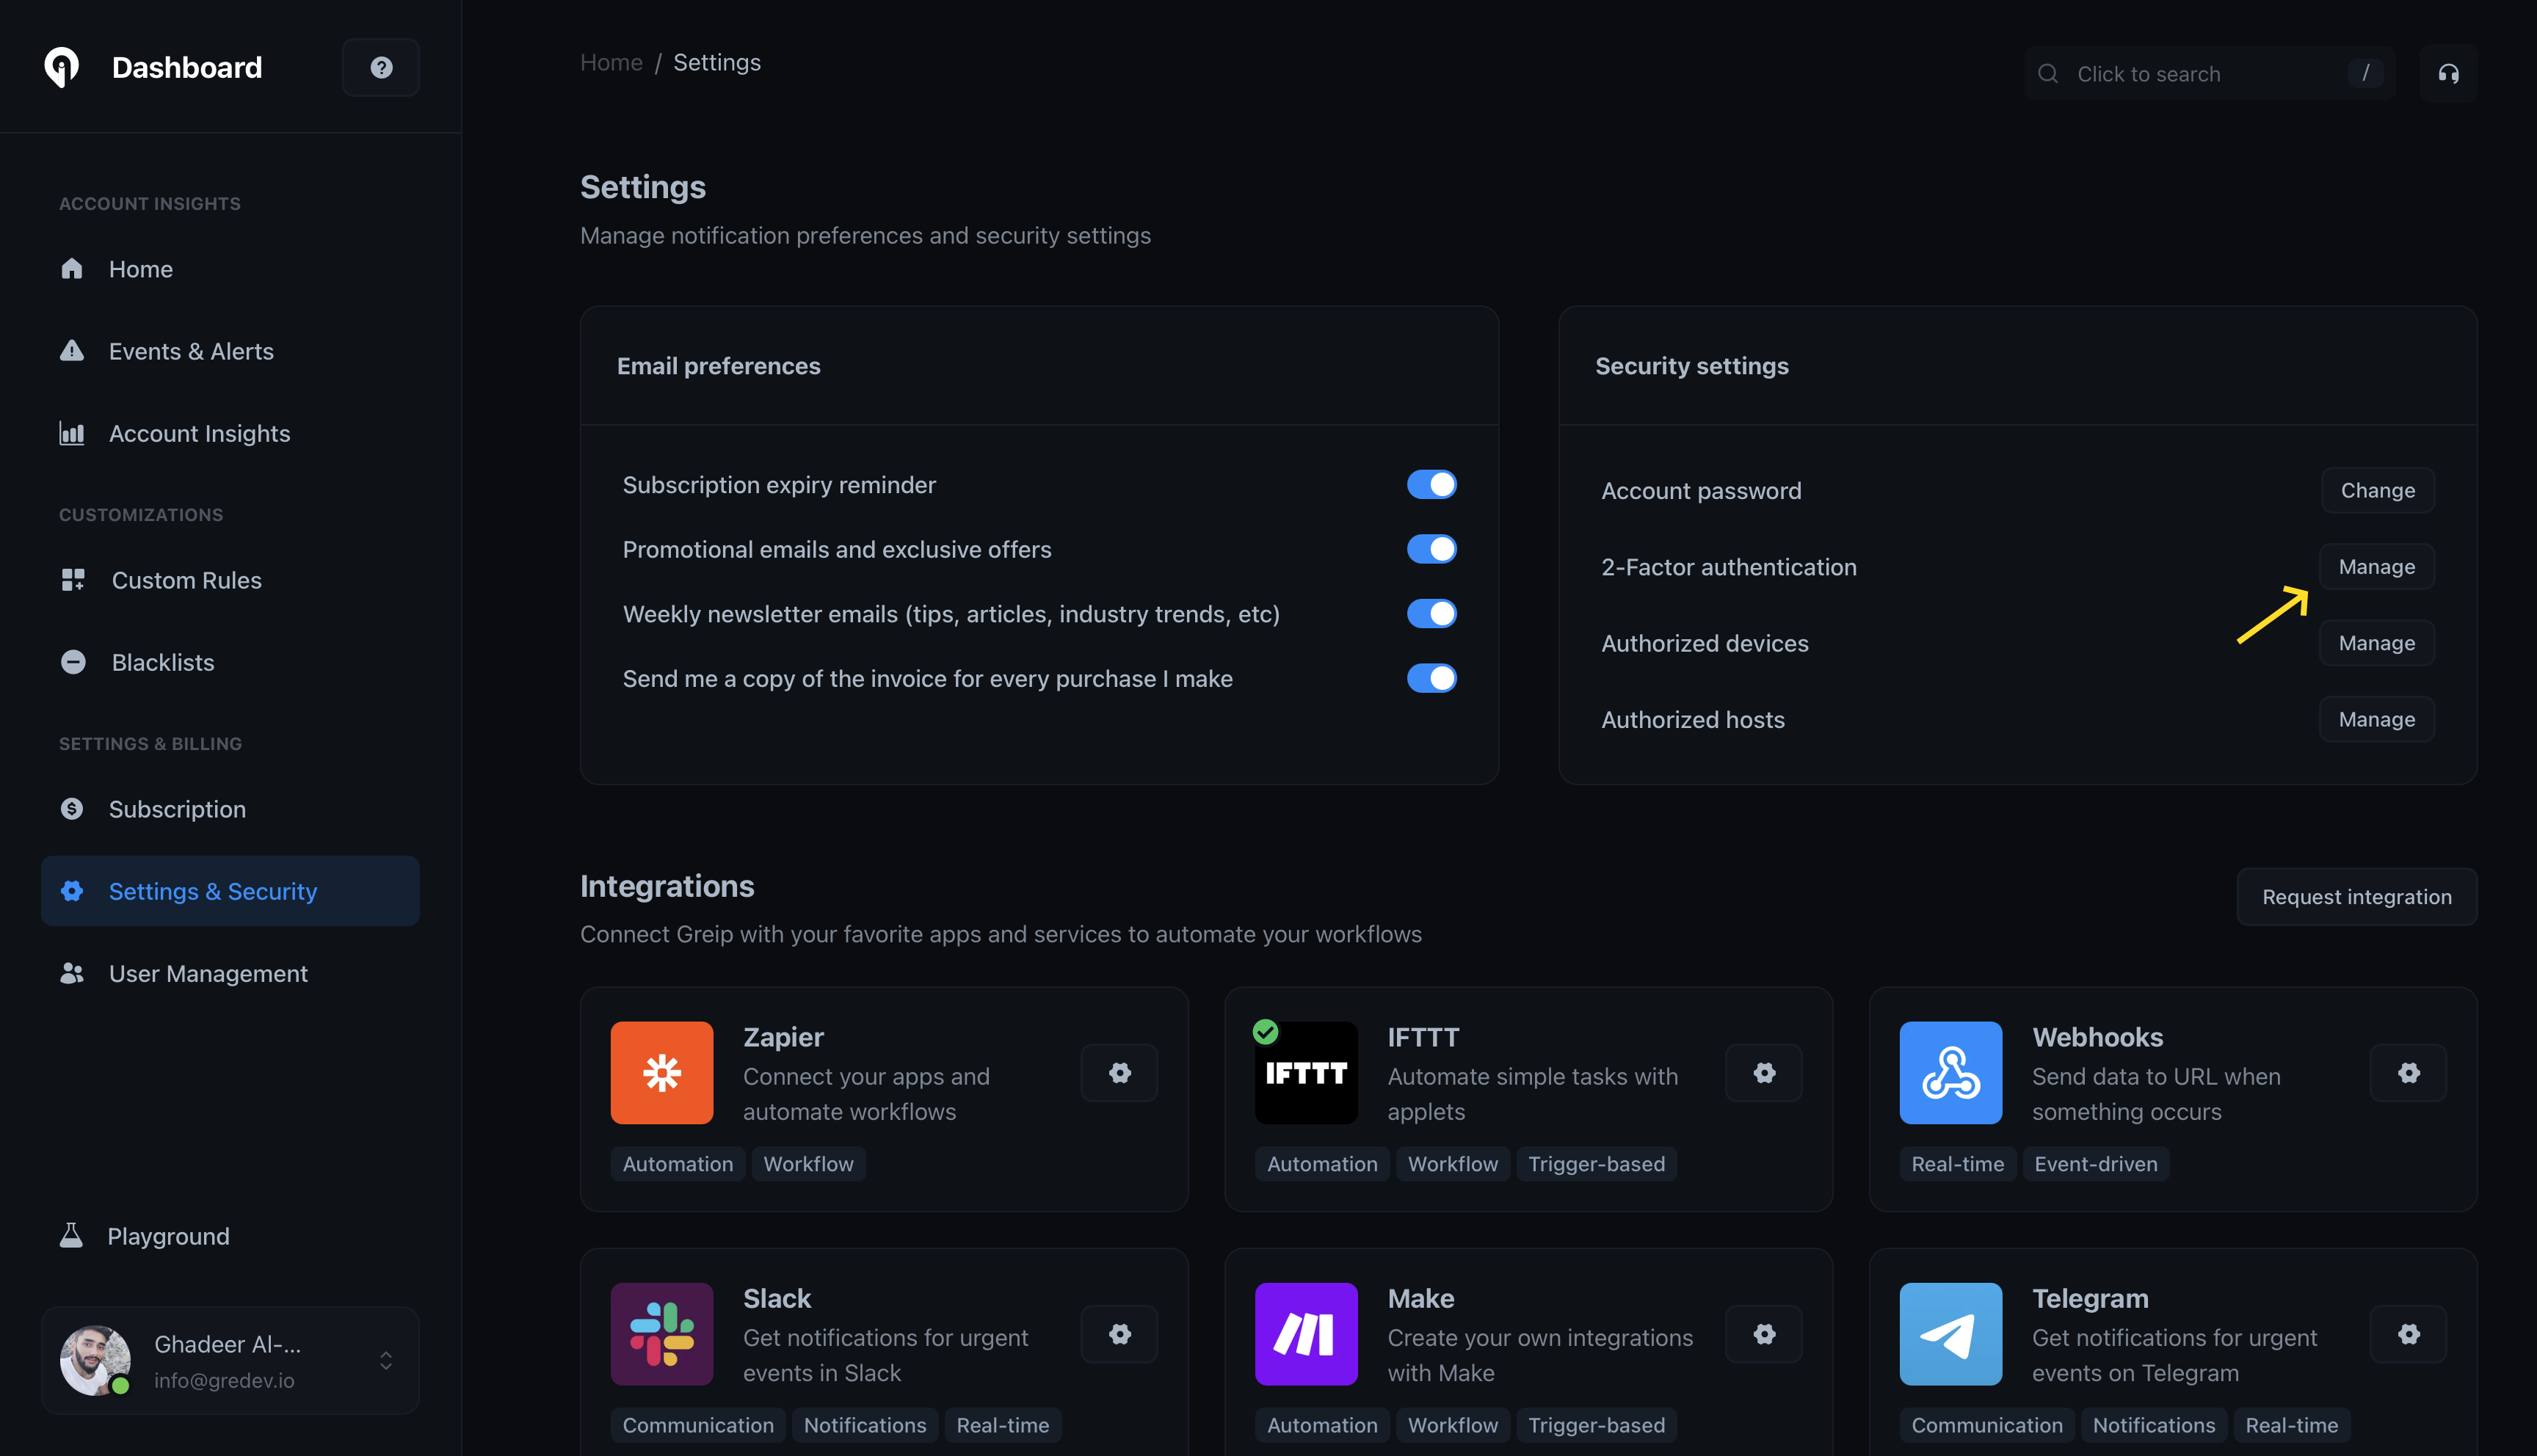
Scan the QR code with your authenticator app (e.g. Google Authenticator,
Authy, etc.). Then enter the code generated by the app in it's field and
click on the 'Verify & Enable' button.
# Manage Authorized Devices
Source: https://docs.greip.io/knowledge-base/account-management/manage-authorized-devices
Manage the devices that are authorized to access your account
You can manage the devices that are authorized to access your account. This feature is useful if you want to revoke access to a device that you no longer use or if you suspect that your account has been compromised.
To manage authorized devices, follow these steps:
Go to the [Account Settings page](https://dashboard.greip.io/settings) from
the account dashboard.
Under the 'Security settings' section, click on the 'Manage' button on the
right side of the "Authorized devices" setting as shown below:
You will see a list of devices that are currently authorized to access your
account. To revoke access to a device, click on the 'Revoke' button next to
the device.
You can enter domain names and/or IP Addresses in this field.
For example: let's say you want to send requests to the API from client-side using our JS Package and in the same time you're using our PHP Library to send request from the server-side. Then you have to add your domain name (where your client-side is hosted) and your server IP Address (where you use the PHP Library).
E.g:
```diff
+ domain.com
+ sub.domain.com
+ 123.45.67.89
```
**Important Notes**
1. If you use subdomains, then you have to list them all.
2. If you use CloudFlare or any other service that using Proxy approach and you want to whitelist your server IP Address, then just add the **real server IP address**.
3. If you leave the authorised hosts field empty, then **you're telling us that you want to allow all domains and IP addresses to use the API Key**.
# Obtaining an API Key
Source: https://docs.greip.io/knowledge-base/account-management/obtaining-api-key
Creating a [new account](https://dashboard.greip.io/register) will automatically generate an API Key for you. So, the only thing you need to for using this service is to have an account.
After completing the registration process, you'll find your API Key on the top right corner of the home page of [the dashboard](https://dashboard.greip.io/home).
# Protecting your API Key
Source: https://docs.greip.io/knowledge-base/account-management/protecting-your-api-key
## Overview
In order to use this service you have to obtain an API Key (You will have it once you open a new account). This is the secret key that will be used to send the requests to our API.
As we mentioned above, it's a **SECRET KEY**. So, you cannot share it with others.
In some cases you may need to leave this key to the public. So, anyone can obtain and use it. In such cases, you have to limit the usage of this API Key to your authorized hosts (domain names and/or IP Addresses). So, let's dive into this:
## Whitelisting your hosts
The purpose of this approach is to determine whether a request is originating from a specific list of domains or IP Addresses. If the request is coming from one of these domains or hosts, it is allowed. Otherwise, an error is returned, preventing the usage of the API Key. By implementing this method, your remaining requests will remain unaffected and won't be deducted.
In order to do that, you have complete the following steps:
Go to the [settings](https://dashboard.greip.io/settings) page of the
account dashboard
Under the 'Security settings' section, click on the 'Manage' button on the
right side of the 'Authorised hosts' setting
You can enter domain names and/or IP Addresses in this field.
For example: let's say you want to send requests to the API from client-side using our JS Package and in the same time you're using our PHP Library to send request from the server-side. Then you have to add your domain name (where your client-side is hosted) and your server IP Address (where you use the PHP Library).
E.g:
```diff
+ domain.com
+ sub.domain.com
+ 123.45.67.89
```
**Important Notes**
1. If you use subdomains, then you have to list them all.
2. If you use CloudFlare or any other service that using Proxy approach and you want to whitelist your server IP Address, then just add the **real server IP address**.
3. If you leave the authorised hosts field empty, then **you're telling us that you want to allow all domains and IP addresses to use the API Key**.
# Upgrading Account Subscription
Source: https://docs.greip.io/knowledge-base/account-management/upgrading-your-account
Be part of our loyal family
In order to renew/upgrade your plan you need to follow these steps:
Go to the [Subscription page](https://dashboard.greip.io/subscription) from
the account dashboard.
Under the 'Current Subscription' section, click on the 'Upgrade' button as
shown below:
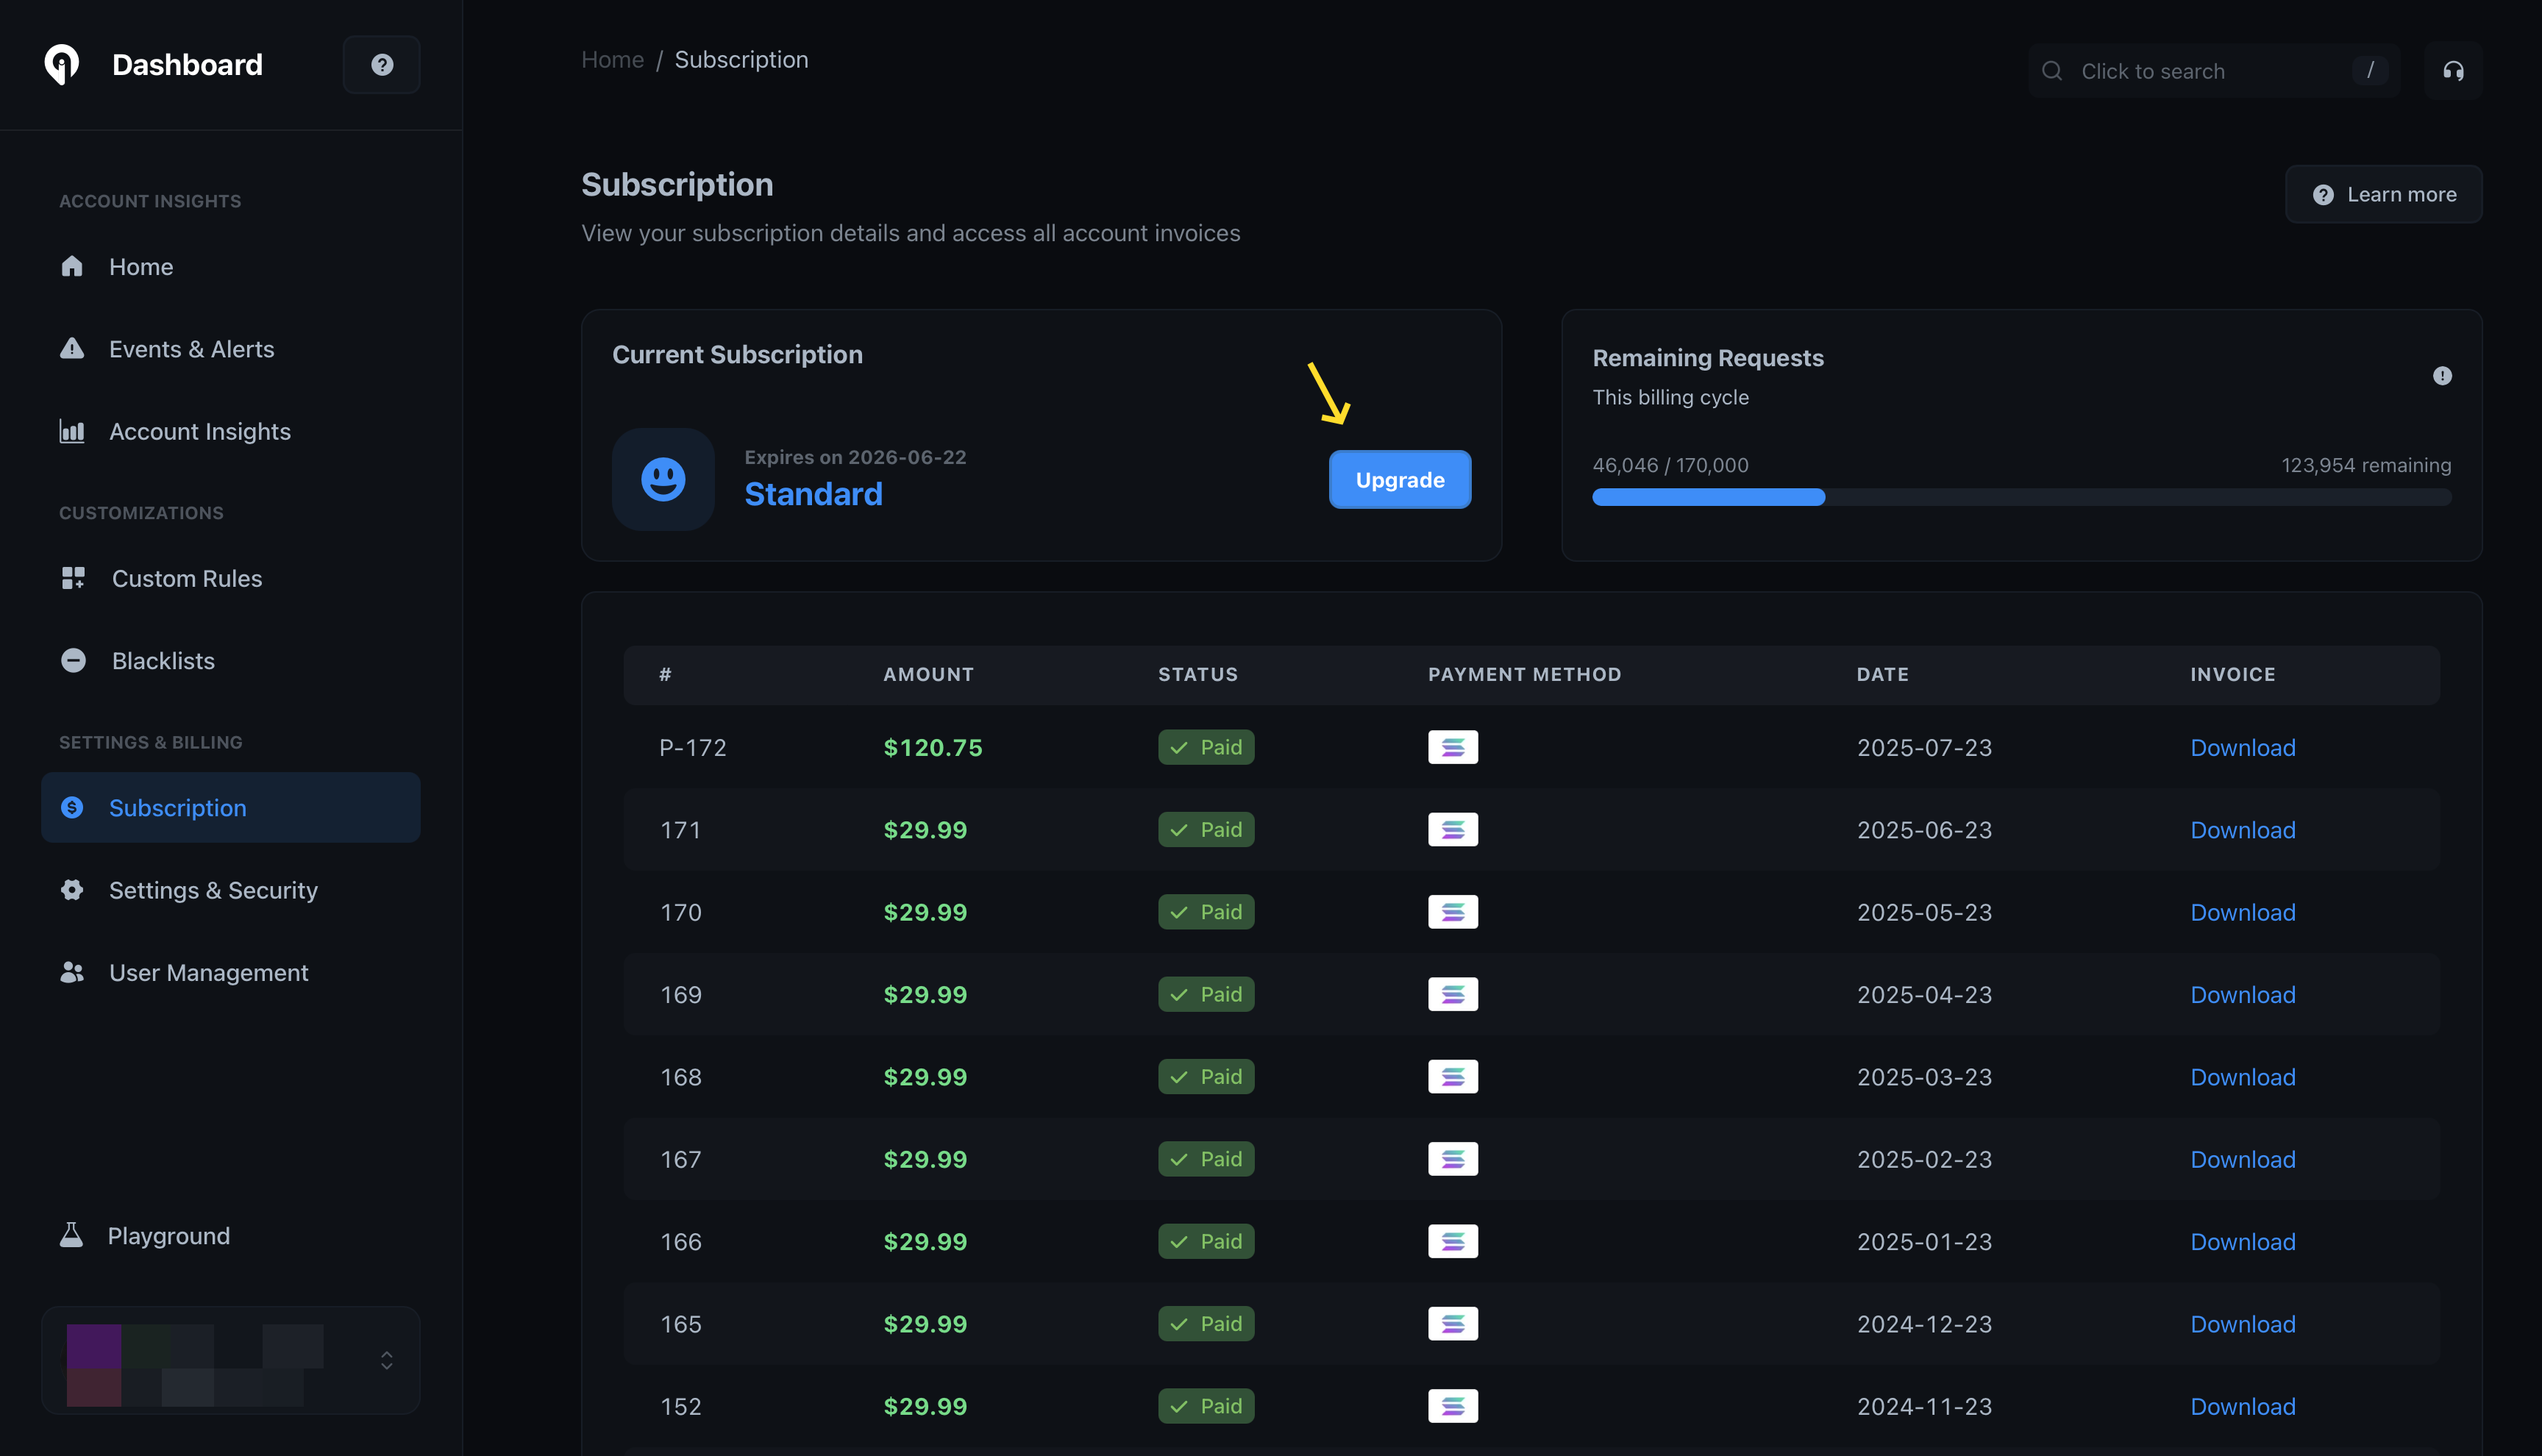
Then, choose your plan & period then click 'Proceed to payment' to complete
the payment process.
If you prefer another payment method, feel free to [contact
us](mailto:support@greip.io).
# Webhooks
Source: https://docs.greip.io/knowledge-base/account-management/webhooks
## Overview
Webhooks are a way for your Greip account to communicate and send notifications to external services or applications in real-time. By adding webhook URLs to your account, you can receive immediate updates and notifications about important events and activities within the Greip API.
Webhooks play a vital role in enhancing the functionality and integration capabilities of Greip. They provide a seamless means to respond to events such as the detection of new Proxy Connection IP Addresses or the identification of fraudulent payments. With webhooks, you can stay informed about critical activities within your account and promptly take appropriate actions.
Webhooks enable you to leverage the power of external systems by receiving event-driven data and updates. By receiving notifications through webhooks, you can streamline your workflows, trigger automated responses, and gain real-time insights into the fraudulent activities detected by Greip. This integration helps you enhance your fraud prevention measures, safeguard your systems, and maintain a secure online environment for your business and customers.
## How to Add New Webhooks to Your Account
Adding new webhooks to your Greip account is a straightforward process. Follow these steps to integrate webhooks into your account and start receiving notifications:
Go to the [settings](https://dashboard.greip.io/settings) of your account
dashboard
Under the 'Integrations' section, Locate the 'Webhooks' service then click
on the configuration icon
Click the 'Add webhook' button to add a new webhook to receive notifications
to
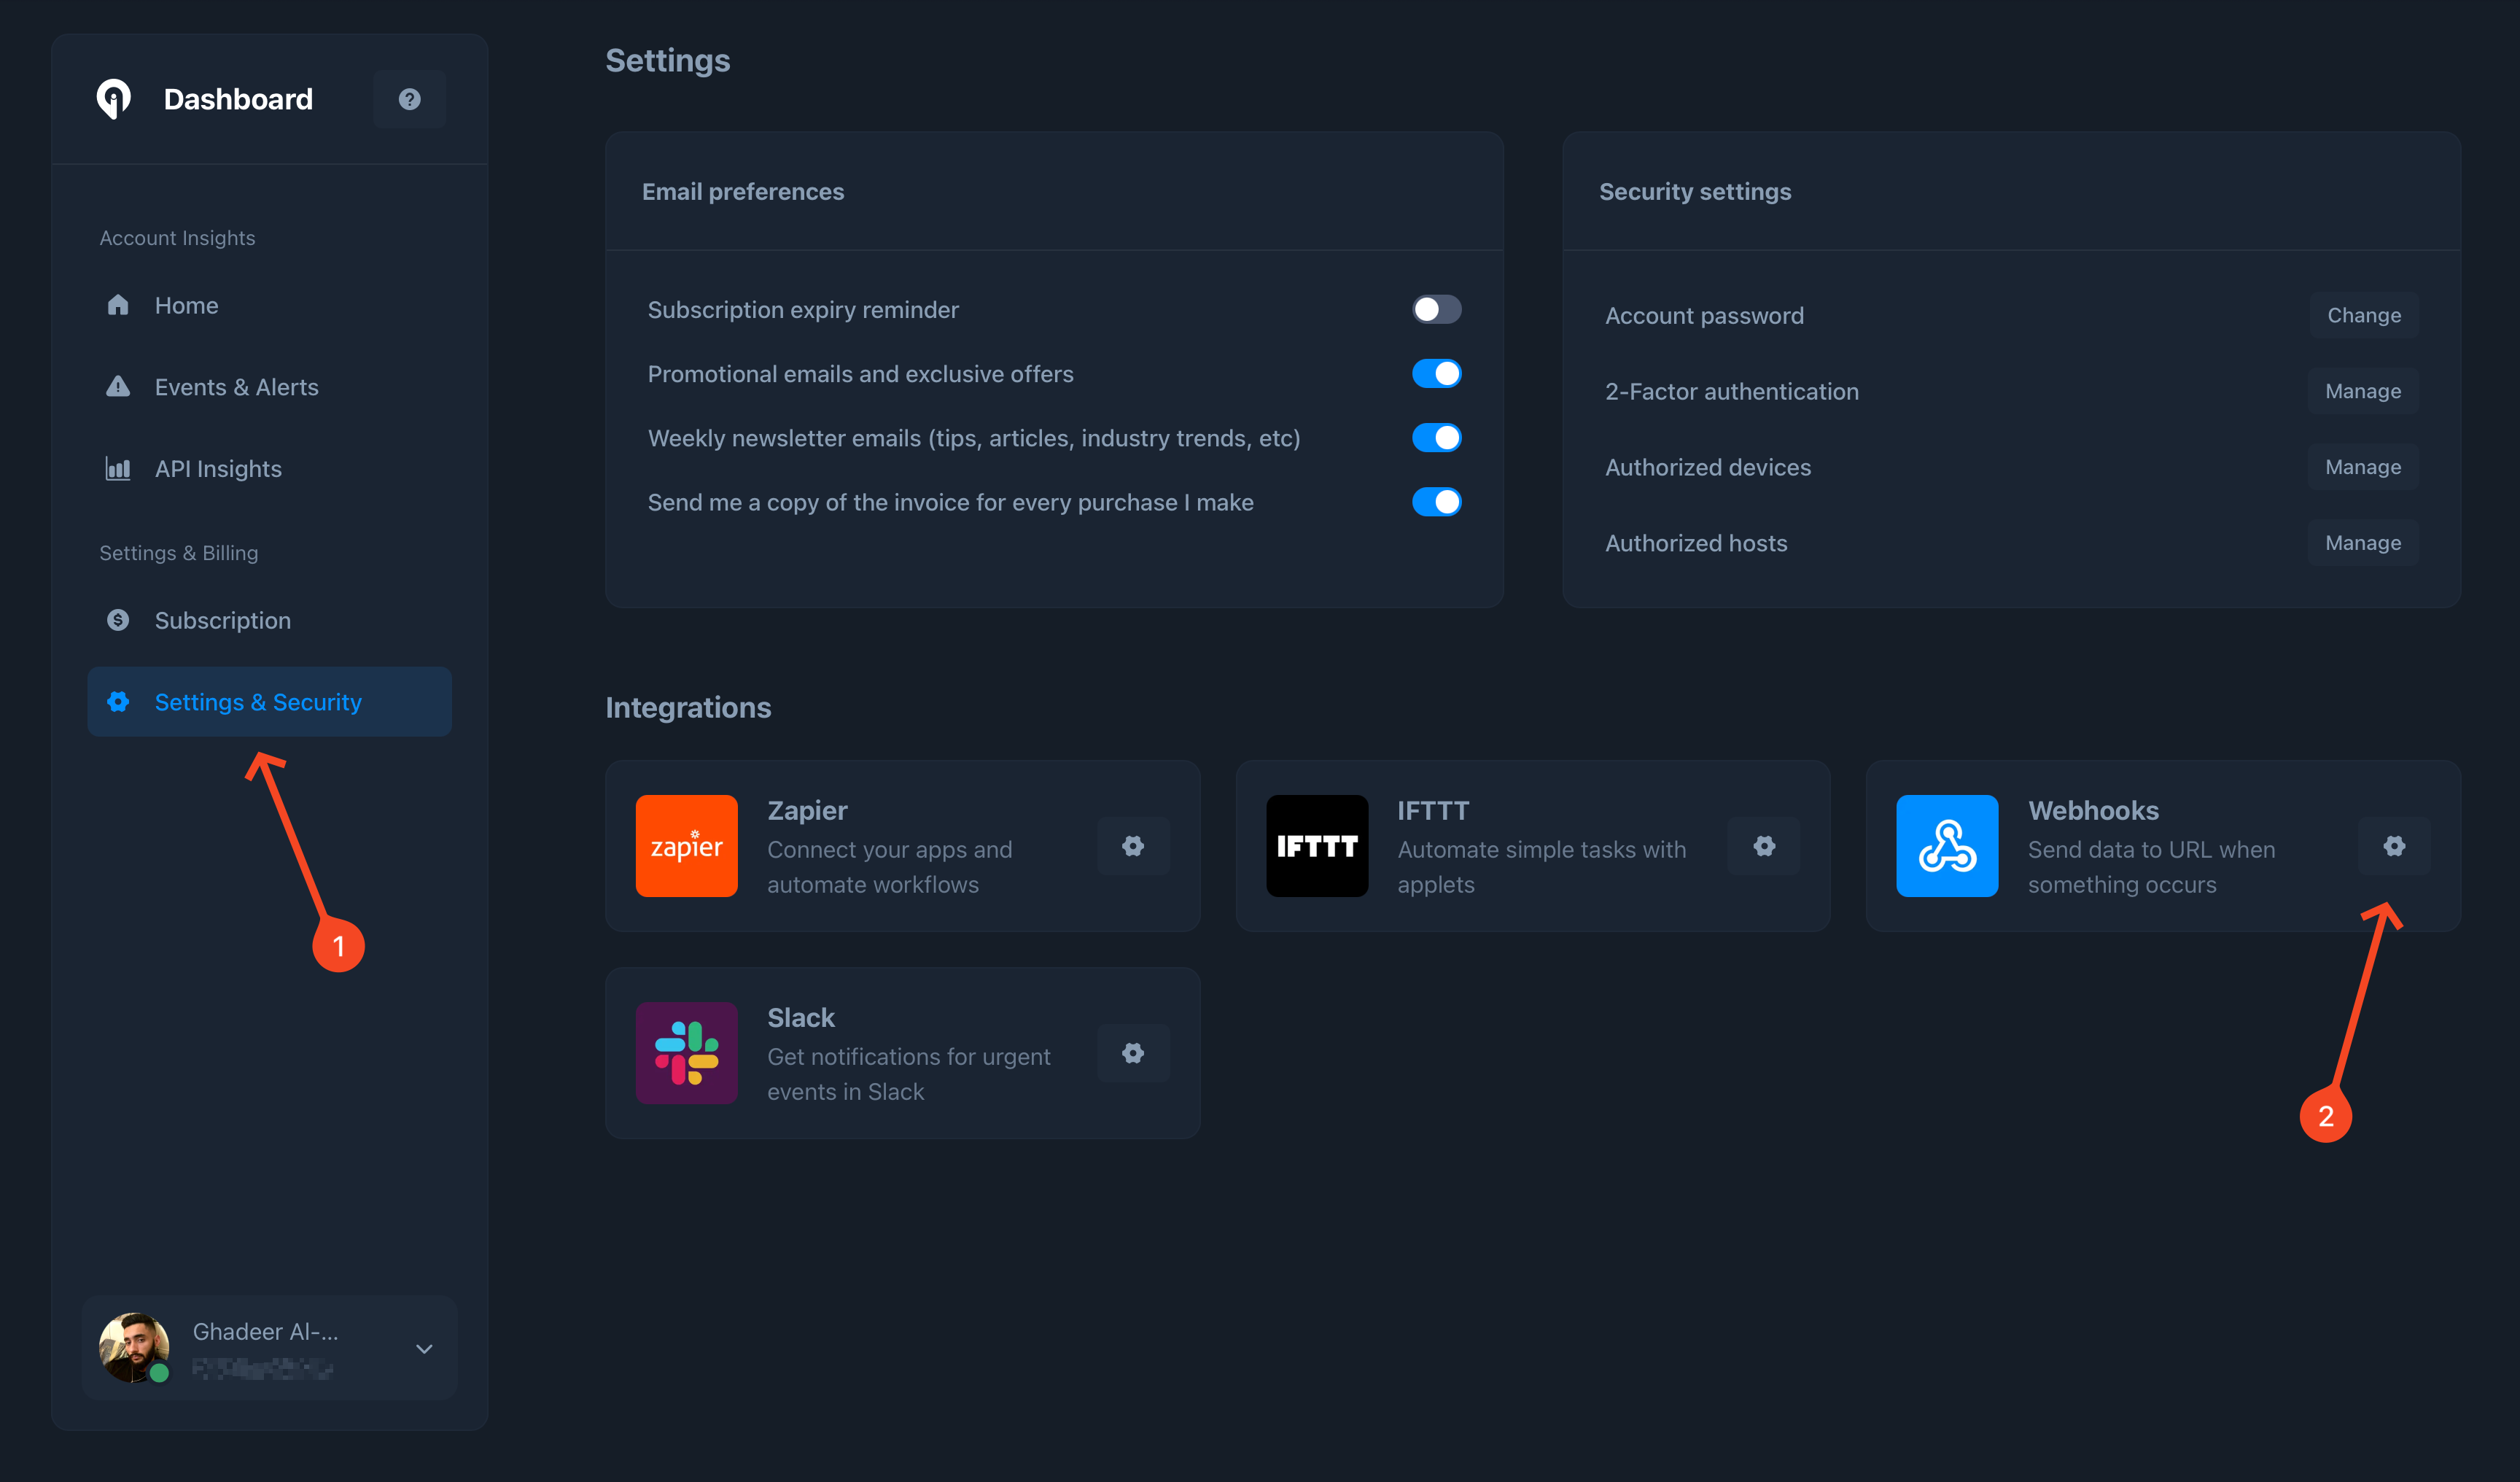
**IMPORTANT NOTES**
* Creating webhooks is only available for accounts with paid subscriptions, and there's a limit for each subscription, please visit our [pricing](https://greip.io/pricing) page for more information.
* You have the ability to add Webhook URLs that are already operating in production mode. It is important to ensure that these URLs return an HTTP Code 200 upon access. This signifies that the URL is functioning correctly.
## Webhook events
Below, you will find sample requests for each event you may receive:
**Method: POST**
Request headers
```
Accept: application/json
Accept-Charset: utf-8
Accept-Encoding: gzip, deflate
User-Agent: Greip-Protocol/v1
```
Respones body
```json
{
"event": "proxy_detected",
"ip": "1.1.1.1",
"ipType": "IPv4",
"IPNumber": 16843009,
"countryCode": "US",
"countryGeoNameID": 6252001,
"countryName": "United States",
"security": {
"isProxy": false,
"proxyType": null,
"isTor": false,
"isBot": false,
"isRelay": false,
"isHosting": false
}
}
```
**Method: POST**
Request headers
```
Accept: application/json
Accept-Charset: utf-8
Accept-Encoding: gzip, deflate
User-Agent: Greip-Protocol/v1
```
Respones body
```json
{
"event": "fraud_payment",
"customer_id": "UID123",
"customer_email": "name@domain.com",
"customer_phone": "0555123456",
"score": 31.666666666666664,
"rules": [
{
"id": "PF10001",
"description": "High purchase rate, according to `customer_ip`."
},
{
"id": "PF10002",
"description": "High purchase rate, according to `customer_id`."
}
],
"rulesChecked": 6,
"rulesDetected": 2
}
```
**Method: POST**
Request headers
```
Accept: application/json
Accept-Charset: utf-8
Accept-Encoding: gzip, deflate
User-Agent: Greip-Protocol/v1
```
Respones body
```json
{
"event": "profanity",
"text": "**** *****",
"totalBadWords": 2,
"riskScore": 1,
"isSafe": false
}
```
**Method: POST**
Request headers
```
Accept: application/json
Accept-Charset: utf-8
Accept-Encoding: gzip, deflate
User-Agent: Greip-Protocol/v1
```
Respones body
```json
{
"event": "spam_email",
"email": "name@domain.com",
"score": 3,
"reason": "Email domain's SPF record is not set properly.",
"isValid": false
}
```
**Method: POST**
Request headers
```
Accept: application/json
Accept-Charset: utf-8
Accept-Encoding: gzip, deflate
User-Agent: Greip-Protocol/v1
```
Respones body
```json
{
"event": "spam_phone",
"phone": "0555123456",
"countryCode": "ir",
"carrier": "",
"reason": "Invalid phone number structure.",
"isValid": false
}
```
# Becoming Affiliate Partner
Source: https://docs.greip.io/knowledge-base/affiliates-program/becoming-affiliate-partner
Be part of our affiliate partners and earn commisions
In order to become an affiliate partner with Greip, you should go through the following steps:
Go to the [Dashboard](https://dashboard.greip.io/home) of your account
Click on the 'Affiliate' link under the 'Quick Links' section
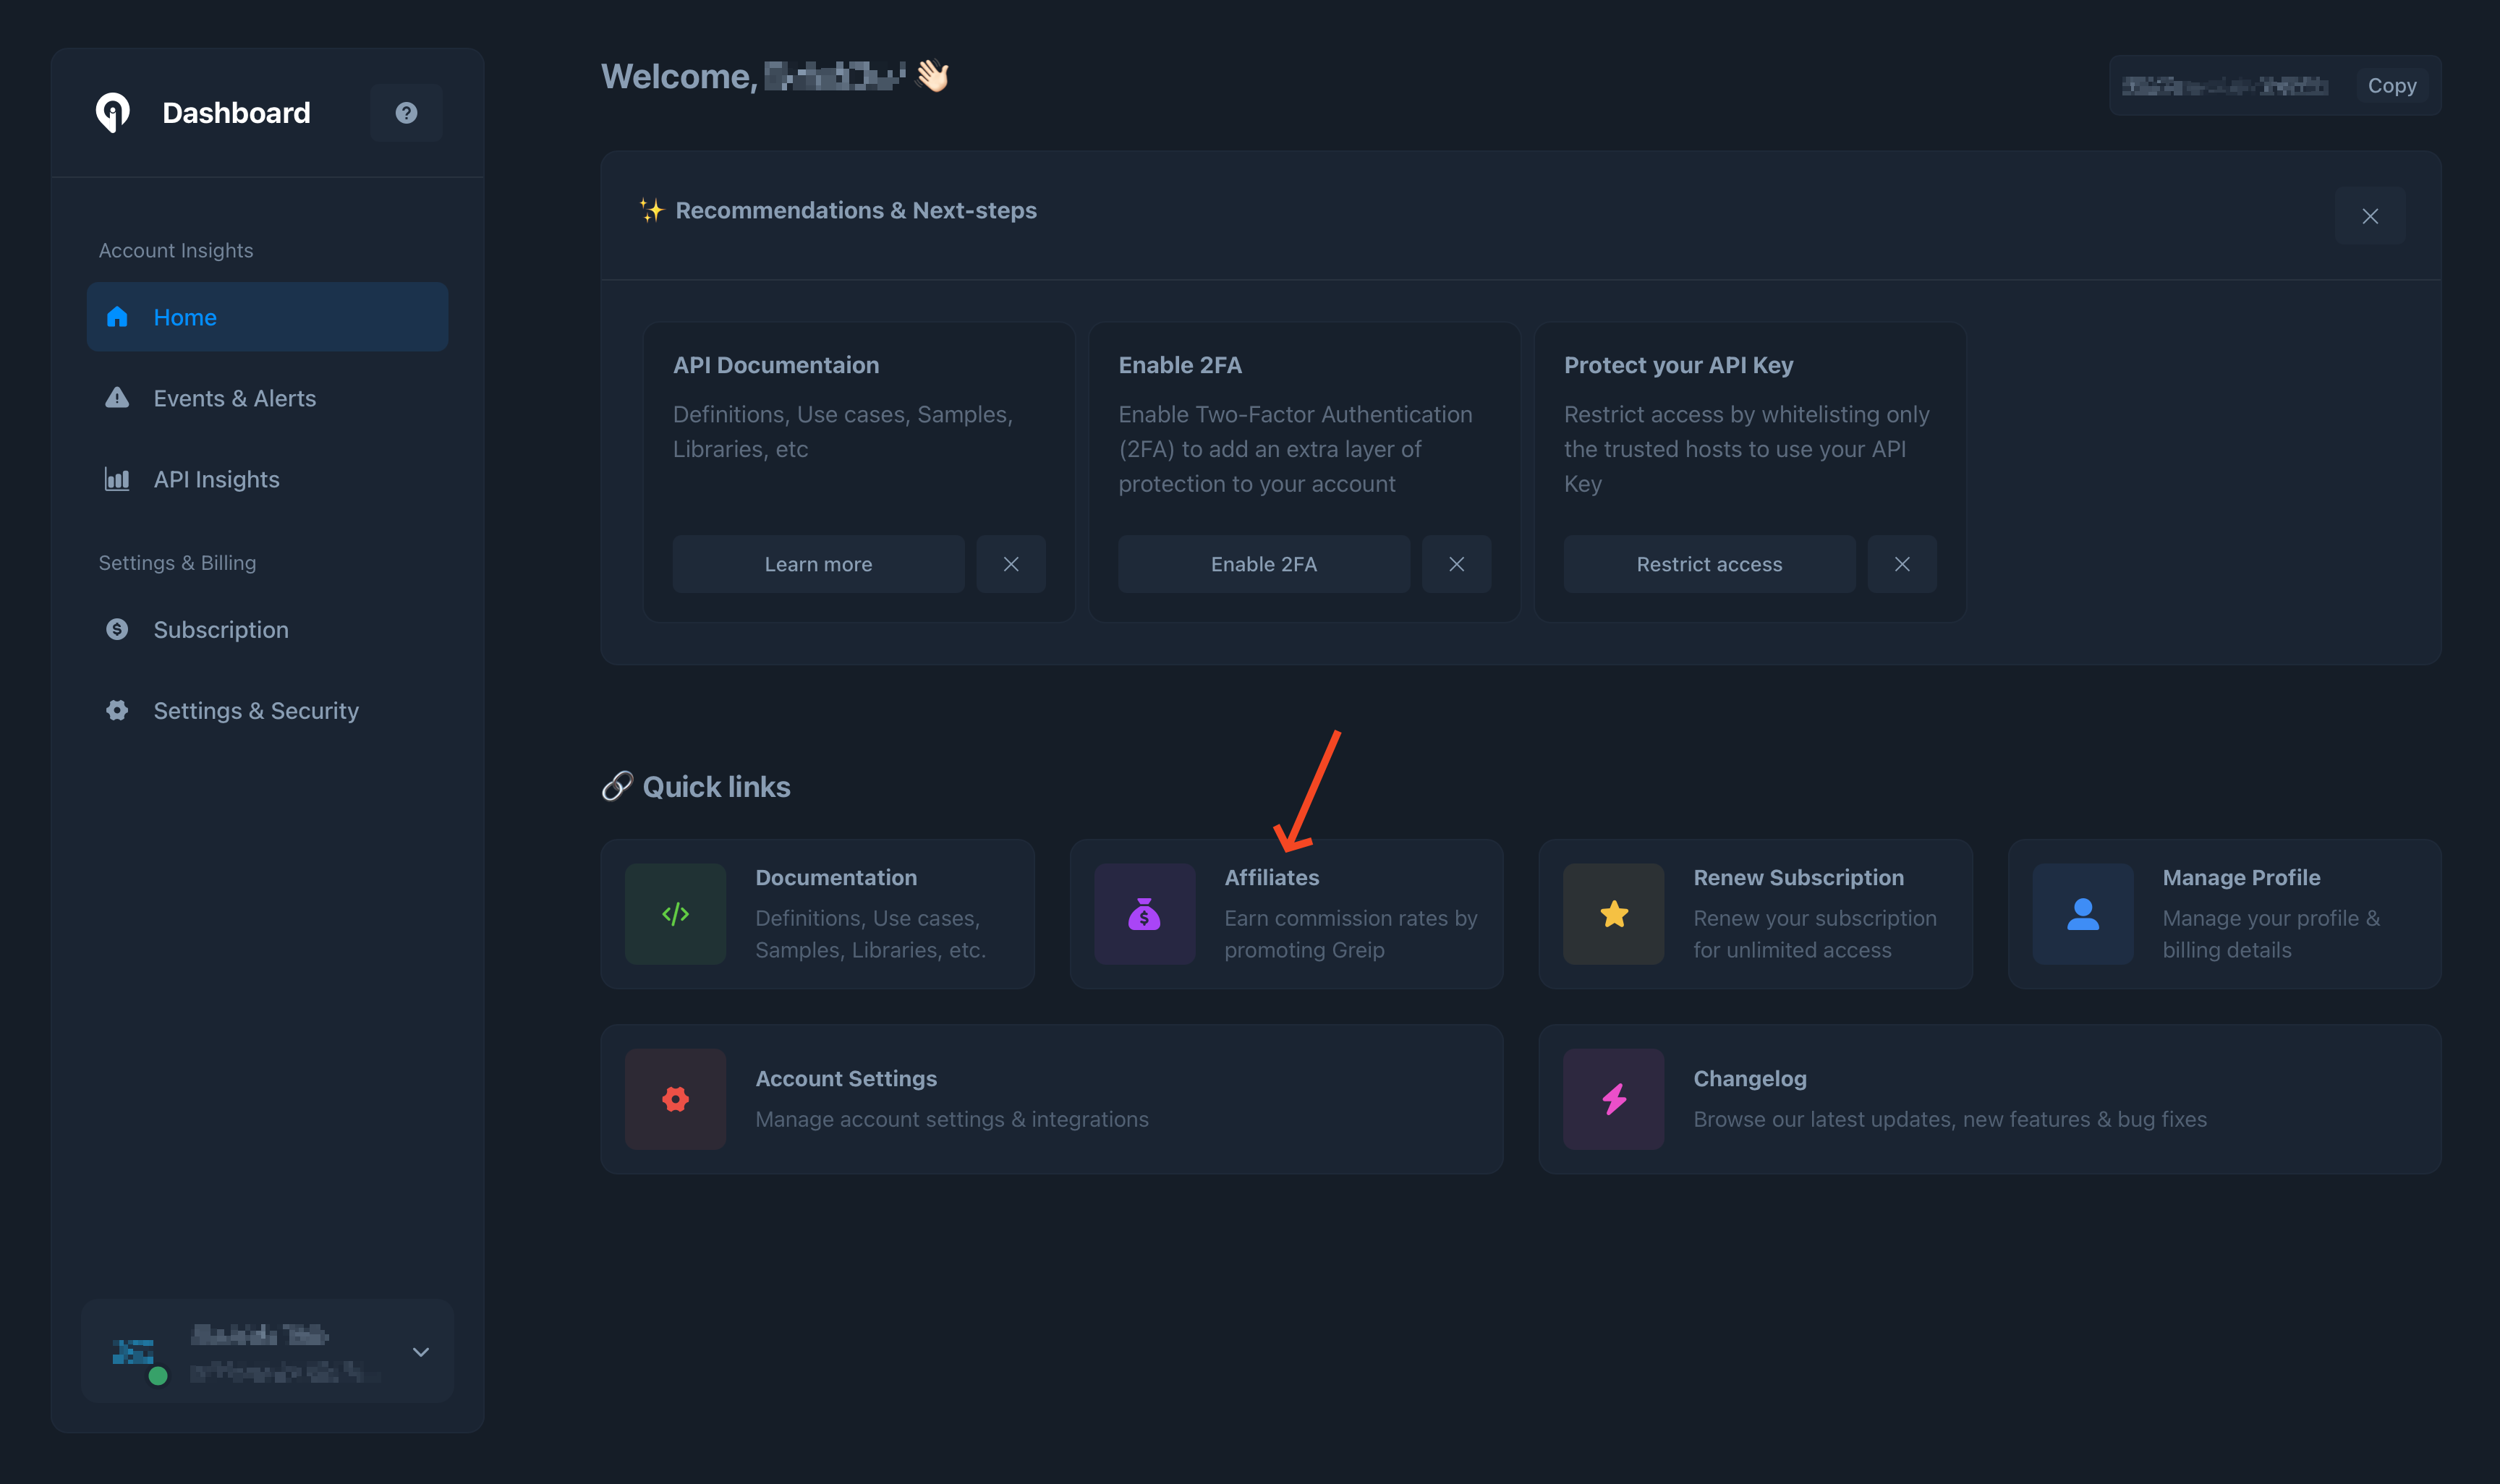
Click on the 'Join the program' button, as shown below:

After joining in, you'll be able to setup your affiliate account and start promoting Greip immediately.
# Payout Settings
Source: https://docs.greip.io/knowledge-base/affiliates-program/payout-settings
A guide to set up your affiliate account to be ready for receive payouts
Once you become an affiliate partner at Greip, you should setup your payout settings so we can transfer your earnings as soon as you reach the account threshold. Let's dive into this:
Go to the [Affiliate Partner Dashboard](https://dashboard.greip.io/affiliates) of your account
Click on the 'Payouts' button
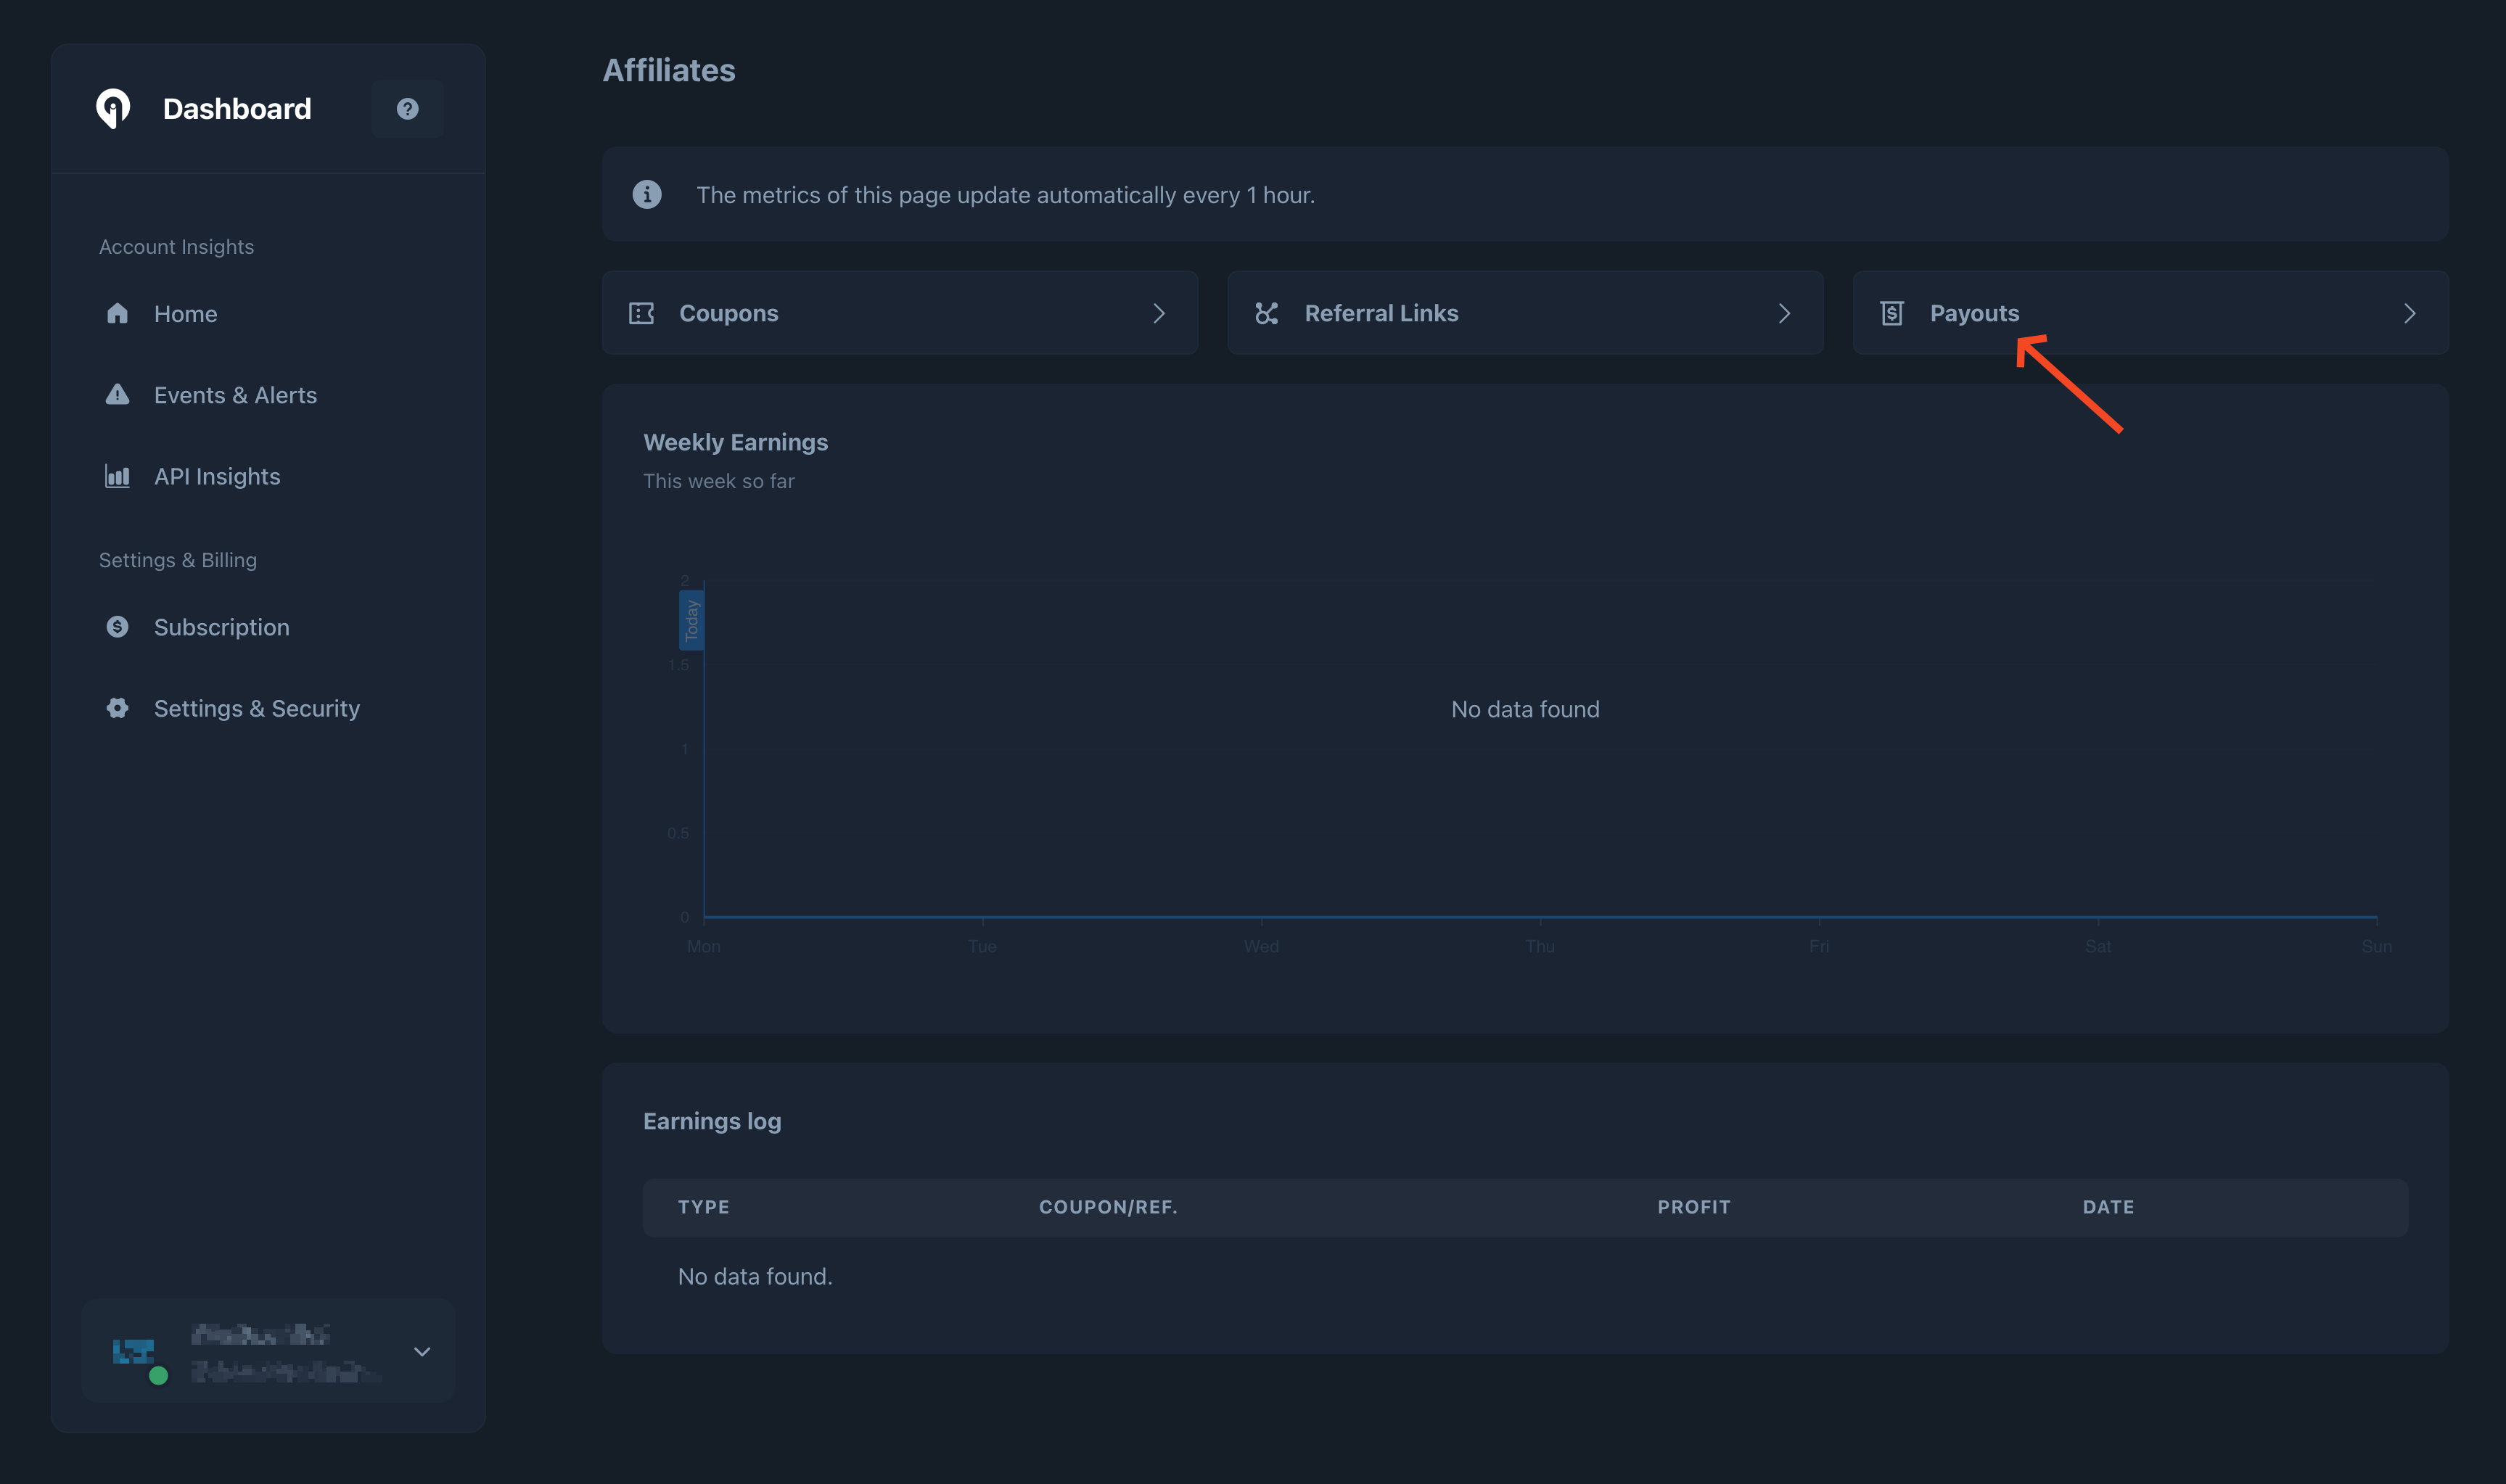
Click on the 'Payouts settings' button to manage the settings
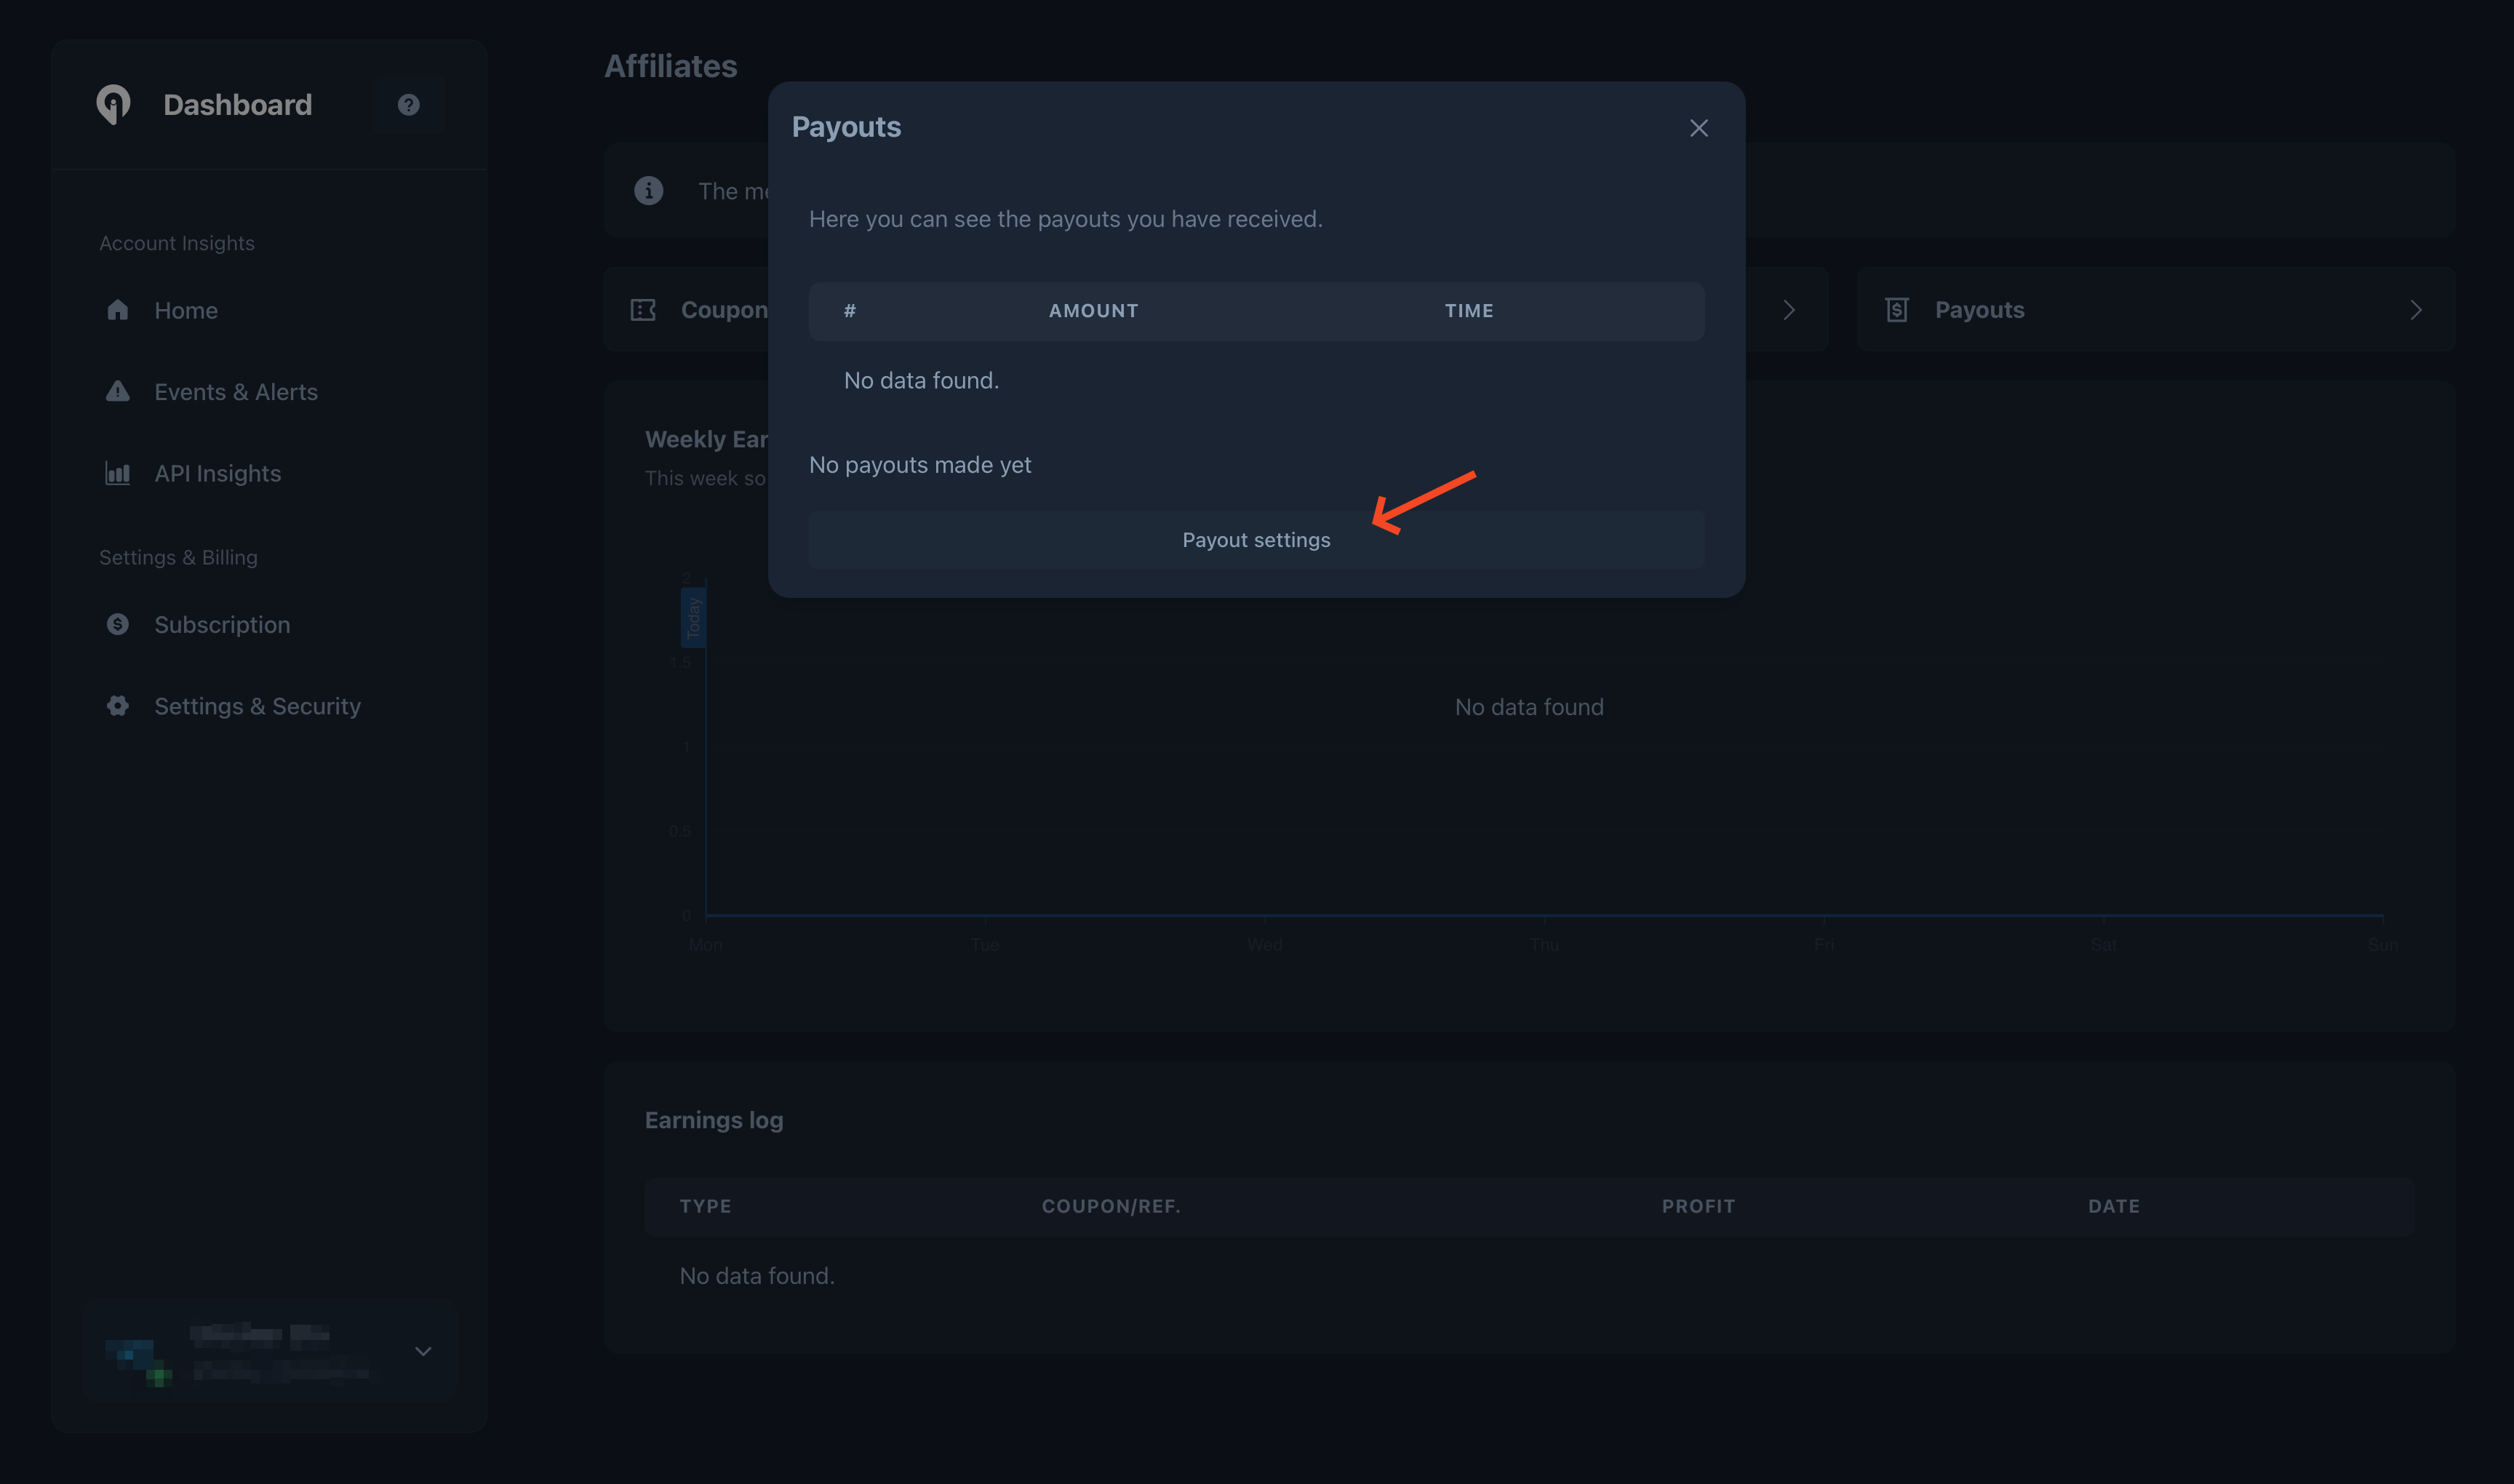
Then you will need to provide the necessary information by filling in the fields.
Once you complete filling in the required fields, click on the 'Save changes' button, and you're ready to start promoting greip and earn commission rates 🎉
**What's next?**
* Create a new coupon from the Coupons section of the affiliates dashboard
* Create a new referral link from the Referral Links section of the affiliates dashboard
* Share the referral link/coupon with your audience, and keep an eye on the charts 🤑
# Overview
Source: https://docs.greip.io/knowledge-base/blacklists/overview
Block lists of IP addresses, emails, email domains, customer IDs, customer IP addresses, card BINs, or card countries.
Blacklists allow you to block specific IP addresses, emails, email domains, customer IDs, customer IP addresses, card BINs, or card countries. This guide provides an overview of the blacklist feature, its benefits, and how to create and manage blacklists in Greip.
## Adding a blacklist
To add a new blacklist, follow these steps:
Go to the [Blacklists page](https://dashboard.greip.io/blacklists) from the
account dashboard.
Click on the 'Add new' button from the top right corner of the page to
create a new blacklist.
Give it a title that describes the list. This will help you identify the
rule later.
Choose the type of blacklist you want to create.
Click the "Add blacklist" button to save the new blacklist.
Click on the name of the the blacklist you just created to add values to it
(e.g: IP addresses, emails, etc.).
Once you have added values to a blacklist, it will be considered immediately when you use the API.
## Sample response with a blacklist detection
When the speicified value is found in one of your blacklists, the API will set the `blacklisted` property to `true` in the response. Here is a sample response:
```json BIN Lookup
{
"data": {
"blacklisted": true
// ...
}
}
```
```json Geoip, IP Lookup
{
"data": {
// ...
"security": {
// ...
"blacklisted": false
}
}
}
```
```json IP Reputation
{
"data": {
// ...
"threats": {
// ...
"blacklisted": true
}
}
}
```
```json Email Scoring
{
"data": {
// ...
"blacklisted": false
}
}
```
```json Phone Scoring
{
"data": {
// ...
"blacklisted": false
}
}
```
## Definitions of blacklist types
The following are the types of blacklists you can create in Greip:
This type can be used to blacklist IP addresses and takes effect in the following endpoints:
* IP Geolocation
* IP Lookup
* Bulk IP Lookup
* IP Reputation
* Payment Fraud Detection
Sample value: `1.1.1.1`
This type can be used to blacklist email addresses and takes effect in the following endpoints:
* Email Scoring
* Payment Fraud Detection
Sample value: `name@domain.com`
This type can be used to blacklist email domains and takes effect in the following endpoints:
* Email Scoring
* Payment Fraud Detection
Sample value: `domain.com`
This type can be used to blacklist phone numbers and takes effect in the following endpoints:
* Phone Scoring
* Payment Fraud Detection
Sample value: `1234567890`
The phone number should not have a + sign or zero at the beginning. And make sure to include the country dial code.
This type can be used to blacklist customer IDs and takes effect in the following endpoints:
* Payment Fraud Detection
This type can be used to blacklist card BINs and takes effect in the following endpoints:
* BIN Lookup
* Payment Fraud Detection
Sample value: `456789`
This type can be used to blacklist card countries and takes effect in the following endpoints:
* BIN Lookup
* Payment Fraud Detection
Sample value: `US`
# Overview
Source: https://docs.greip.io/knowledge-base/custom-rules/overview
Set-up your own custom rules that will be applied when you use the API
Custom rules allow you to define specific conditions and actions to be executed based on incoming events or data. This guide provides an overview of custom rules, their benefits, and how to create and manage them in Greip.
## Adding custom rules
To add a custom rule, follow these steps:
Go to the [Custom Rules page](https://dashboard.greip.io/custom-rules) from
the account dashboard.
Click on the 'Add Rule' button from the top right corner of the page to
create a new custom rule.
Give it a title that describes the rule. This will help you identify the
rule later, and when the custom rule is applied to an API request, it will
be returned in the API response along with the rule ID.
Choose the endpoint then define the conditions and action for the custom
rule.
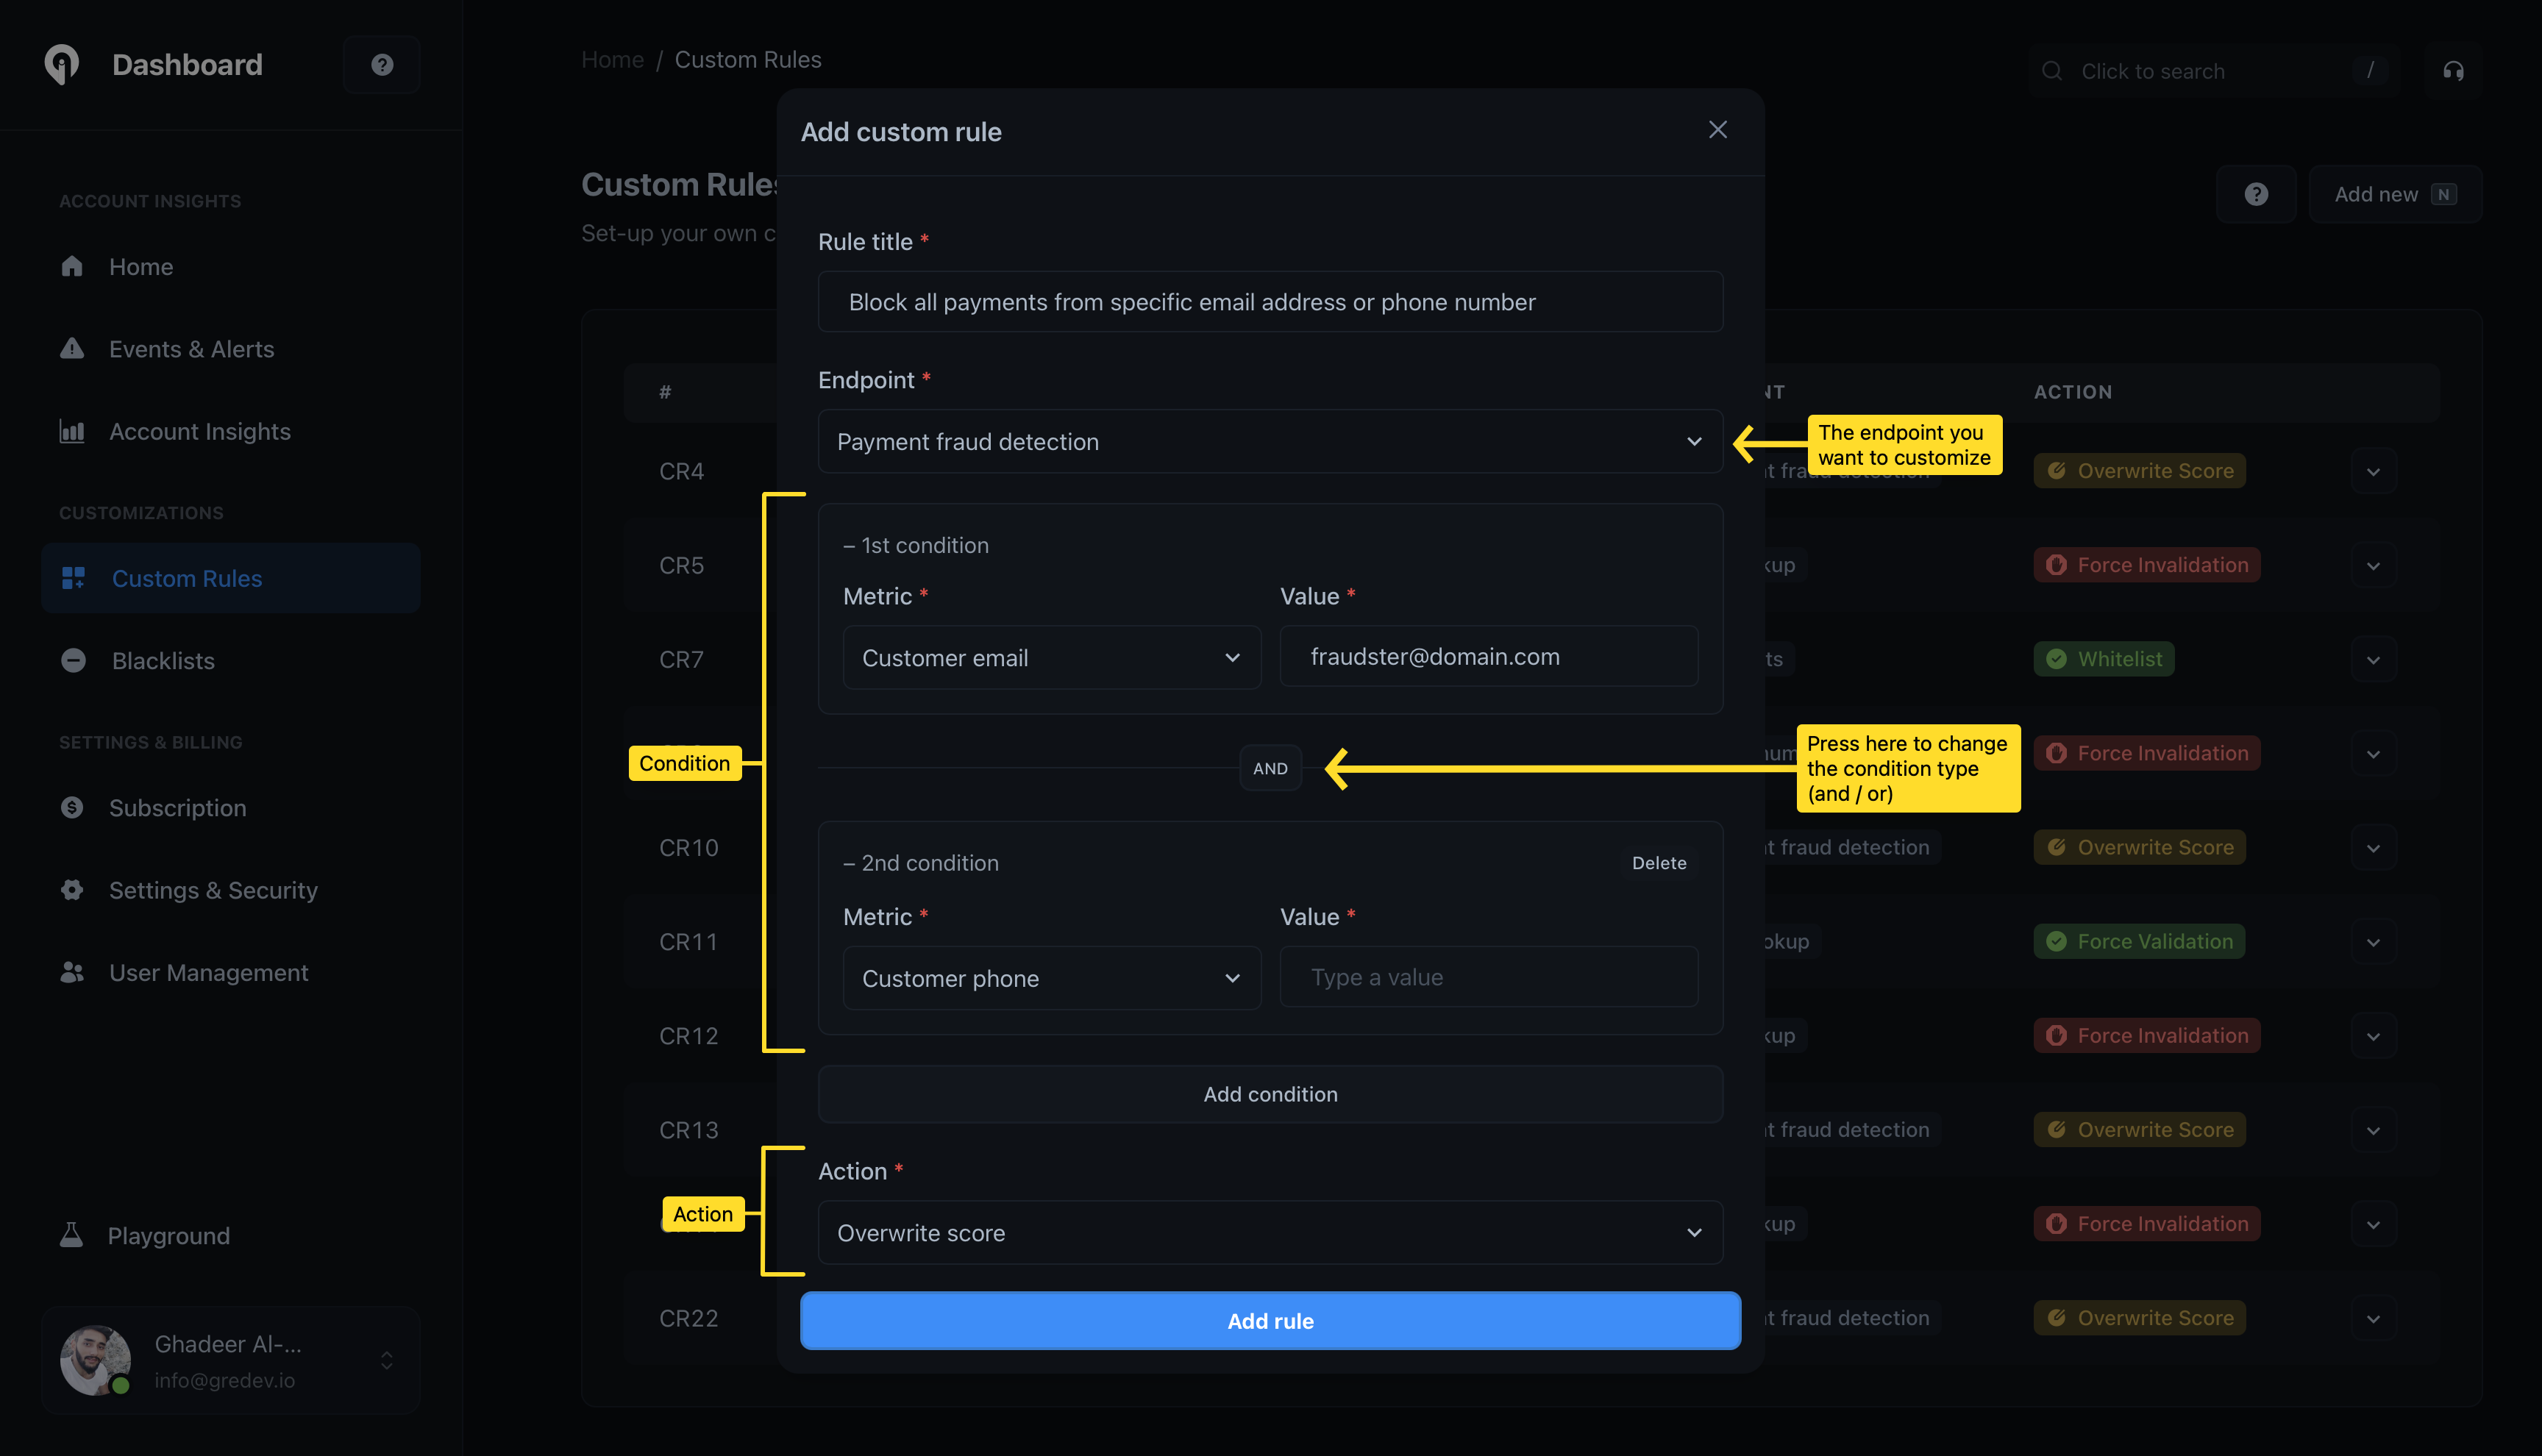
Click the "Add rule" button to save the custom rule.
Once you have added a custom rule, it will be considered immediately when you use the API. If the conditions are met, the action will be executed and the custom rule will be returned in the API response.
## Sample response with custom rule
When a custom rule is applied to an API request, the custom rule ID will be returned in the API response. Here is an example of a response with a custom rule:
```json
{
"status": "success",
"data": {
"sample_property": "sample_value",
"another_property": "another_value",
"custom_rules_applied": {
"total": 1,
"rules": [
{
"id": "CR104",
"message": "Block all payments from specific email address or phone number"
}
]
}
}
}
```
## Definitions of custom rule actions
Custom rules can be defined with the following actions:
This includes both the `IP geolocation` and `IP lookup` endpoints.
* **Add to blacklist**: Marks the IP address as blacklisted. It adds a `blacklisted` property with the value of `true` under the `security` object in the API response.
* **Add to whitelist**: Marks the IP address as whitelisted. It adds a `blacklisted` property with the value of `false` under the `security` object in the API response.
* **Add to blacklist**: Marks the IP address as blacklisted. It adds a `blacklisted` property with the value of `true` under the `threats` object in the API response.
* **Add to whitelist**: Marks the IP address as whitelisted. It adds a `blacklisted` property with the value of `false` under the `threats` object in the API response.
* **Overwrite score**: Overwrites the `score` property value with the speicifed score value in the custom rule.
* **Overwrite score**: Overwrites the `score` property value with the speicifed score value in the custom rule.
* **Mark as valid**: Marks the email address as valid. It overwrites the `isValid` property value to `true`.
* **Mark as invalid**: Marks the email address as invalid. It overwrites the `isValid` property value to `false`.
* **Mark as valid**: Marks the phone number as valid. It overwrites the `isValid` property value to `true`.
* **Mark as invalid**: Marks the phone number as invalid. It overwrites the `isValid` property value to `false`.
* **Mark as valid**: Marks the BIN as valid. It overwrites the `isValid` property value to `true`.
* **Mark as invalid**: Marks the BIN as invalid. It overwrites the `isValid` property value to `false`.
* **Mark as valid**: Marks the IBAN as valid. It overwrites the `isValid` property value to `true`.
* **Mark as invalid**: Marks the IBAN as invalid. It overwrites the `isValid` property value to `false`.
# Testing Custom Rules
Source: https://docs.greip.io/knowledge-base/custom-rules/testing-custom-rules
Run a test on a custom rule to see if the conditions are met.
You can test a custom rule by using the `Test` button on right side of each custom rule. This will allow you to test the custom rule with a sample request and see if the conditions are met.
To test a custom rule, follow these steps:
Go to the [Custom Rules page](https://dashboard.greip.io/custom-rules) from
the account dashboard.
From the dropdown menu on the right side of the custom rule you want to
test, click on the `Test` button.
In the modal that appears on the screen, update the pre-filled sample
response with the data you want to test. Then, click the `Apply the rule`
button.
The custom rule will be tested with the sample response you provided. If the
conditions are met, the met actions will be displayed with details.
# Exporting Data
Source: https://docs.greip.io/knowledge-base/events-and-alerts/exporting-events
Export the events and alerts in CSV format
In the Events and Alerts section, you can export the events and alerts in CSV format. This way, you can analyze the events and alerts in your favorite spreadsheet software.
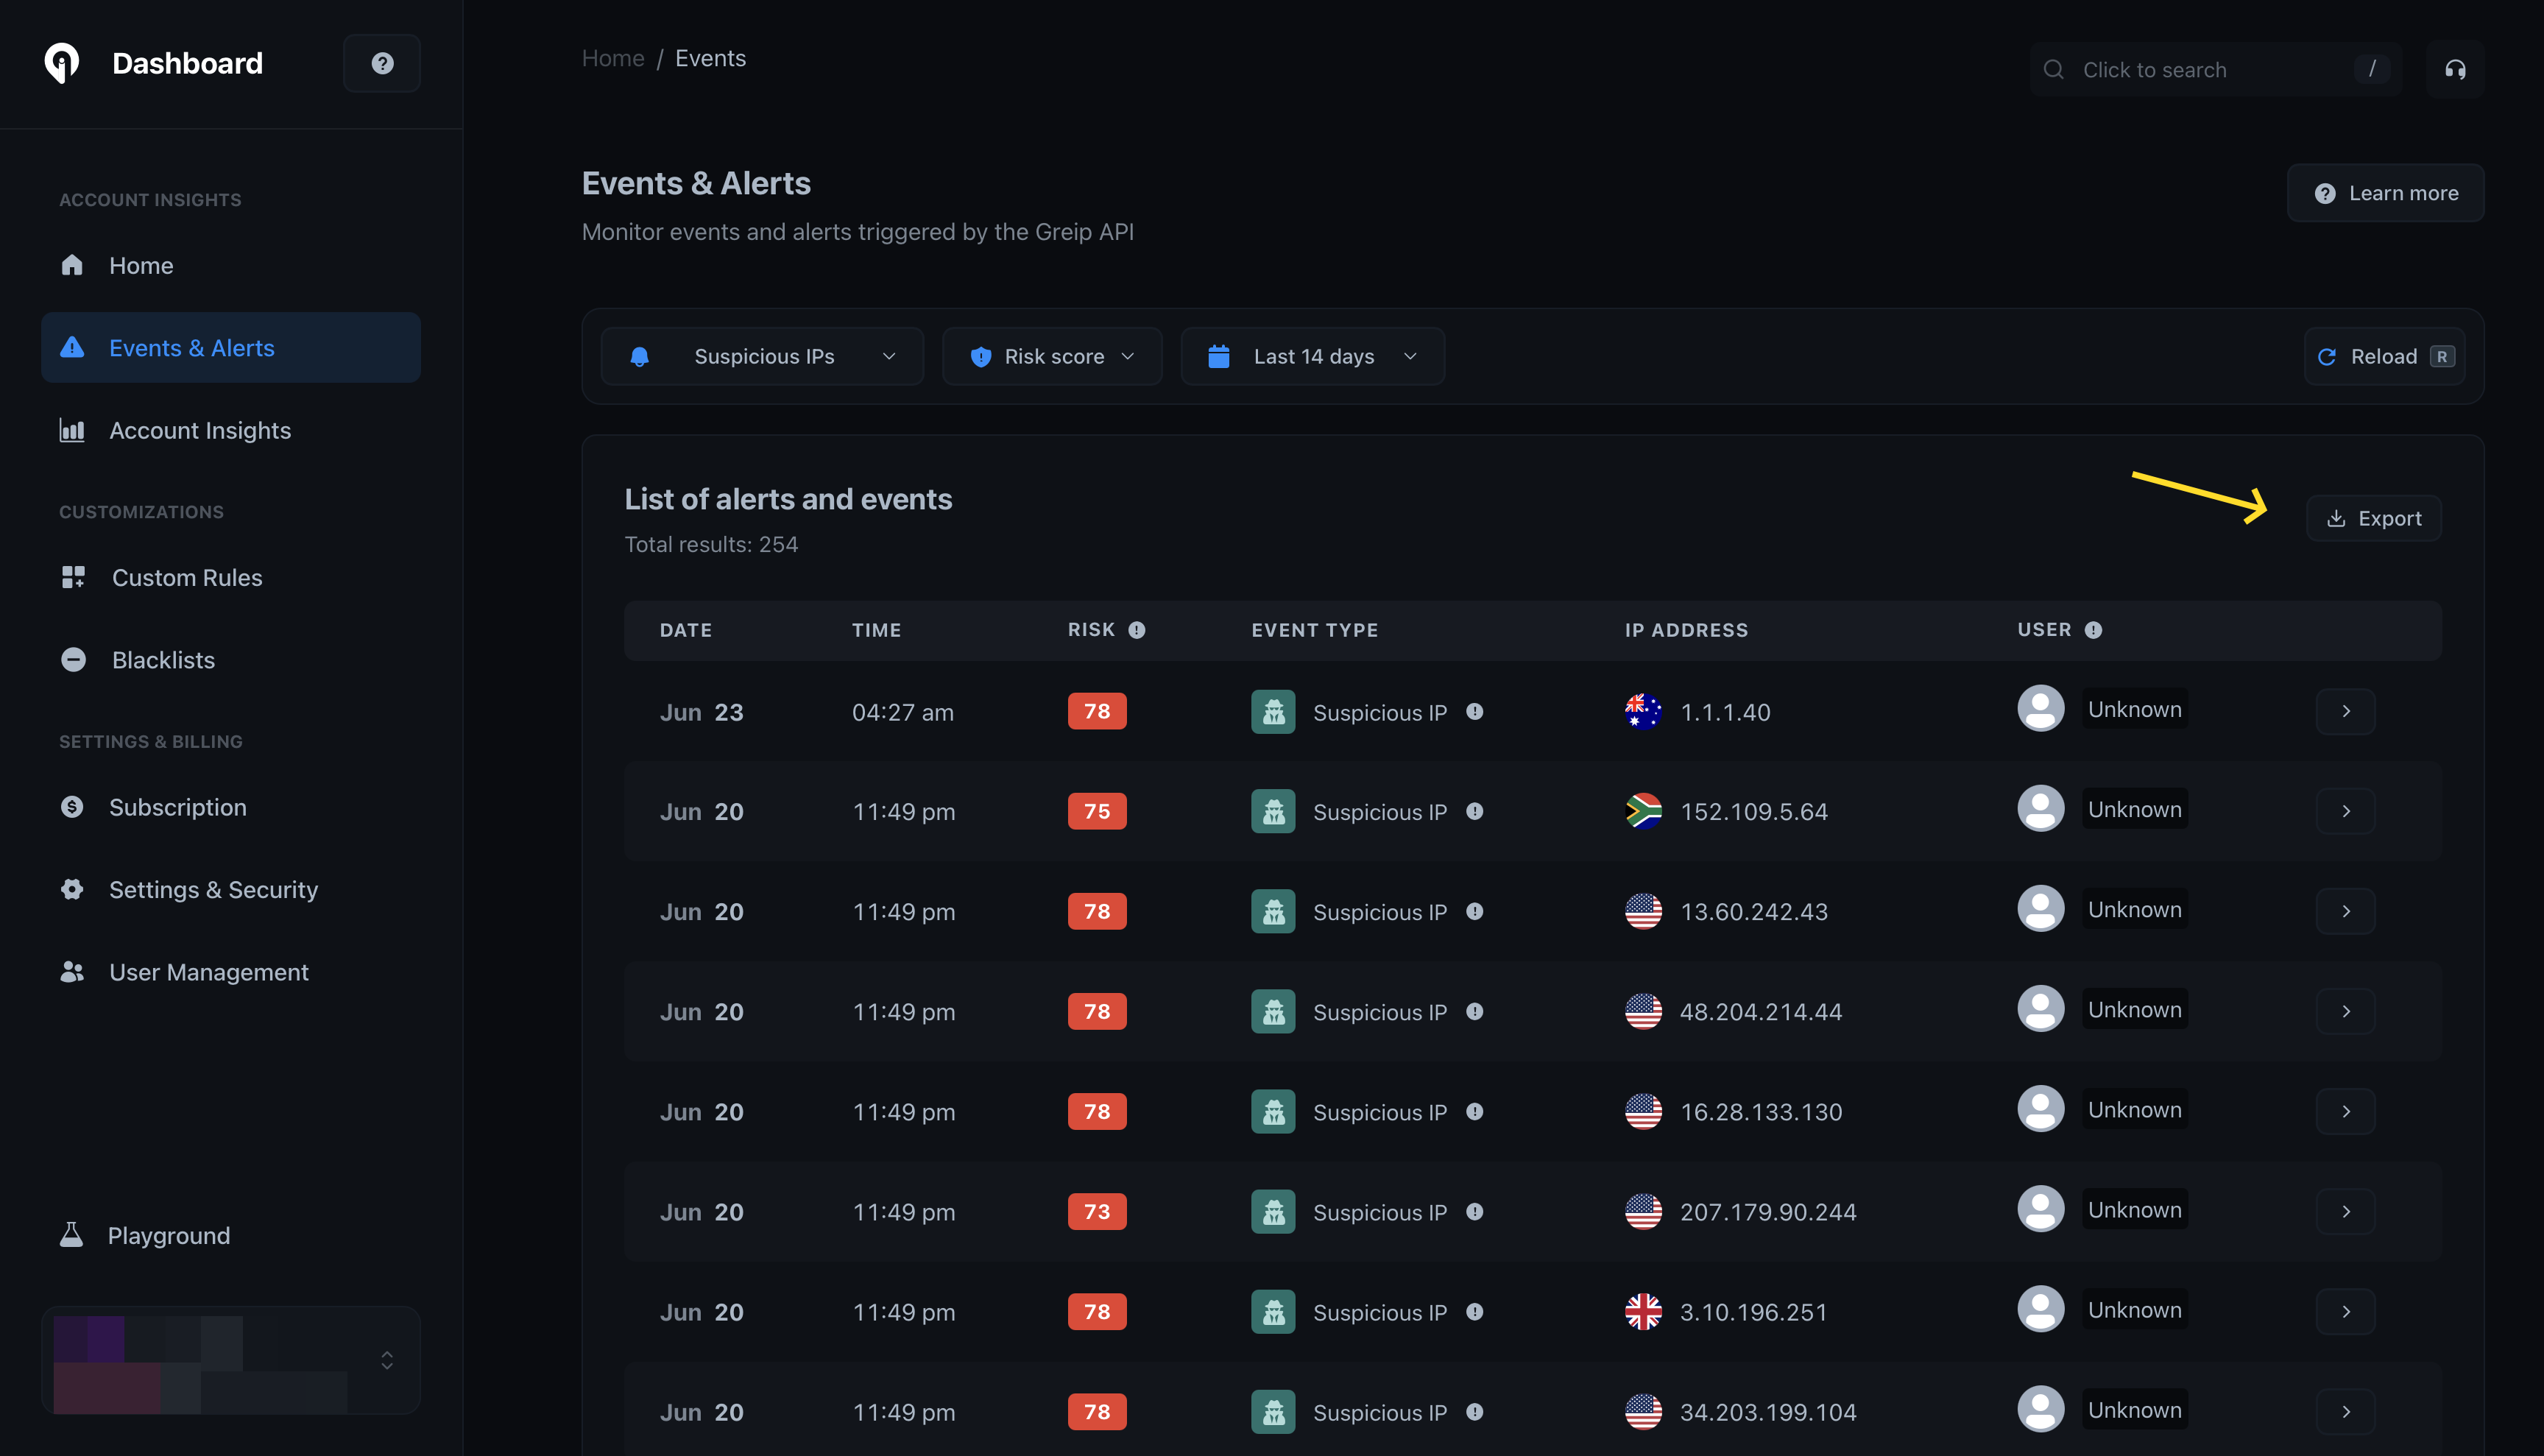
## Notes
* You can export as much data as you want, there's no limit applied to this feature.
* Wherever you lose the CSV file, you can always download it again from the events and alerts section, and this time it will be way faster because the data is already prepared.
* Make sure you set the correct filters before exporting the data, so you can get the most accurate results.
# Filtering Results
Source: https://docs.greip.io/knowledge-base/events-and-alerts/filtering
Filter the events and alerts based on the event type, risk score, and time period
In the Events and Alerts section, you can filter the events and alerts based on the event type, risk score, and time period. This way, you can focus on the events and alerts that you are interested in.
## Filtering options
You can filter the events and alerts based on the following options:
* **Event type**: You can filter the events and alerts based on the event type. For example, you can filter the events and alerts that triggered when a suspicious IP address tried to access your system.
* **Risk score**: You can filter the events and alerts based on the risk score. For example, you can filter the events and alerts that have a risk score higher than 80.
* **Time period**: You can filter the events and alerts based on the time period. For example, you can filter the events and alerts that triggered in the last 7 days.
# Overview
Source: https://docs.greip.io/knowledge-base/events-and-alerts/overview
Keep track of your system events and alerts
In the Events and Alerts section, you can keep track of all the events and alerts that triggered in your system. From suspecious IP addresses to fake registration attempts, you can monitor all the activities in your system.

## Capabilities
* **Listing events and alerts**: You can list all the events and alerts that triggered in your system.
* **Filtering events and alerts**: You can filter the events and alerts based on the event type, risk score, and time period.
* **Viewing event details**: You can view the details of an event.
* **Exporting events and alerts**: You can export the events and alerts in CSV format.
## Event types
* **Suspicious IP**: An event that triggered when a suspicious IP address tried to access your system.
* **Profane content**: An event that triggered when a user tried to post a profane content.
* **Fraudulent payment attempt**: An event that triggered when a user tried to make a fraudulent payment.
* **Fake registration attempt**: An event that triggered when a user tried to register with fake information.
* **Invalid IBAN**: An event that triggered when a user tried to use an invalid IBAN.
You can click on the [User Identifier](/options/user-identifier) from the
events page to copy it to your clipboard.
# Viewing Event Details
Source: https://docs.greip.io/knowledge-base/events-and-alerts/view-event-details
View the details of an event to get more information about it
In the Events and Alerts section, you can view the details of an event. This way, you can get more information about the event and take the necessary actions.
To view the details of an event, you can simply click on the button on the right side of the event. This will open a modal that contains detailed information about the event.
# Introduction
Source: https://docs.greip.io/knowledge-base/getting-started/introduction
Welcome to the Greip Knowledge Base
Your go-to hub for all things related to Greip. Whether you’re just starting out or need detailed information on our advanced fraud prevention tools, you’ll find helpful resources here. Below are sections designed to guide you through integrating and optimizing Greip in your workflow.
Everything you need to know about managing your account
Keep track of your system events and alerts
Learn how to earn money by referring customers to Greip
Discover Greip's advanced monitoring capabilities
# Integrate Greip with IFTTT
Source: https://docs.greip.io/knowledge-base/integrations/ifttt
Integrate Greip with over 6500 apps and services using IFTTT
IFTTT is a free web-based service that allows you to create chains of simple conditional statements, called app connections, which are triggered based on changes that occur within other web services such as Gmail, Facebook, Instagram, and more. Greip's IFTTT integration allows you to create automated workflows that connect Greip with other apps and services.
## Prerequisites
Before you can integrate Greip with IFTTT, you need to have the following:
* A Greip account with an active subscription
* An IFTTT account with the necessary permissions to create applets
## Installation
To install the Greip IFTTT app, follow these steps:
Go to the [Account Settings page](https://dashboard.greip.io/settings) from
the account dashboard.
Under the 'Integrations' section, click on the configuration button on the
right side of the "IFTTT" app as shown below:
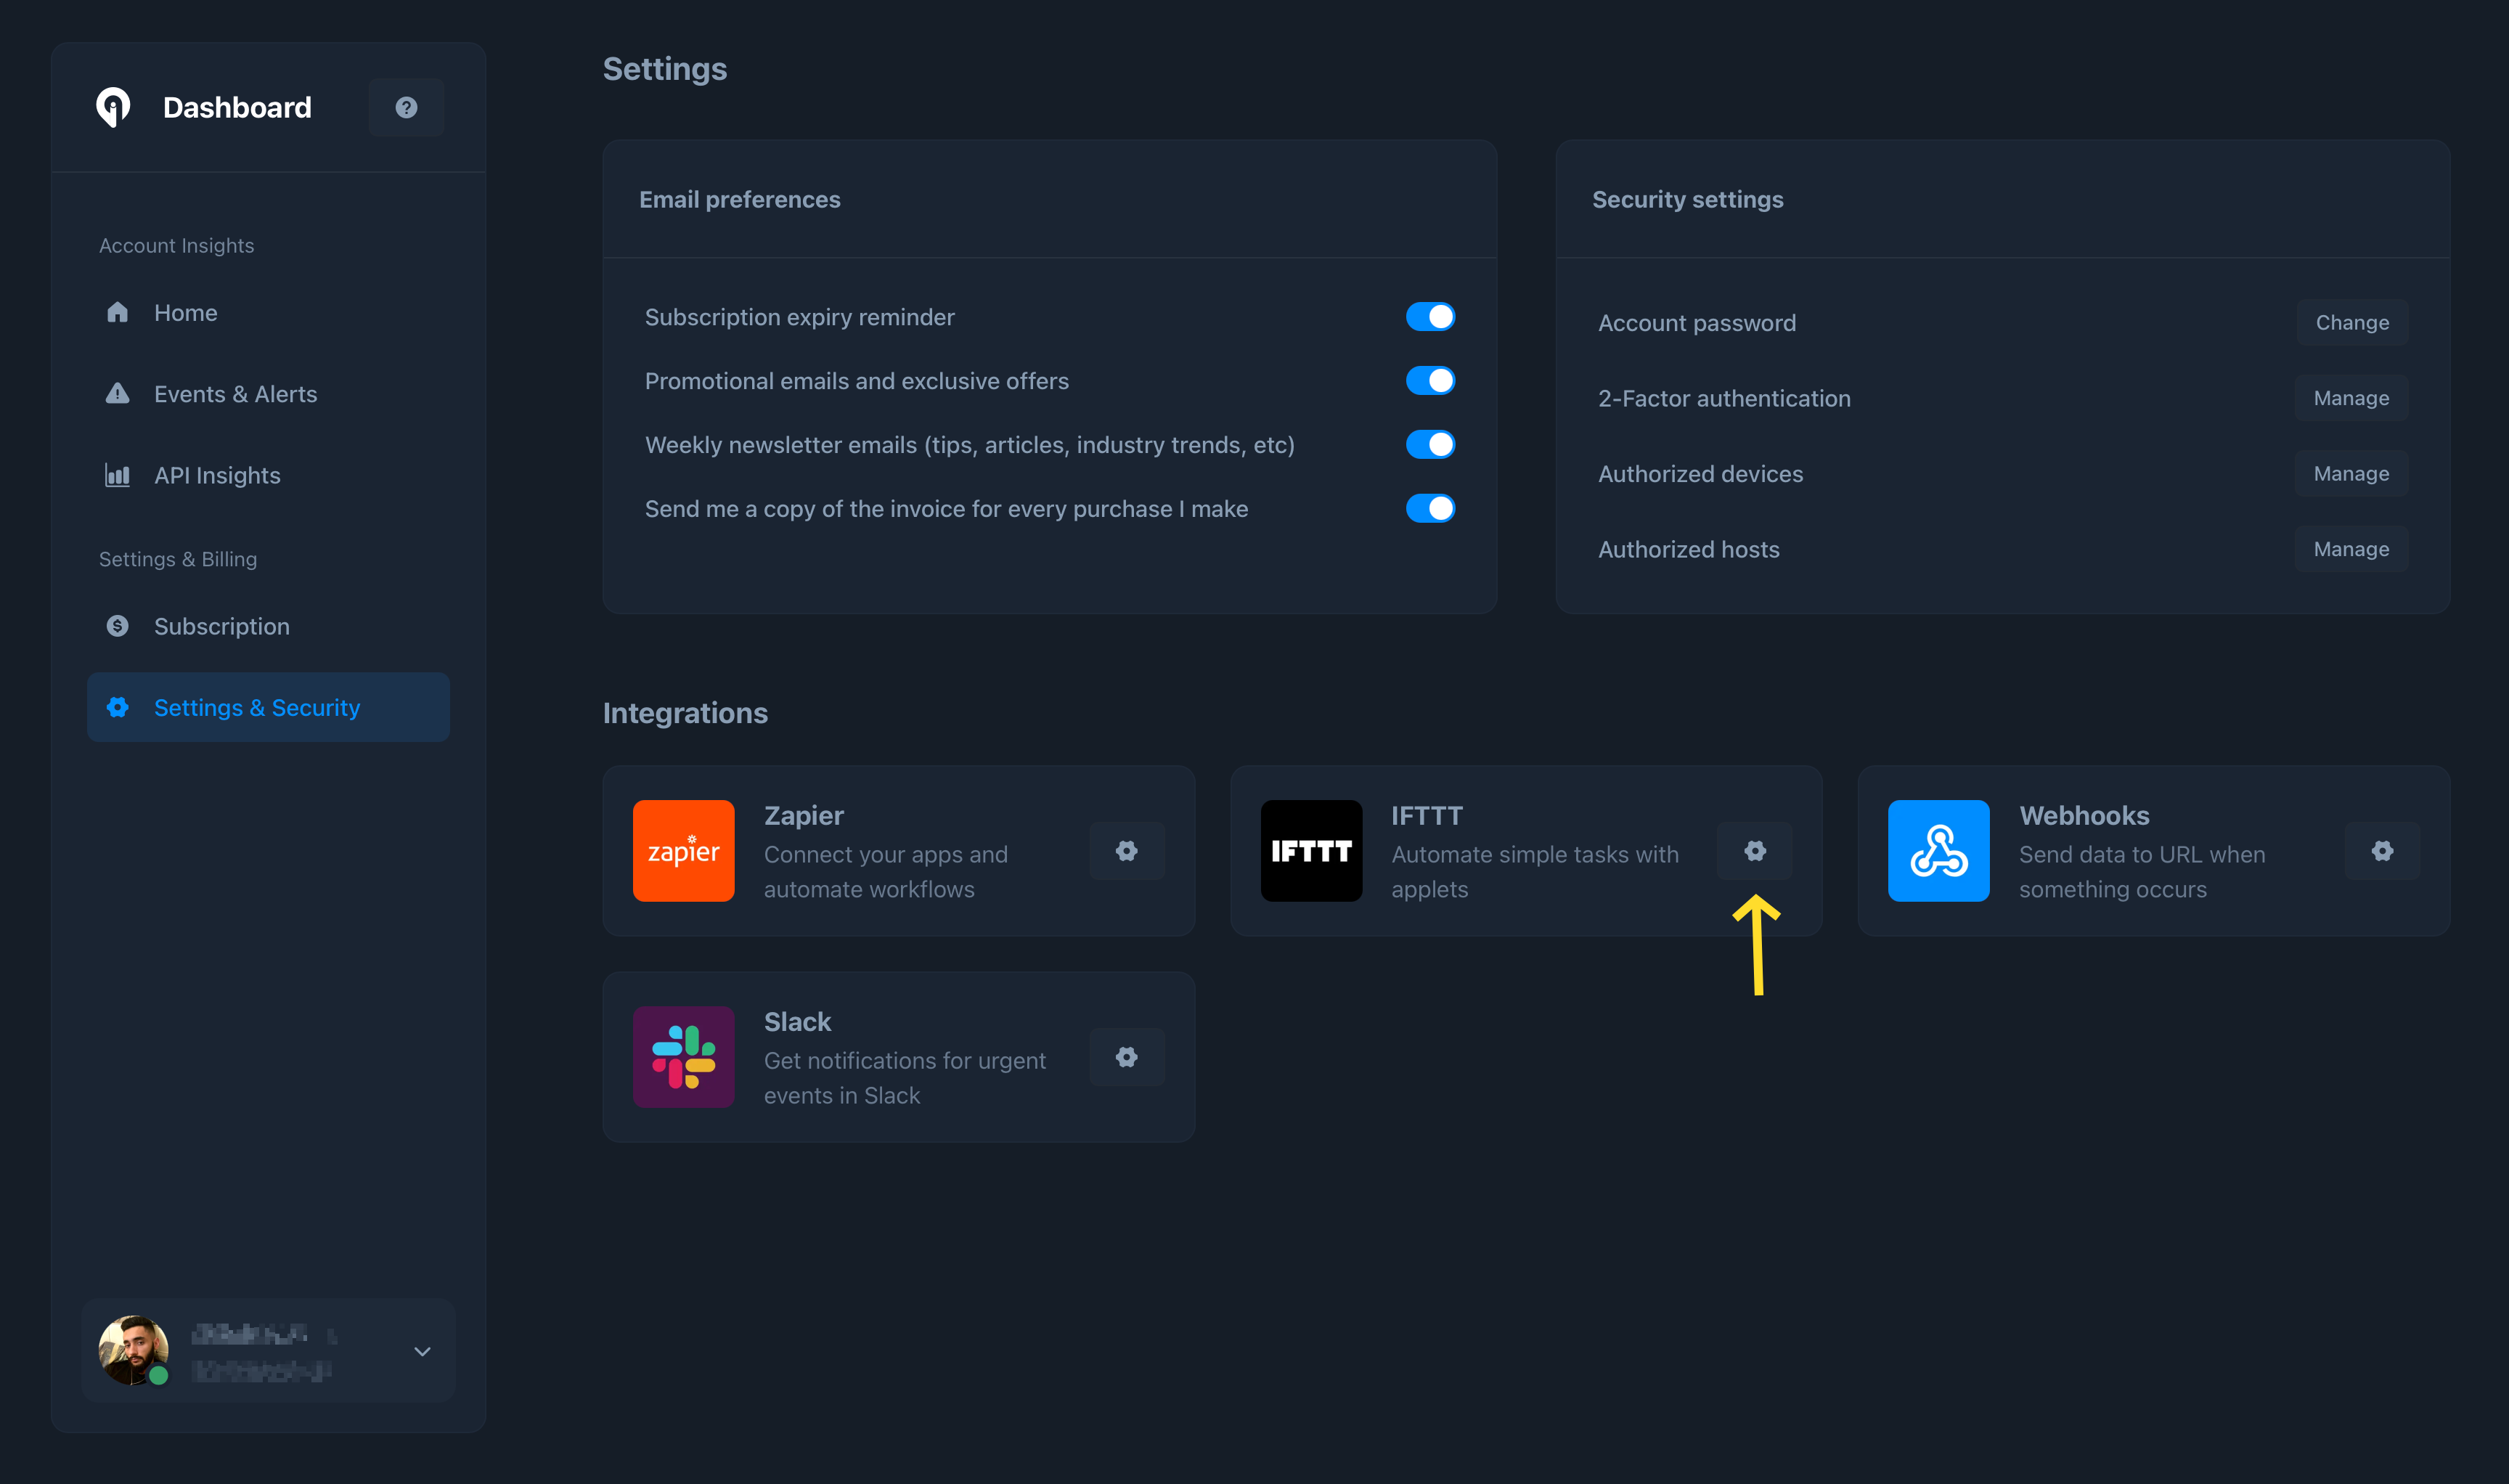
Click on the 'Greip page on IFTTT' button to start the installation process
as shown below:
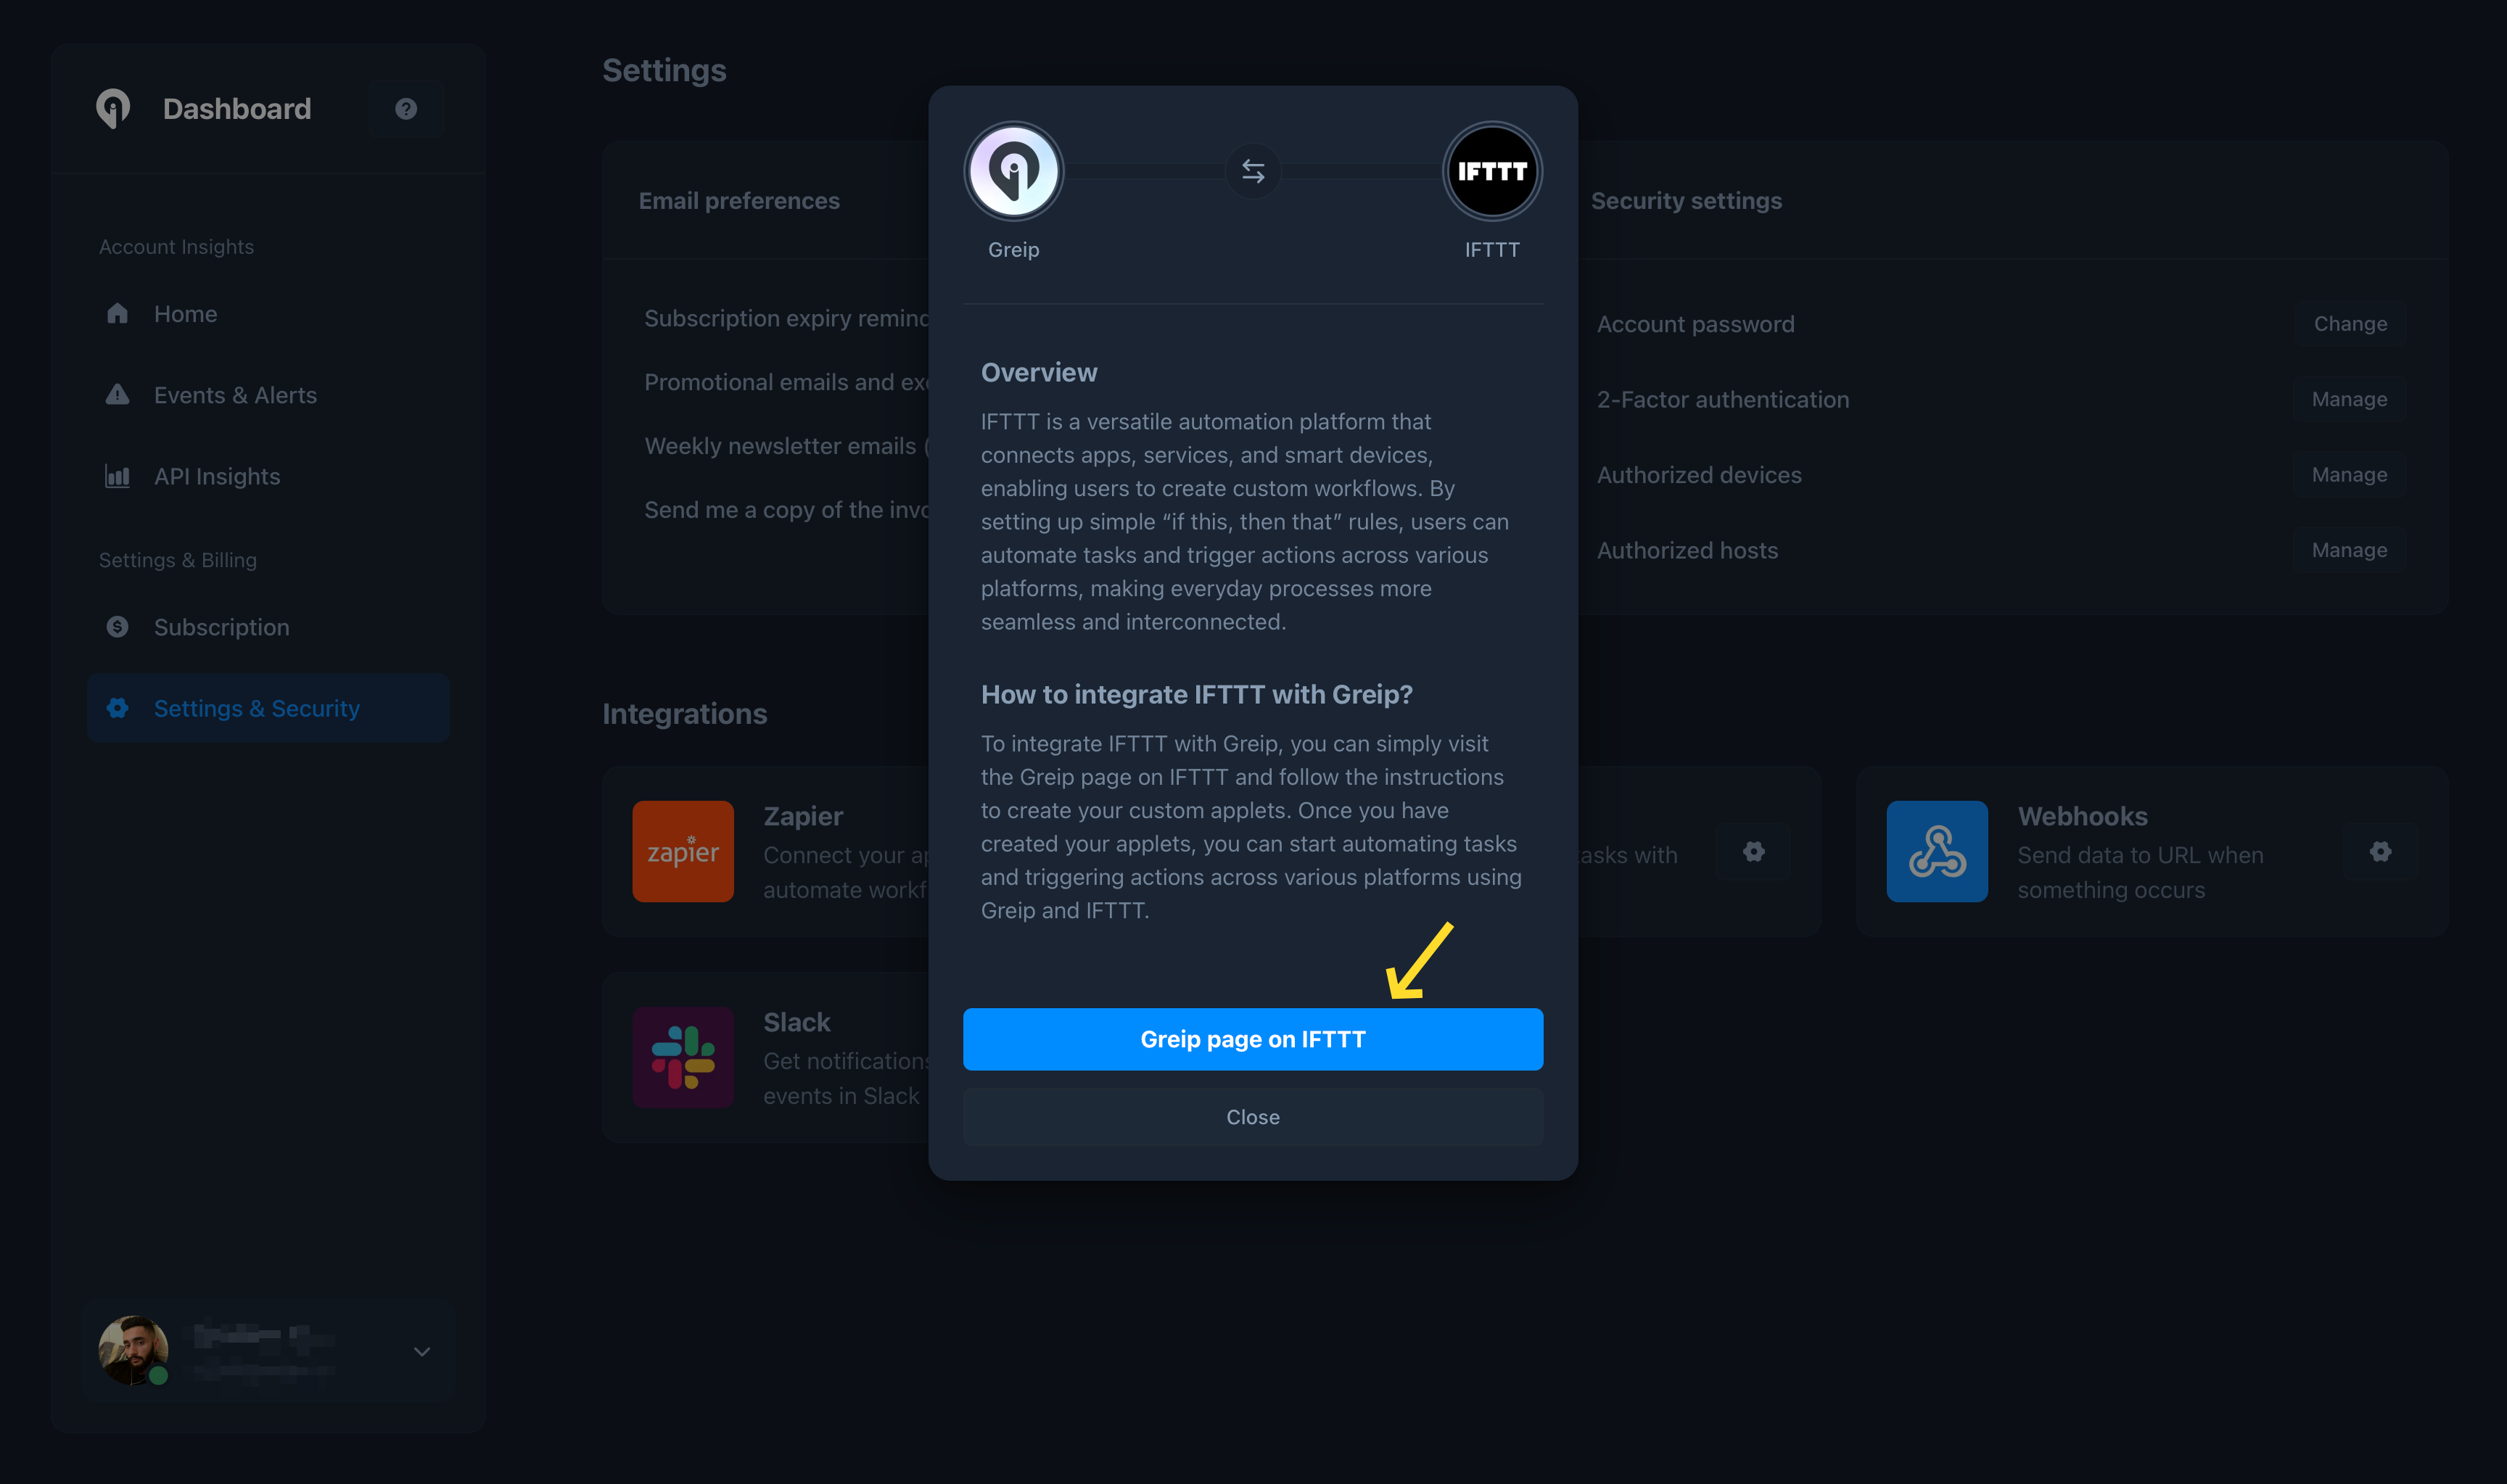
You will be redirected to the IFTTT authorization page. Click on the
'Connect' button to grant the necessary permissions to the Greip app.
## App Triggers
Greip's IFTTT app supports the following triggers:
* New suspicious IP address is detected
* New profane content is detected
* New high-risk email address is detected
* New high-risk phone number is detected
* New fraudulent payment is detected
* New host is authorised
* Subscription is about to expire
* Your account password is changed
* New coupon is created (Affiliate Program)
## App Queries
Greip's IFTTT app supports the following queries:
* IP lookup
* ASN lookup
* Profanity detection
* Email validation
* Phone number validation
* BIN/IIN validation
## App Actions
Greip's IFTTT app supports the following actions:
* Add new coupon (Affiliate Program)
## Uninstallation
To uninstall the Greip IFTTT app, follow these steps:
Go to the [Account Settings page](https://dashboard.greip.io/settings) from
the account dashboard.
Under the 'Integrations' section, click on the configuration button on the
right side of the "IFTTT" app.
Click on the 'Greip page on IFTTT' button.
Click on the 'Settings' button and then click on the 'Remove' button to
revoke the necessary permissions.
Note that this will remove all Applets and connections for Greip service from your IFTTT account. If you choose to reconnect the service, you'll be able to restore any removed Applets from your IFTTT archive.
# Integrate Greip with Slack
Source: https://docs.greip.io/knowledge-base/integrations/slack
Integrate Greip with Slack to receive real-time alerts and notifications
Slack is a collaboration hub that connects your work with the people you work with. Greip's Slack integration allows you to receive real-time alerts and notifications directly in your Slack workspace.
## Prerequisites
Before you can integrate Greip with Slack, you need to have the following:
* A Greip account with an active subscription
* A Slack account with the necessary permissions to install apps
## Installation
To install the Greip Slack app, follow these steps:
Go to the [Account Settings page](https://dashboard.greip.io/settings) from
the account dashboard.
Under the 'Integrations' section, click on the configuration button on the
right side of the "Slack" app as shown below:
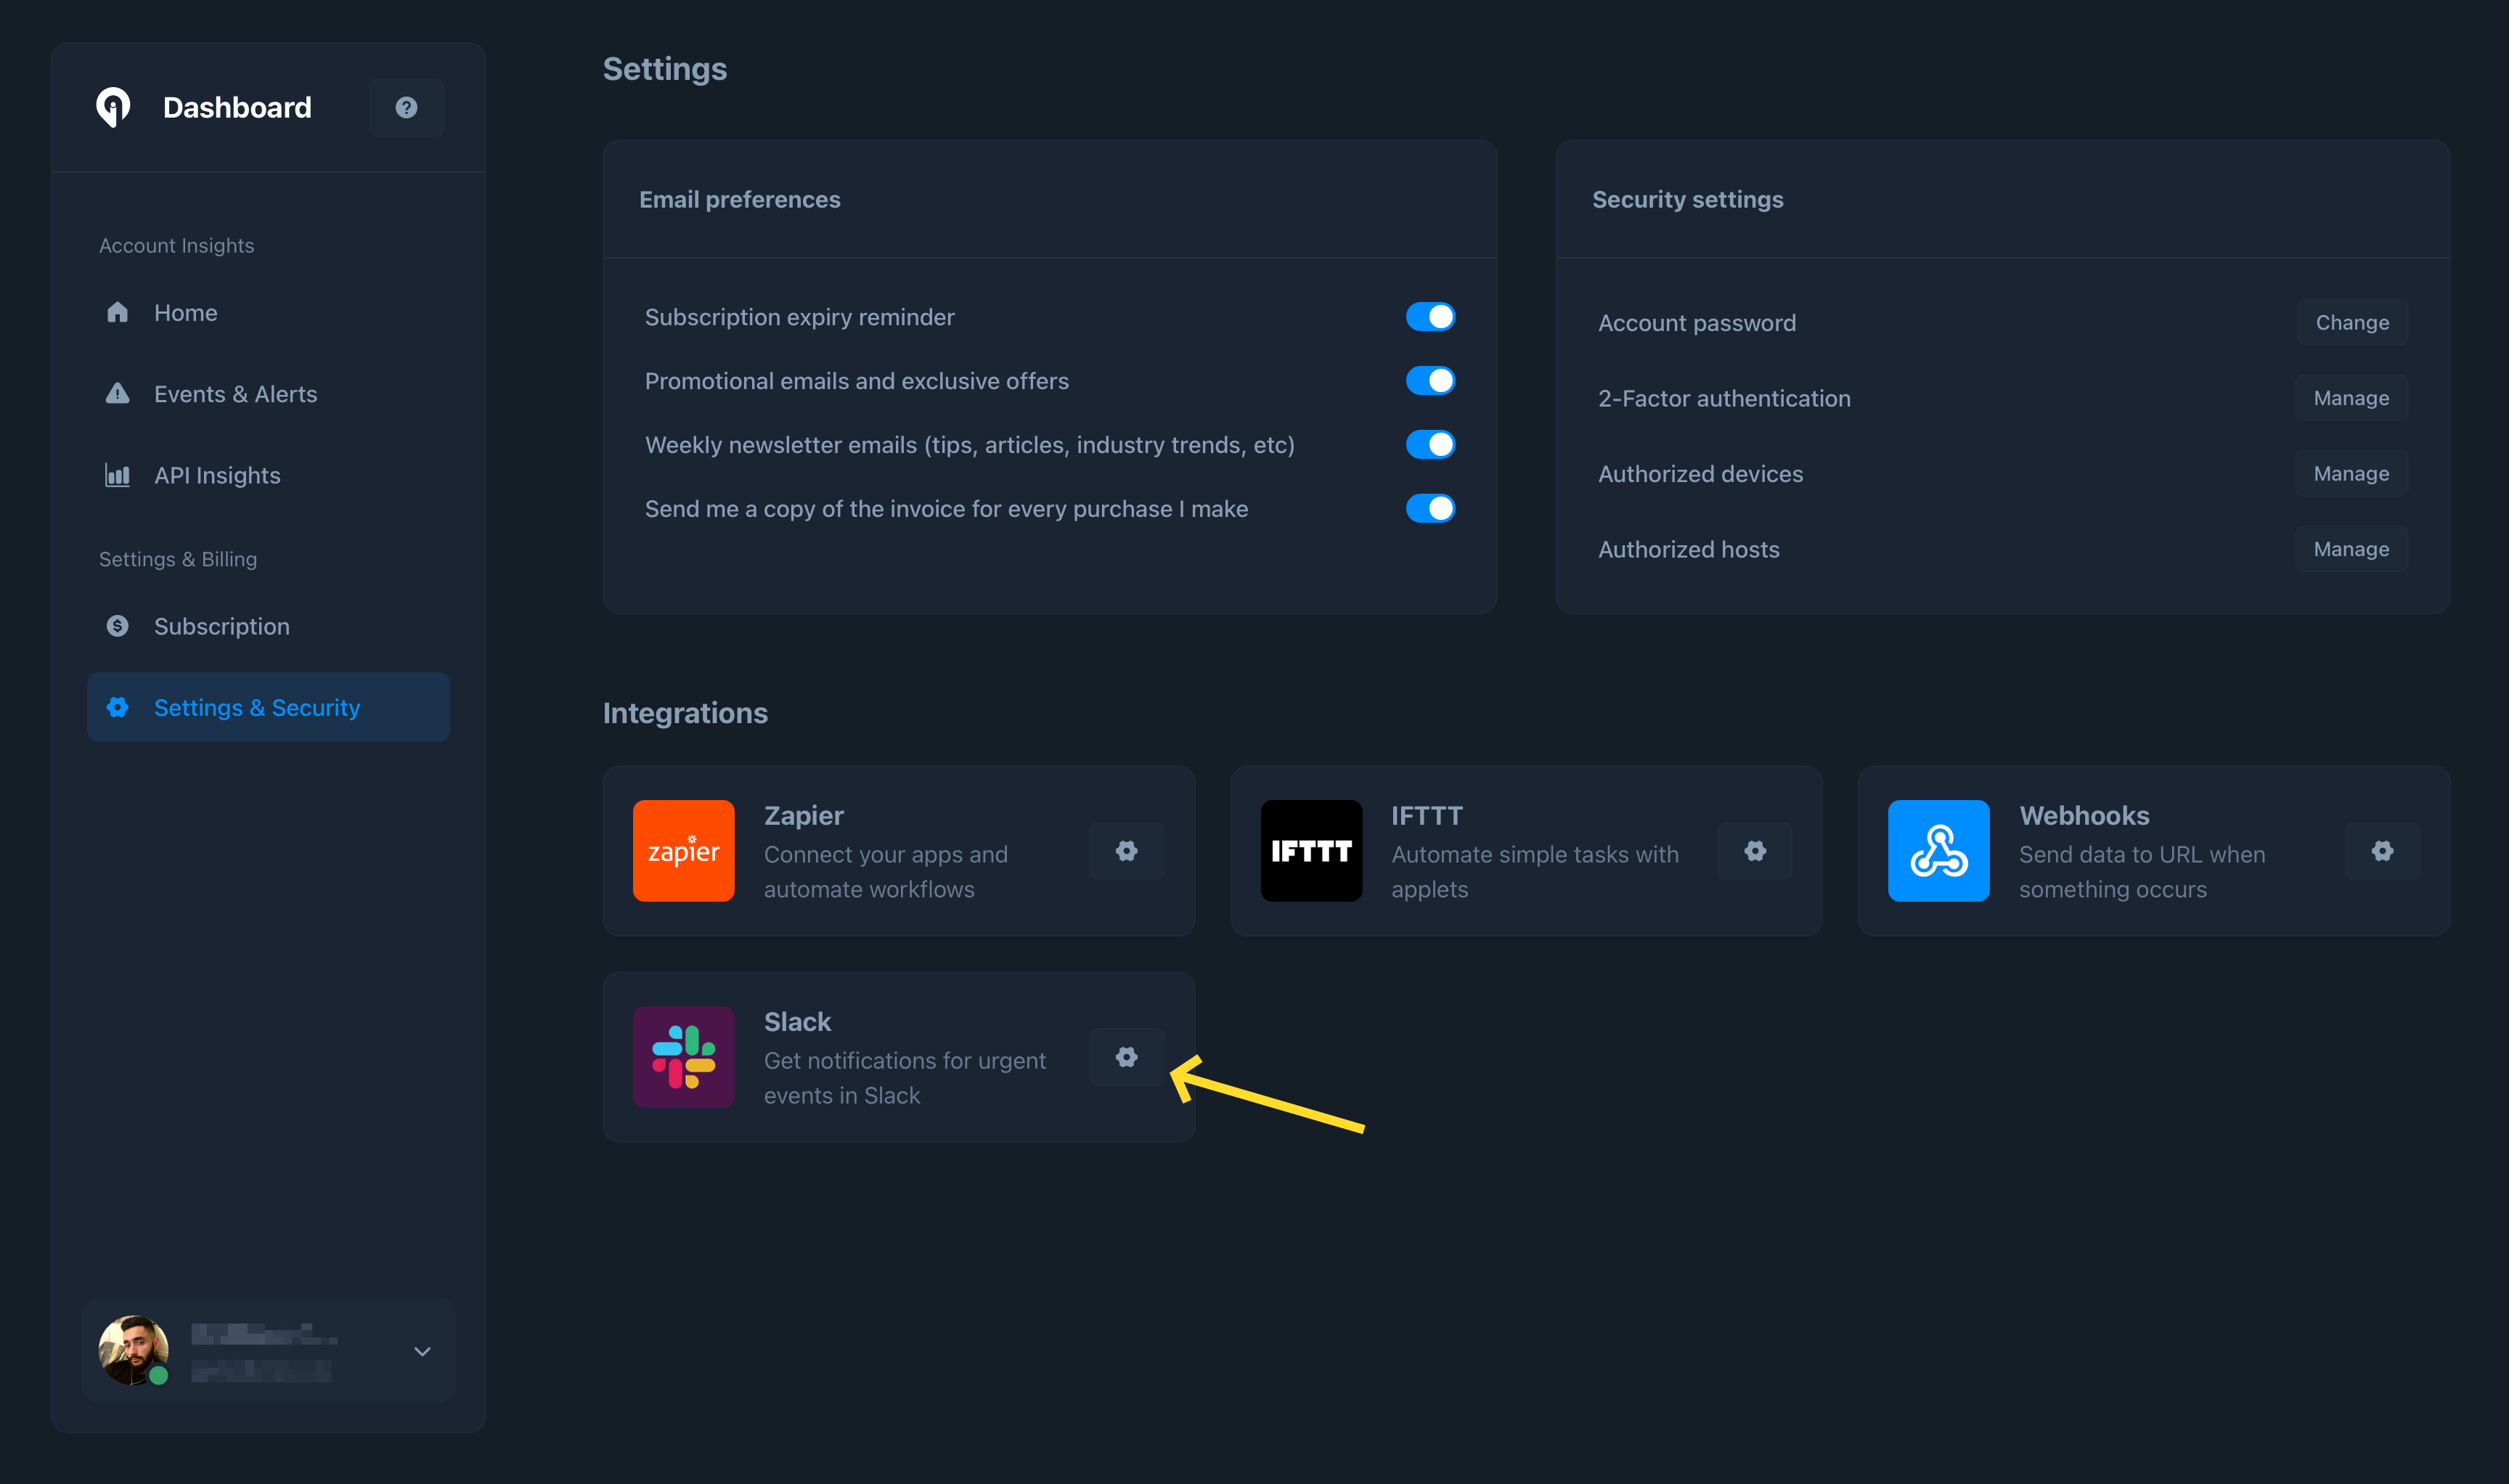
Click on the 'Connect Slack' button to start the installation process as shown below:
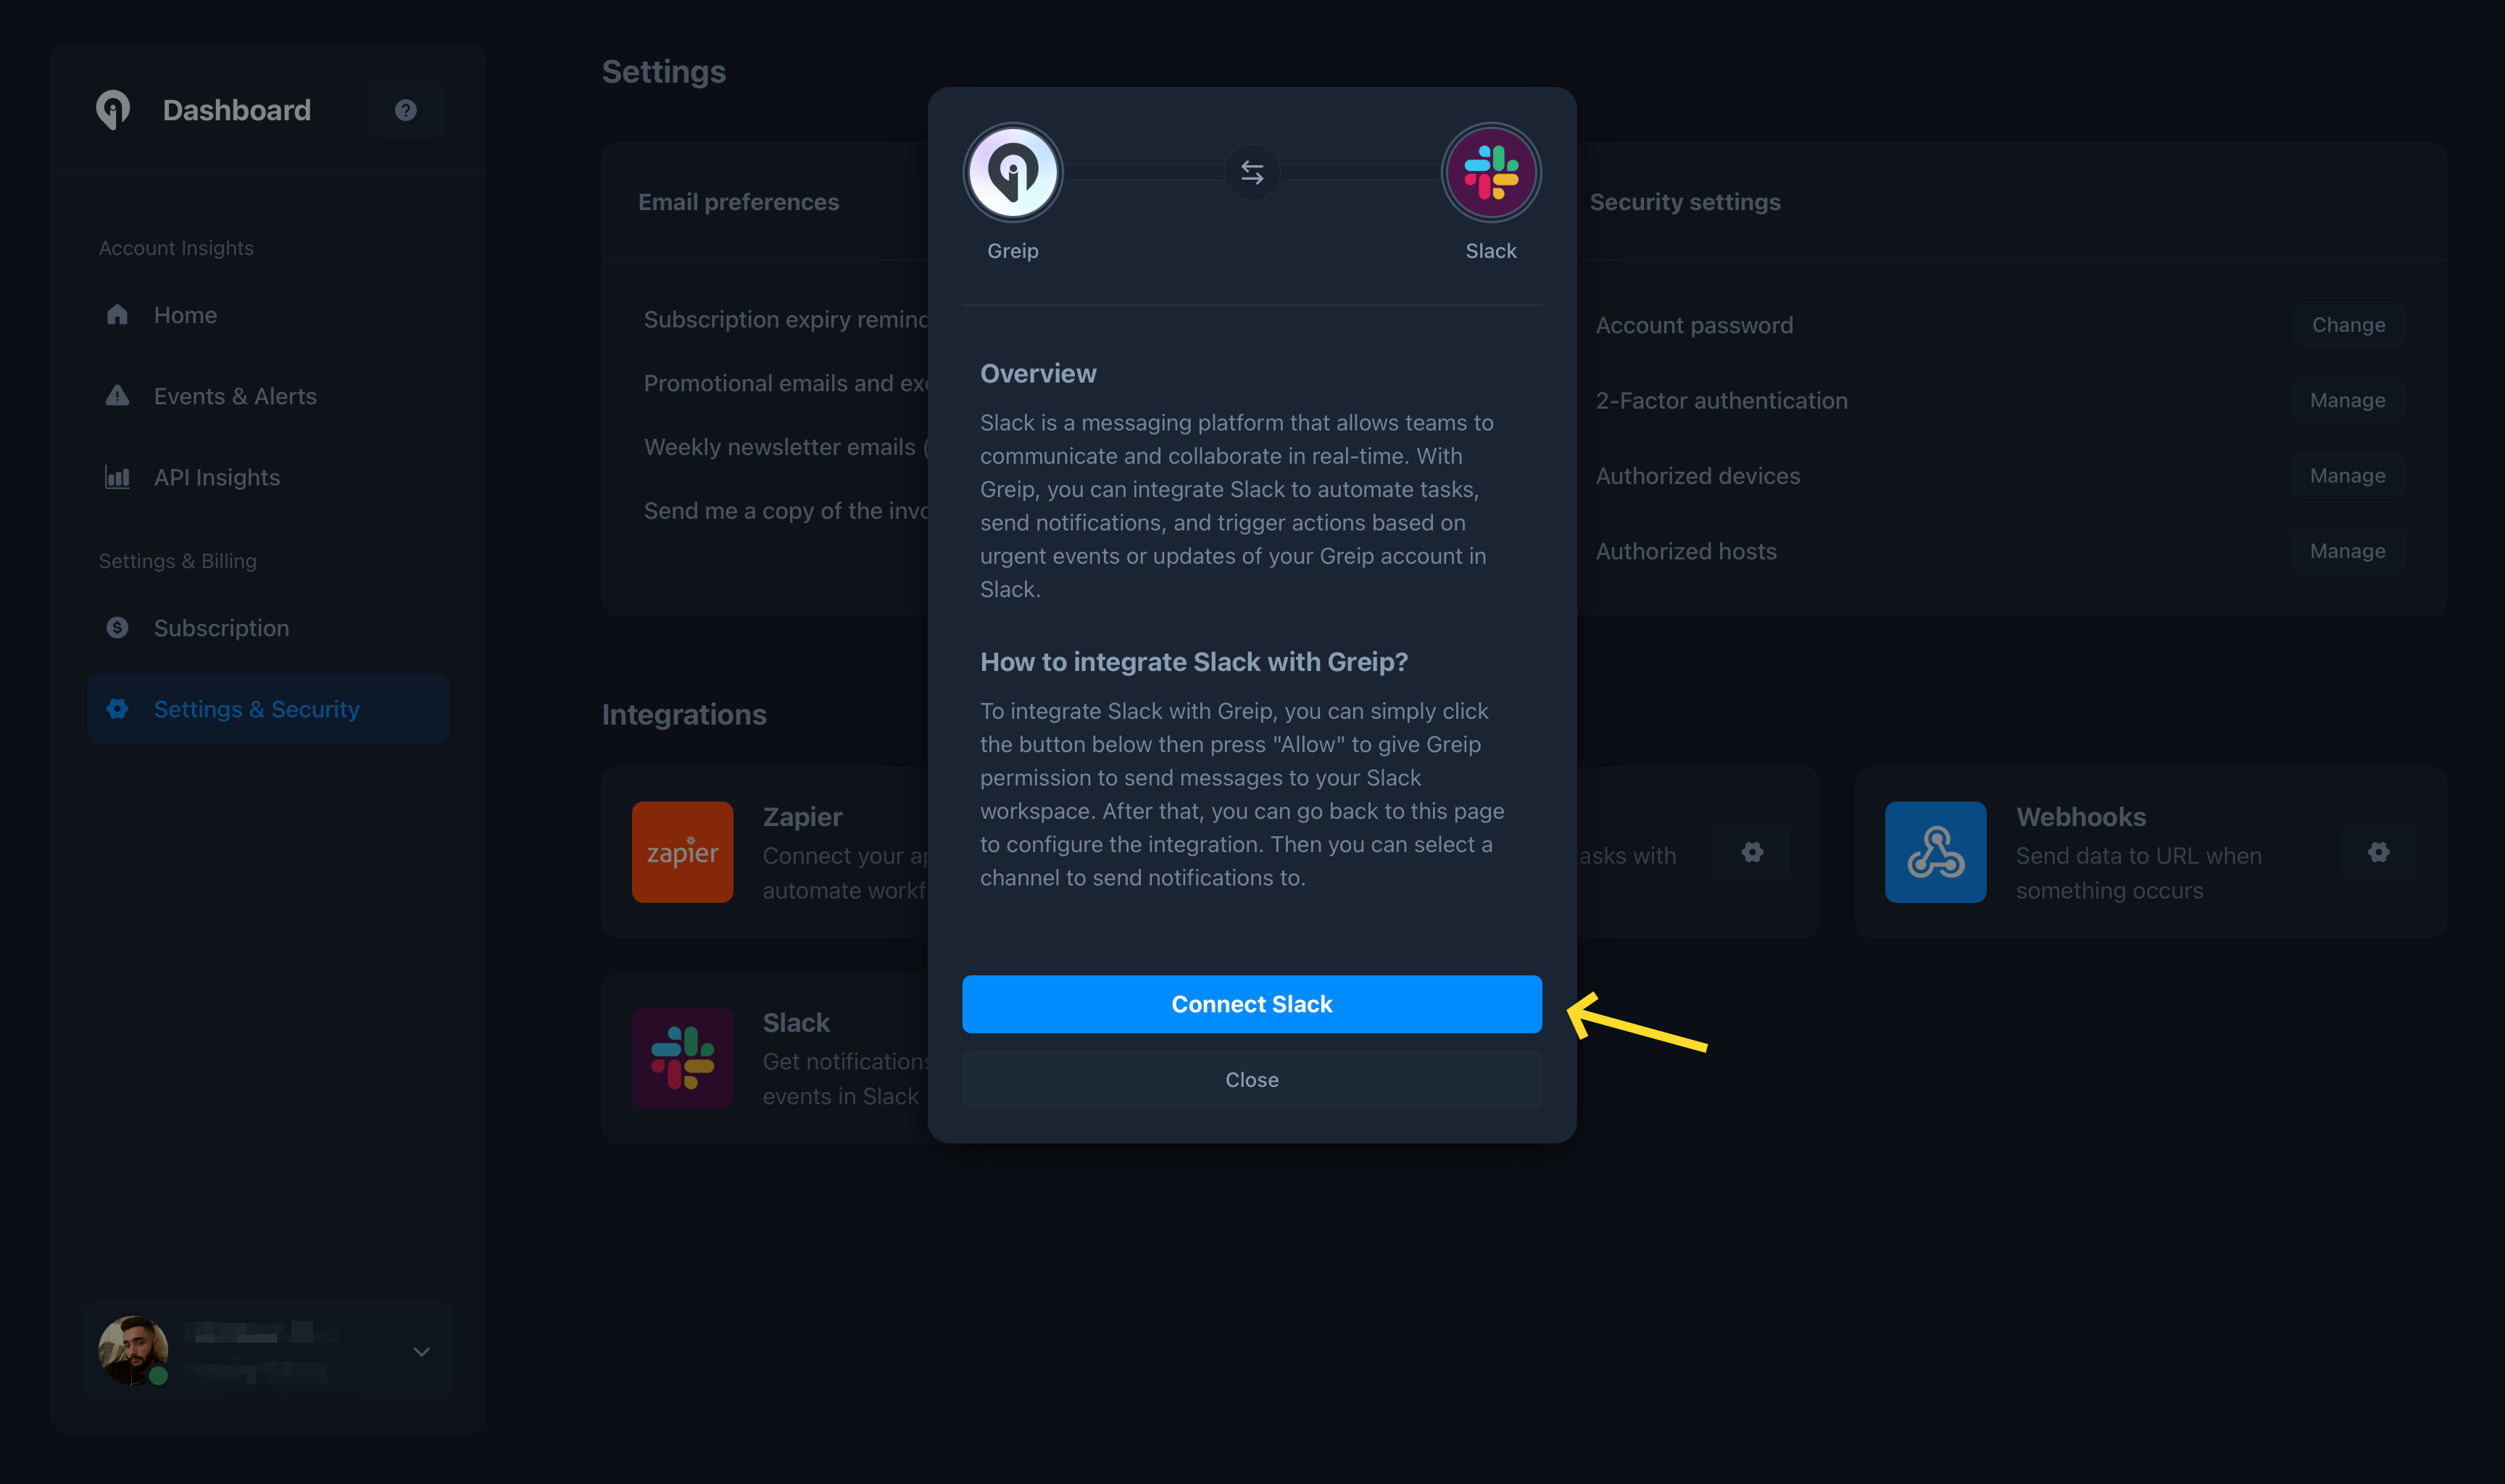
You will be redirected to the Slack authorization page. Click on the 'Allow' button to grant the necessary permissions to the Greip app.
Once the installation is complete, you will be redirected back to the Greip dashboard. All you need to do is to choose a Slack channel from the dropdown menu and hit the 'Save' button as shown below:
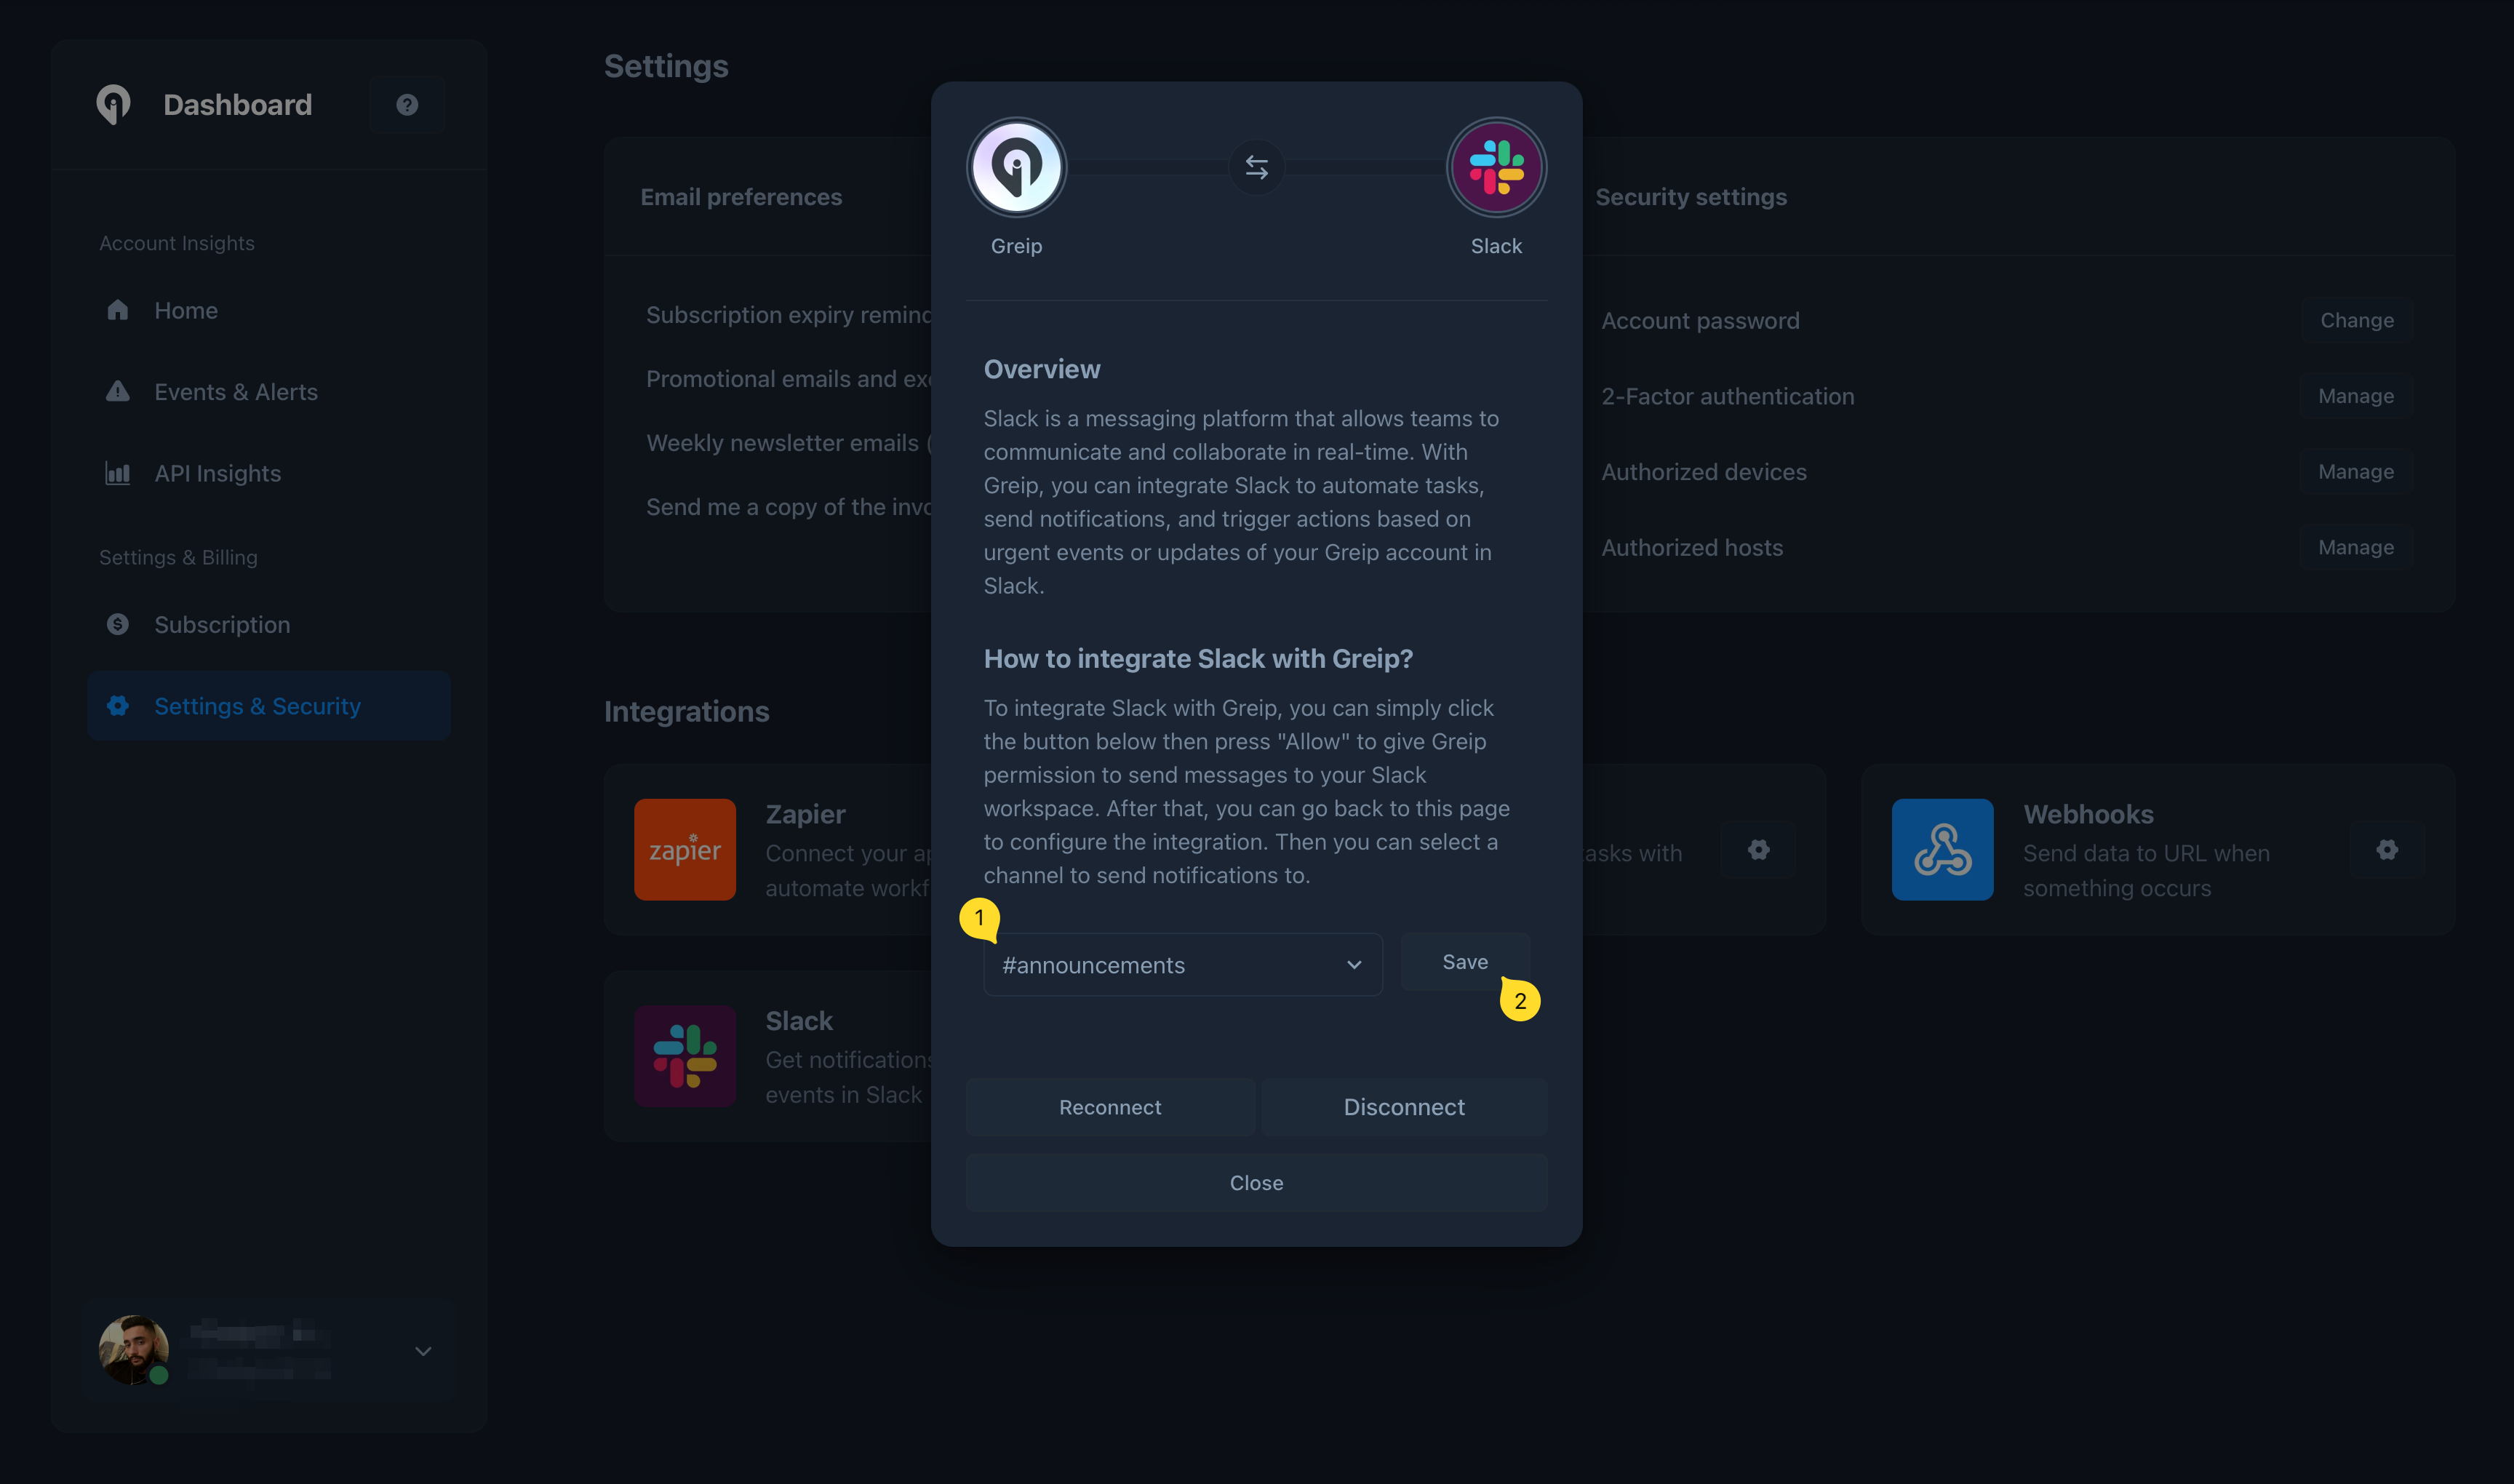
## Notifications and Alerts
Once the installation is complete, you will start receiving real-time alerts and notifications in your Slack workspace. Notifications are sent for the following events:
* New suspicious IP address is detected
* New profane content is detected
* New invalid BIN/IIN is detected
* New high-risk email address is detected
* New high-risk phone number is detected
* New high-risk/invalid IBAN is detected
* New fraudulent payment is detected
* When your account 2FA is enabled/disabled
* When your account password is changed
* New authorised host is added
* When an unauthorised login attempt is detected
## Uninstallation
To uninstall the Greip Slack app, follow these steps:
Go to the [Account Settings page](https://dashboard.greip.io/settings) from
the account dashboard.
Under the 'Integrations' section, click on the configuration button on the
right side of the "Slack" app.
Click on the 'Disconnect Slack' button to remove the integration. This will
stop all notifications and alerts from being sent to your Slack workspace.
Delete the Greip app from your Slack workspace.
# Integrate Greip with Zapier
Source: https://docs.greip.io/knowledge-base/integrations/zapier
Integrate Greip with over 2,000 apps and services using Zapier
Zapier is an online automation tool that connects your favorite apps, such as Gmail, Slack, Mailchimp, and over 2,000 more. Greip's Zapier integration allows you to create automated workflows that connect Greip with other apps and services.
## Prerequisites
Before you can integrate Greip with Zapier, you need to have the following:
* A Greip account with an active subscription
* A Zapier account with the necessary permissions to create Zaps
## Installation
To install the Greip Zapier app, follow these steps:
Go to the [Account Settings page](https://dashboard.greip.io/settings) from
the account dashboard.
Under the 'Integrations' section, click on the configuration button on the
right side of the "Zapier" app as shown below:
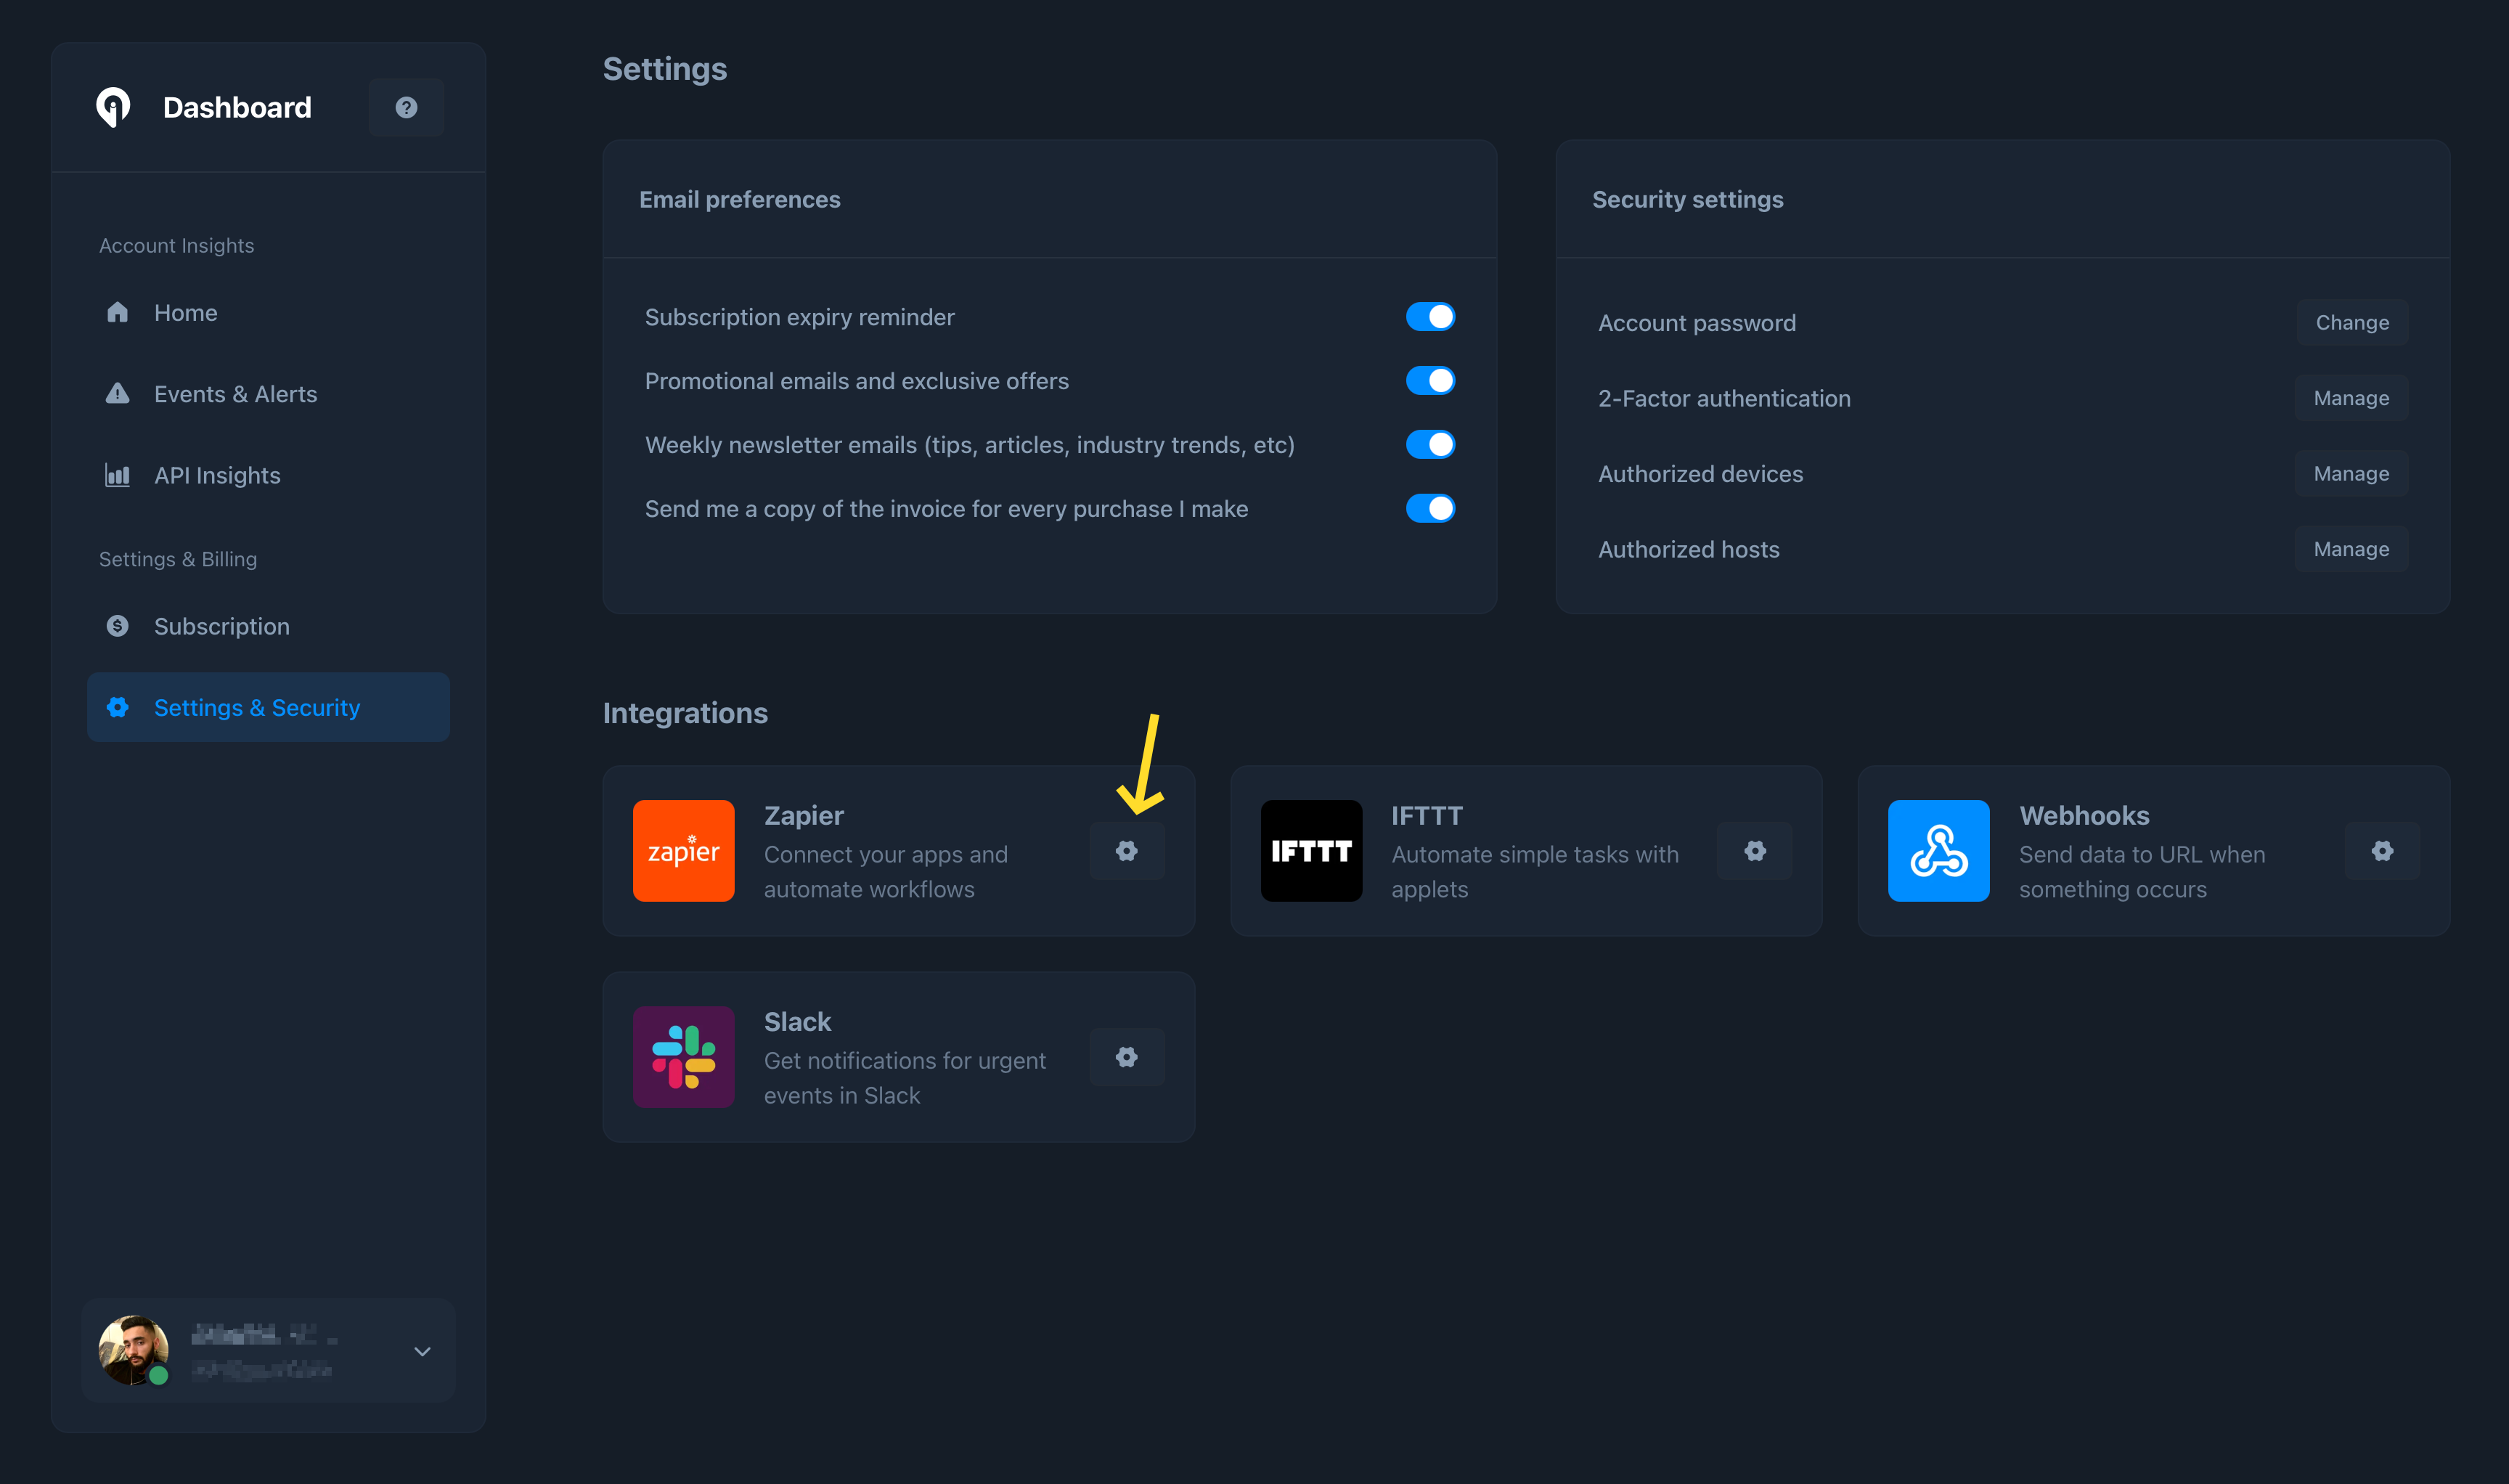
Click on the 'Copy' button to copy your Zapier integration API Key, enable
the integration, and finally click on the 'Greip page on Zapier' as shown
below:
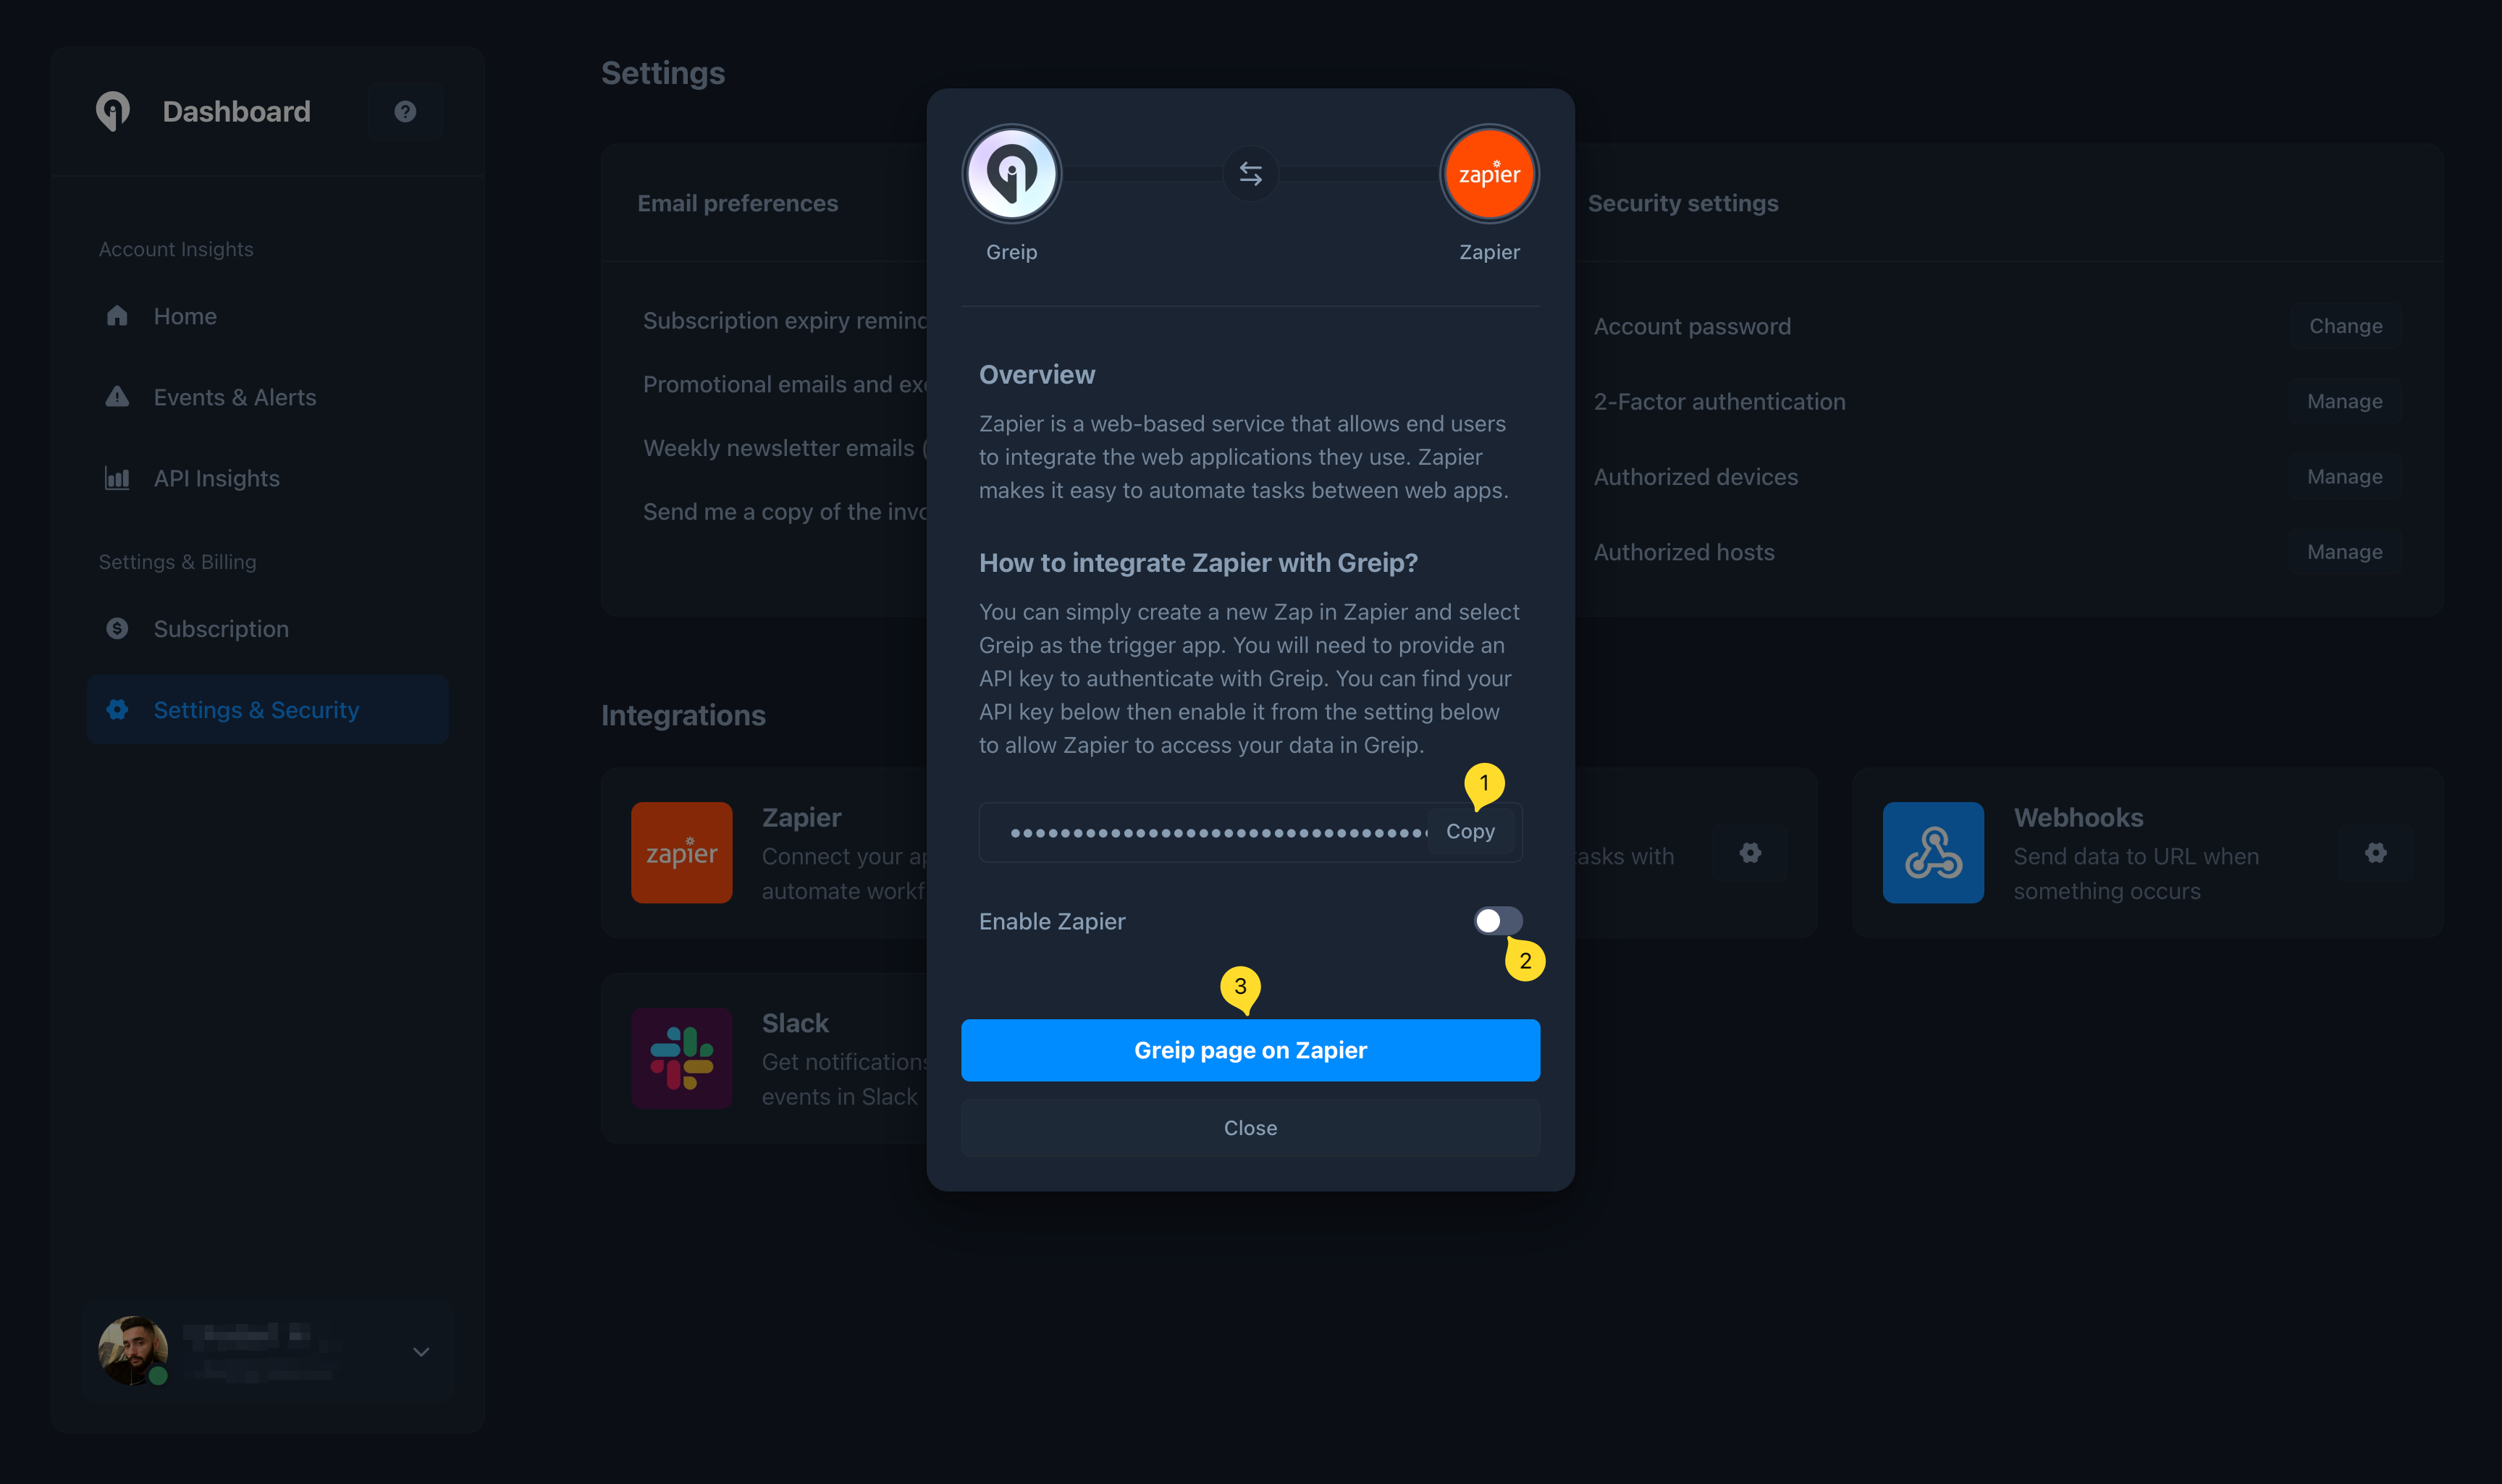
You will be redirected to the Zapier authorization page. Click on the
'Connect' button and start creating Zaps to automate workflows between Greip
and other apps and services. And whenever you are asked to enter an API Key,
paste the one you copied in the previous step.
## App Triggers
Greip's Zapier app supports the following triggers:
* New suspicious IP address is detected
* New profane content is detected
* New high-risk email address is detected
* New high-risk phone number is detected
* New fraudulent payment is detected
* New host is authorised
* Subscription is about to expire
* New invoice created
* New insights are available
* New coupon created (Affiliate Program)
* Coupon usage (Affiliate Program)
## App Actions
Greip's Zapier app supports the following actions:
* ASN lookup
* IP lookup
* Email scoring
* Phone number scoring
* Profanity detection
* BIN/IIN lookup
## Uninstallation
To uninstall the Greip Zapier app, follow these steps:
Go to the [Account Settings page](https://dashboard.greip.io/settings) from
the account dashboard.
Under the 'Integrations' section, click on the configuration button on the
right side of the "Zapier" app.
Toggle the 'Enabled' switch to disable the integration.
# Real-time Threat Monitoring
Source: https://docs.greip.io/knowledge-base/monitoring-capabilities/real-time-threat-monitoring
Detailed Event Detection and Analysis
The [Events & Alerts](https://dashboard.greip.io/events) page in the Greip dashboard provides comprehensive information on detected events related to payment fraud, suspicious IPs, invalid IBANs, spam sign-ups, profanity detection, and more. This guide will walk you through the different sections and features of the Events & Alerts page, helping you effectively analyze and manage these events for enhanced fraud prevention.
## Event Details and Risk Score
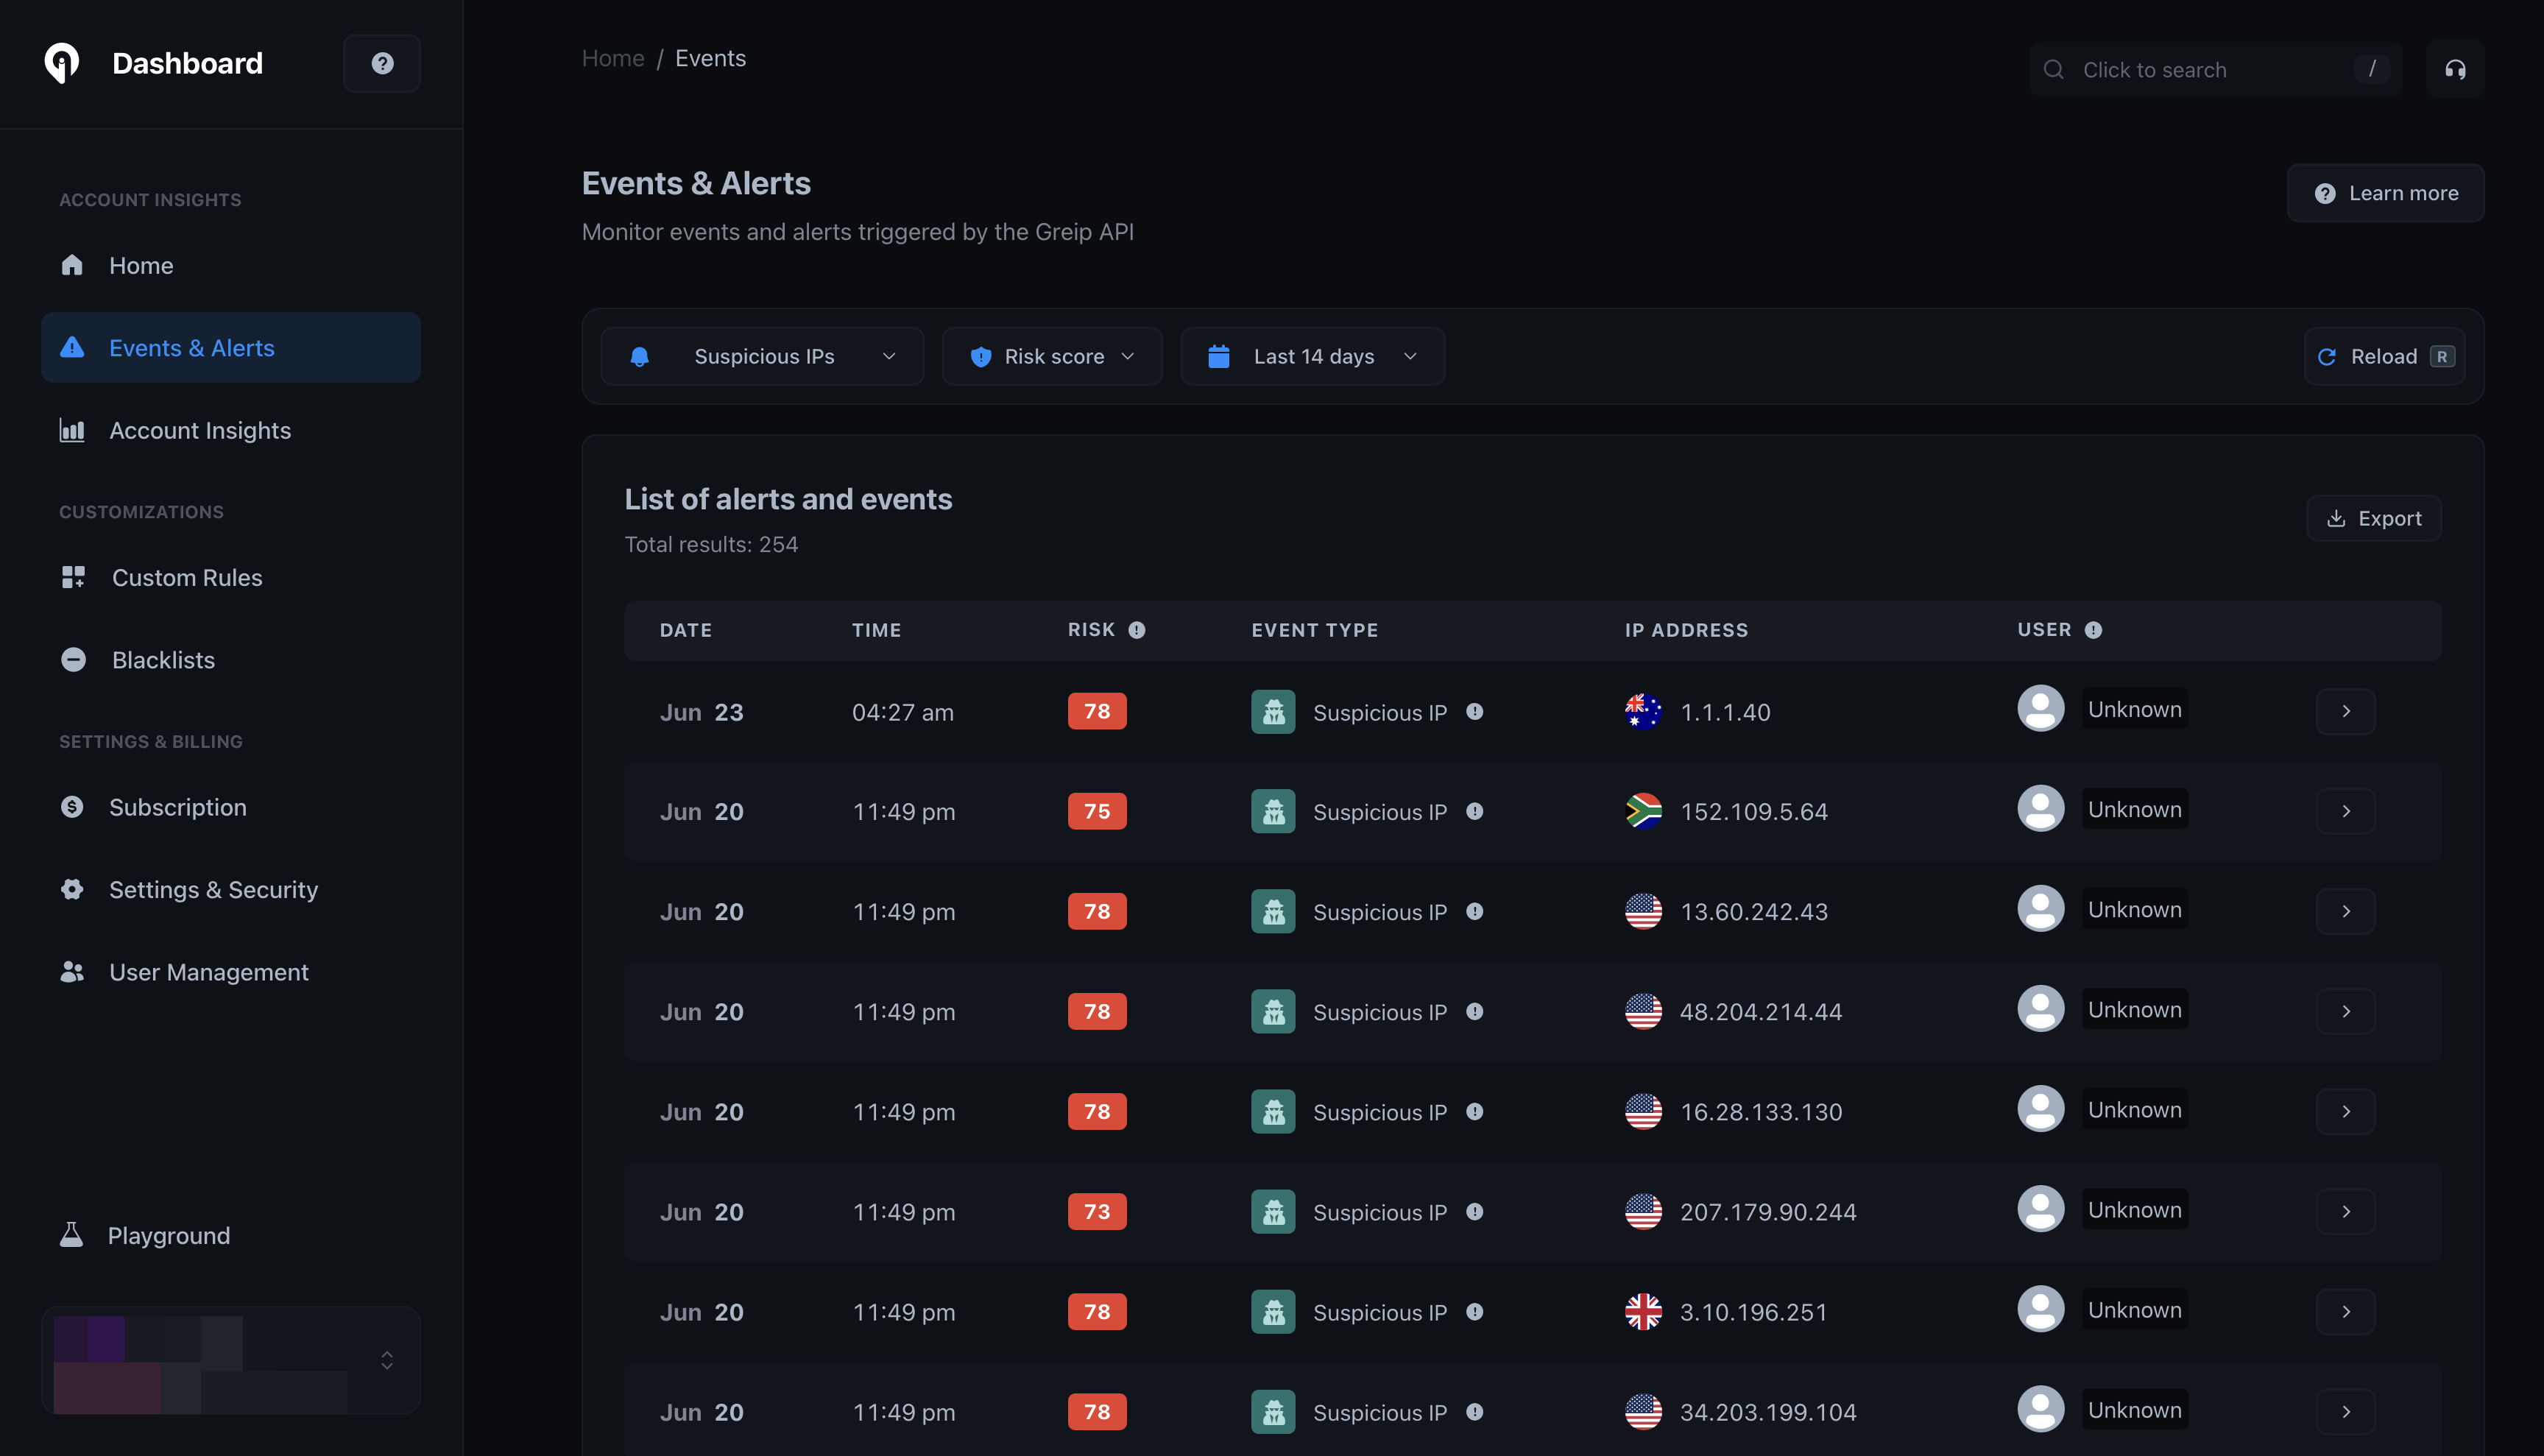
Upon accessing the [Events & Alerts](https://dashboard.greip.io/events) page, you'll find a detailed breakdown of each event type detected by Greip. Each event is accompanied by relevant information and assigned a risk score. The risk score reflects the severity of the event and helps prioritize your focus on the most critical issues requiring attention.
## Filtering and Search Capabilities
The Events & Alerts page offers powerful filtering and search capabilities to help you streamline event management and investigation. You can filter events based on risk score range, specify the date range for the events, and select event types for focused analysis. These filtering options allow you to narrow down the displayed results and efficiently identify specific events for further investigation.
## Tips for effectively leverage the information of the Events & Alerts page
1. **Apply Filters and Search**: Utilize the filtering options to narrow down results based on risk score ranges, date ranges, or event types.
2. **Analyze Event Details**: Review the detailed information provided for each event, focusing on relevant details, risk scores, and any associated patterns or trends.
3. **Take Action and Respond**: Based on the risk scores and event details, take appropriate actions to investigate and mitigate the identified threats. Implement strategies to prevent future occurrences of similar events and monitor ongoing activity.
By effectively analyzing, investigating, and responding to events on the Events & Alerts page, you can enhance your fraud prevention efforts and maintain a secure environment for your business and customers.
# Subscription Usage Tracking
Source: https://docs.greip.io/knowledge-base/monitoring-capabilities/subscription-usage-tracking
The [API Insights](https://dashboard.greip.io/insights) page in the Greip dashboard offers valuable insights into the weekly usage of your subscription and API methods. This guide will walk you through the different sections and features of this page, helping you effectively analyze your usage and optimize resource allocation.
## Weekly Usage Metrics

Upon accessing the [API Insights](https://dashboard.greip.io/insights) page, you'll find a chart that visualizes the weekly usage metrics of your Greip subscription. This chart provides an overview of the volume of API requests made over time, allowing you to track trends and patterns. By analyzing this data, you can identify peak activity periods (commonly known as rush hours) and evaluate resource allocation during those times.
## Identify Rush Hour

Identifying rush hours is crucial for optimal resource allocation and ensuring optimal service availability during high-traffic periods. To identify rush hours on the [API Insights](https://dashboard.greip.io/insights) page, just take note of the time periods when API requests reach their peak, as these often correspond to rush hours when there is a higher volume of transactions or user interactions. Consider external factors such as marketing campaigns, sales promotions, or seasonal trends that may influence usage patterns.
## Steps to Leverage the Information Effectively:
1. **Analyze Weekly Usage Trends**: Monitor the line chart to identify patterns and trends in your API usage. Look for spikes or dips in the usage graph and correlate them with events or campaigns to gain insights into your business's transaction volumes.
2. **Identify Rush Hours**: Determine the time periods when your API requests reach their peak. This information can help you allocate resources more efficiently and ensure optimal service availability during high-traffic hours.
Utilize the [API Insights](https://dashboard.greip.io/insights) page to gain a deeper understanding of your Greip subscription's usage patterns, identify key trends, and optimize resource allocation. By actively monitoring and analyzing your usage metrics, you can fine-tune your fraud prevention strategies, enhance performance, and maximize the value derived from Greip.
# Customize Response
Source: https://docs.greip.io/options/customize-modules
Get exactly what you need for each request to Greip
Our API provides the ability to specify which modules you need to retrieve data from, giving you more control over the information you receive. With this feature, you can streamline your workflow and optimize the performance of your platform.
To retrieve data from specific modules, simply add the params parameter to your API request and specify the desired modules. Please note that the basic modules will always be included, so you don't need to specify them in the params parameter.
For example, if you only need to retrieve user device information without the timezone data, you can use the following request URL:
```
https://greipapi.com/geoip?key=1234567890¶ms=device
```
And, if your need to retrieve multiple modules, you can add the parameter by separate the needed modules with a comma:
```
https://greipapi.com/geoip?key=1234567890¶ms=timezone,currency,security
```
## Available Options
| Option | Description |
| ---------- | --------------------------------------------------------------------------------------------------------- |
| `security` | Gives you the security checks for the IP Address including Proxy/VPN/Tor Detection. |
| `currency` | Gives you more details about user currency. |
| `timezone` | Provides you user timezone details (like: sunset, sunrise, etc). |
| `location` | Adds more details about user location data. |
| `device` | Provides you information related to user device (like: browser name & version, device type, OS, version). |
# Development Environment
Source: https://docs.greip.io/options/development-environment
Test everything before releasing it to the production environment
Our Development Environment offers a seamless integration process for our API with your website or application. To ensure that your current plan's available requests remain unaffected, we recommend implementing the integration by adding the \&mode=test parameter to your request.
We highly recommend testing your integration thoroughly with the \&mode=test parameter before removing it from your requests to ensure that everything is functioning as expected.
This parameter accepts two values, which are `test` and `live` and will be
working for all our modules.
Please note that after setting this option to `test` you will get fake information,
it's used just through the development stage.
Once the integration process is complete, you can remove the "\&mode=test" parameter from your API requests. This parameter is designed solely for testing purposes and has no impact on the actual functionality of the API.
## Sample Requests
```
https://greipapi.com/geoip?key=12345&parms=location,currency&mode=test
```
```
https://greipapi.com/IPLookup?key=12345&parms=location,currency&mode=test
```
# JSONP Callback
Source: https://docs.greip.io/options/jsonp-callback
Our API supports JSONP (JavaScript Object Notation with Padding) Callbacks, which allows you to specify the function name you want to use and have the API response wrapped inside that function. This feature is useful when you need to perform cross-domain AJAX requests or when you want to improve the performance of your application by caching the response.
To use JSONP Callbacks, simply add the "callback" parameter to your API request with the name of the function you want to use. The API response will be wrapped inside this function name, making it available to your JavaScript code.
Here is an example of how to use JSONP Callbacks with our API:
```
https://greipapi.com/geoip?key=12345&callback=myFunctionName
```
In this example, "myFunction" is the name of the function that will be used to wrap the API response. The response will be sent in JSONP format, with the function name added before the JSON data.
## Sample Response
```javascript
myFunctionName({
"status": "success",
"data": {
"ip": "68.235.60.237",
"ipType": "ipv4",
"IPNumber": 1156267245,
"continentName": "North America"
"continentCode": "NA",
"countryCode": "US",
"countryName": "United States of America"
"regionName": "Illinois",
"cityName": "Chicago",
"zipCode": "60605",
"latitude": 41.8672,
"longitude": -87.6259
}
});
```
Using JSONP Callbacks can help improve the performance of your application and make it easier to perform cross-domain AJAX requests.
# Localization
Source: https://docs.greip.io/options/localization
Get the response in your native language!
Our API supports multiple languages, allowing you to retrieve responses in your native language. We understand the importance of providing an intuitive and user-friendly experience for your users, regardless of their language or location.
To retrieve responses in your desired language, simply add the `lang` parameter to your API request. This parameter allows you to choose from a range of supported languages, including `EN`, `AR`, `DE`, `FR`, `ES`, `JA`, `ZH`, and `RU`.
It's important to note that only specific fields of the response will be translated. However, we're continually working to expand our translation capabilities and add more languages to our API.
Let's take an example:
```
https://greipapi.com/geoip?key=1234567890&lang=RU
```
This feature is available only for specific endpoints.
# Response Format
Source: https://docs.greip.io/options/response-format
Get the response in the format you prefer
Our API provides flexibility in the format of the response, allowing you to customize the response format to best suit your needs. Whether you prefer `JSON`, `XML`, `CSV`, or `Newline` formats, we've got you covered.
To change the format of the API response, simply add the format parameter to your API request and specify the desired format type. Please note that JSON is the default format, so there's no need to add this parameter if you want the response format to be in `JSON`.
The available formats for the format parameter are: `JSON`, `XML`, `CSV`, and `Newline`.
## Usage
For example, if you want to retrieve data in XML format, you can use the following request URL:
```
https://greipapi.com/geoip?key=1234567890¶ms=country_name&format=XML
```
# User Identifier
Source: https://docs.greip.io/options/user-identifier
Identify source of the risk in your system!
To identify users detected through our Dashboard, you need to include the userID parameter in the requests you send to Greip. Let's look at some examples to illustrate this:
```
https://gregeoip.io/IPLookup?key=your-api-key&ip=1.1.1.1&userID=john@example.com
```
```
https://gregeoip.io/IPLookup?key=your-api-key&ip=1.1.1.1&userID=John
```
When you include the userID parameter in your requests to the Greip API, it allows you to identify and track fraudulent activities (found on the [Events page](https://dashboard.greip.io/events)) associated with specific user information such as user name, email address, phone number, and more.
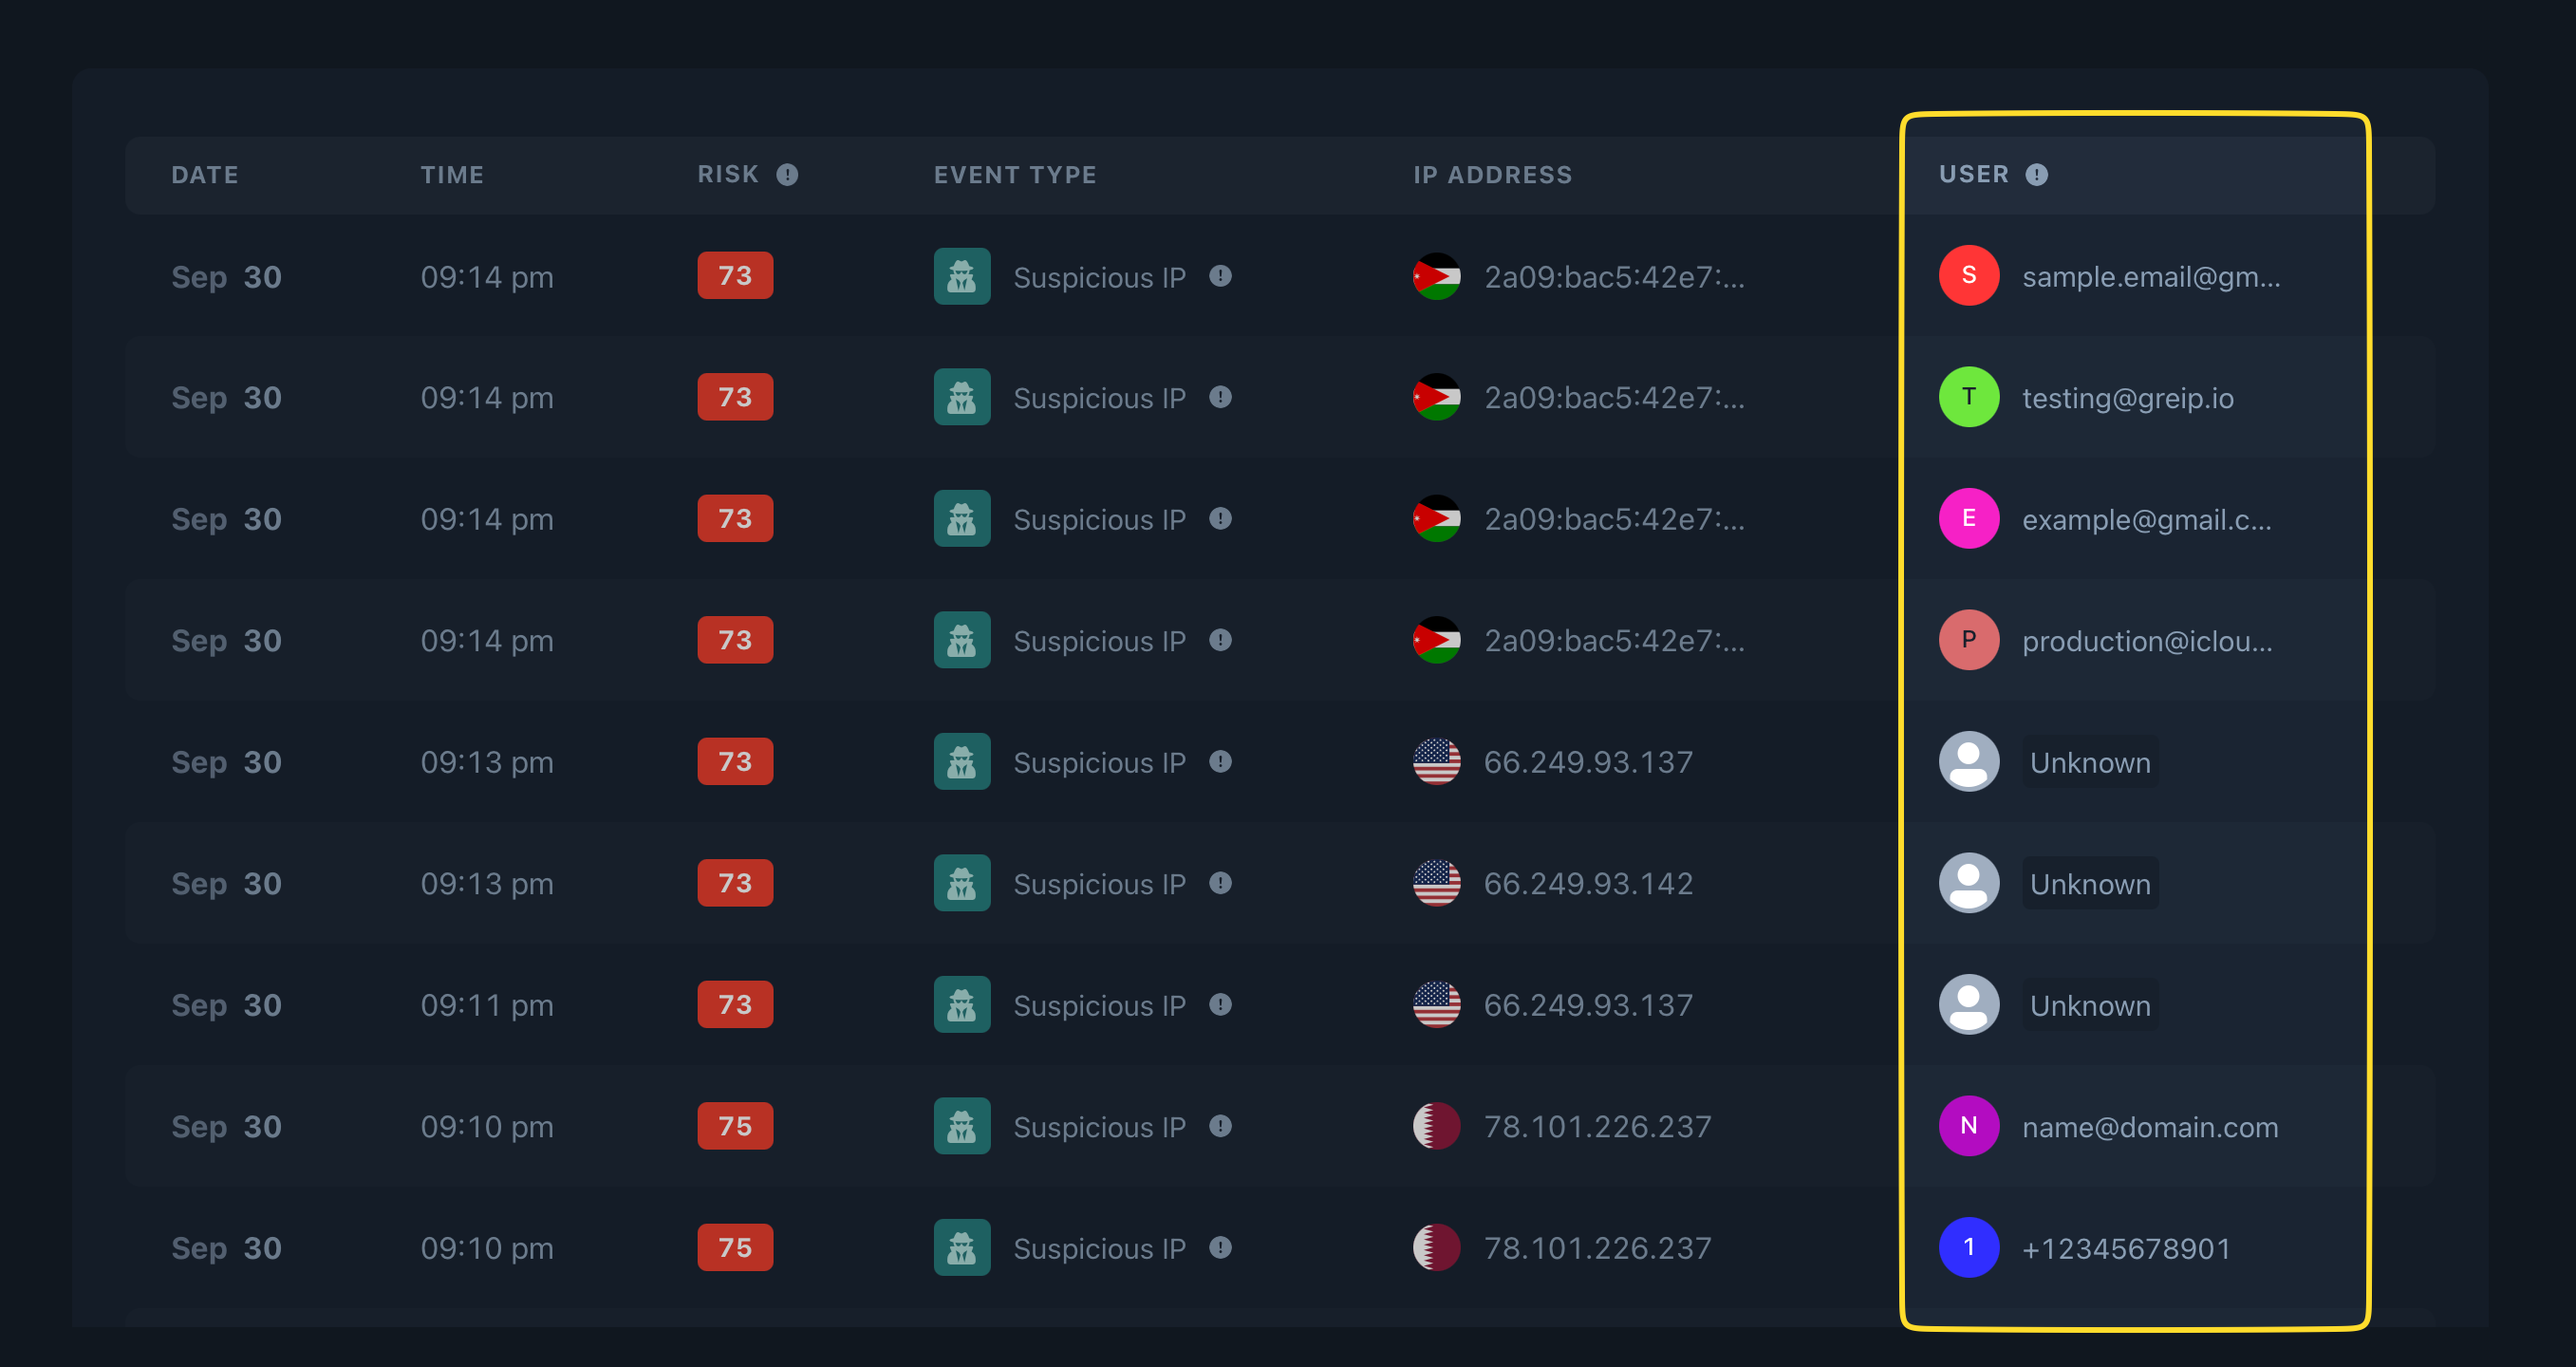
**IMPORTAN NOTE**
There's no need to pass the userID parameter when you send [Payment Fraud Prevention](/api-reference/endpoint/scoring/payment) request to Greip API, as the User Identifier will be retreived from the input data you already pass, like `customer_email`, `customer_phone`, or `customer_id`.
# VPN/Proxy Detection
Source: https://docs.greip.io/options/vpn-proxy-detection
Detect and eliminate bad traffic!
## Overview
In both [IP Geolocation](/api-reference/endpoint/data-lookup/geoip) and [IP Lookup](/api-reference/endpoint/data-lookup/ip) endpoints you can pass the `security` module to the `params` query parameter in order to get full insights about the security threats of that specific IP address.
## Sample Request
```bash cURL
curl --request GET \
--url 'https://greipapi.com/geoip?params=security' \
--header 'Authorization: Bearer '
```
```python Python
import requests
url = "https://greipapi.com/geoip"
querystring = {"params":"security"}
headers = {"Authorization": "Bearer "}
response = requests.request("GET", url, headers=headers, params=querystring)
print(response.text)
```
```javascript Javascript
const options = { method: "GET", headers: { Authorization: "Bearer " } };
fetch("https://greipapi.com/geoip?params=security", options)
.then((response) => response.json())
.then((response) => console.log(response))
.catch((err) => console.error(err));
```
```php PHP
"https://greipapi.com/geoip?params=security",
CURLOPT_RETURNTRANSFER => true,
CURLOPT_ENCODING => "",
CURLOPT_MAXREDIRS => 10,
CURLOPT_TIMEOUT => 30,
CURLOPT_HTTP_VERSION => CURL_HTTP_VERSION_1_1,
CURLOPT_CUSTOMREQUEST => "GET",
CURLOPT_HTTPHEADER => ["Authorization: Bearer "],
]);
$response = curl_exec($curl);
$err = curl_error($curl);
curl_close($curl);
if ($err) {
echo "cURL Error #:" . $err;
} else {
echo $response;
}
```
```go Go
package main
import (
"fmt"
"net/http"
"io/ioutil"
)
func main() {
url := "https://greipapi.com/geoip?params=security"
req, _ := http.NewRequest("GET", url, nil)
req.Header.Add("Authorization", "Bearer ")
res, _ := http.DefaultClient.Do(req)
defer res.Body.Close()
body, _ := ioutil.ReadAll(res.Body)
fmt.Println(res)
fmt.Println(string(body))
}
```
```java Java
HttpResponse response = Unirest.get("https://greipapi.com/geoip?params=security")
.header("Authorization", "Bearer ")
.asString();
```
## Sample Response
```json
{
"data": {
"ip": "165.227.149.217",
"ipType": "IPv4",
"IPNumber": 2783155673,
"continentName": "Europe",
"continentCode": "EU",
"countryCode": "DE",
"continentGeoNameID": 6255148,
"countryName": "Germany",
"countryGeoNameID": 2921044,
"regionName": "Hessen",
"cityName": "Frankfurt am Main",
"zipCode": "65931",
"latitude": "50.115520",
"longitude": "8.684170",
// ↓↓ this added here ↓↓
"security": {
"isProxy": true,
"proxyType": "VPN",
"isTor": false,
"isBot": false,
"isRelay": false,
"isHosting": true
}
// ↑↑ this added here ↑↑
},
"status": "success",
"executionTime": 4
}
```
# List of Packages & Libraries
Source: https://docs.greip.io/packages-and-libraries/list-of-packages-and-libraries
export const GolangIcon = () => ;
export const RubyIcon = () => ;
export const NodejsIcon = () => ;
export const PythonIcon = () => ;
export const PHPIcon = () => ;
export const FlutterIcon = () => ;
}>
A Python SDK meticulously designed to simplify the integration and enhance the efficiency of utilizing Greip services within Python applications.
} href="https://github.com/Greipio/node">
A Node.js module designed for utilizing Greip services with full
capabilities within Node.js environments.
}>
A PHP library crafted to enable efficient utilization of Greip services
within PHP applications.
A ready-to-use Javascript package that provide a complete capability of
using Greip services.
}>
A Ruby Gem designed to seamlessly integrate and optimize the utilization of
Greip services within Ruby applications.
}>
A Dart package meticulously crafted to streamline the integration and
enhance the efficiency of utilizing Greip services within Dart applications.
}>
A Go library meticulously crafted to streamline integration and optimize the utilization of Greip services within Go applications.
A command-line interface (CLI) tool tailored for seamless interaction with
Greip services.
# Other Resources
Source: https://docs.greip.io/packages-and-libraries/other-resources
export const OpenapiIcon = () => ;
export const PostmanIcon = () => ;
} href="https://app.getpostman.com/run-collection/10002119-6f52ce9f-b70b-4d72-bc7a-e262165cda30?action=collection%2Ffork&collection-url=entityId%3D10002119-6f52ce9f-b70b-4d72-bc7a-e262165cda30%26entityType%3Dcollection%26workspaceId%3Ddf7810f8-5bfe-4ad1-8df8-75611bfc15d9">
The official & up-to-date Postman Collection for Greip API.
} href="https://greip.io/OpenAPI.json">
The current OpenAPI specification file (OpenAPI.json) for Greip API.
# Usage Limits
Source: https://docs.greip.io/usage-limits
List of any error you might get while using Greip API
Each API has its own limitation rules. These rules helps the service being more secure by returning error messages to the requests detected by the system's security rules.
Unlike other service providers, the only limits we consider is sending more than 1,000 per second.
So, you will be able to use the service as you want without any daily/monthly limits. Just TRY not to send more than 1k request per second.
Note that you can check your API usage in real-time from your account
dashboard

 Greip's Fraud Prevention API is a powerful tool that can help you detect and prevent various types of fraud in your website or app. By using this API, you can gain more insight into your users and provide a better user experience and more importantly protecting your business from financial losses that rising each year due to fraudulent activities. In this documentation, we'll show you how to use the API by highlighting its methods, options, and other features.
Our API also offers a "development environment," which allows you to test and integrate the API with your website or app without affecting your subscription. Please note that while the development environment simulates live mode exactly, it will retrieve random (fake) information. This feature can be helpful for developers who want to test the API's functionality before going live.
## Quick Start
The Greip Fraud Prevention API can be used for both personal and commercial use cases, and you'll receive the same level of accuracy, speed, and security regardless of whether you have a paid plan or not. To get started, you'll need to [create account](https://dashboard.greip.io/register) and obtain a unique API key. Once you have your key, you can use it to access the API's functions and start detecting and preventing fraud in your website or app.
## Key Sections in This Documentation
Greip's Fraud Prevention API is a powerful tool that can help you detect and prevent various types of fraud in your website or app. By using this API, you can gain more insight into your users and provide a better user experience and more importantly protecting your business from financial losses that rising each year due to fraudulent activities. In this documentation, we'll show you how to use the API by highlighting its methods, options, and other features.
Our API also offers a "development environment," which allows you to test and integrate the API with your website or app without affecting your subscription. Please note that while the development environment simulates live mode exactly, it will retrieve random (fake) information. This feature can be helpful for developers who want to test the API's functionality before going live.
## Quick Start
The Greip Fraud Prevention API can be used for both personal and commercial use cases, and you'll receive the same level of accuracy, speed, and security regardless of whether you have a paid plan or not. To get started, you'll need to [create account](https://dashboard.greip.io/register) and obtain a unique API key. Once you have your key, you can use it to access the API's functions and start detecting and preventing fraud in your website or app.
## Key Sections in This Documentation