Adding custom rules
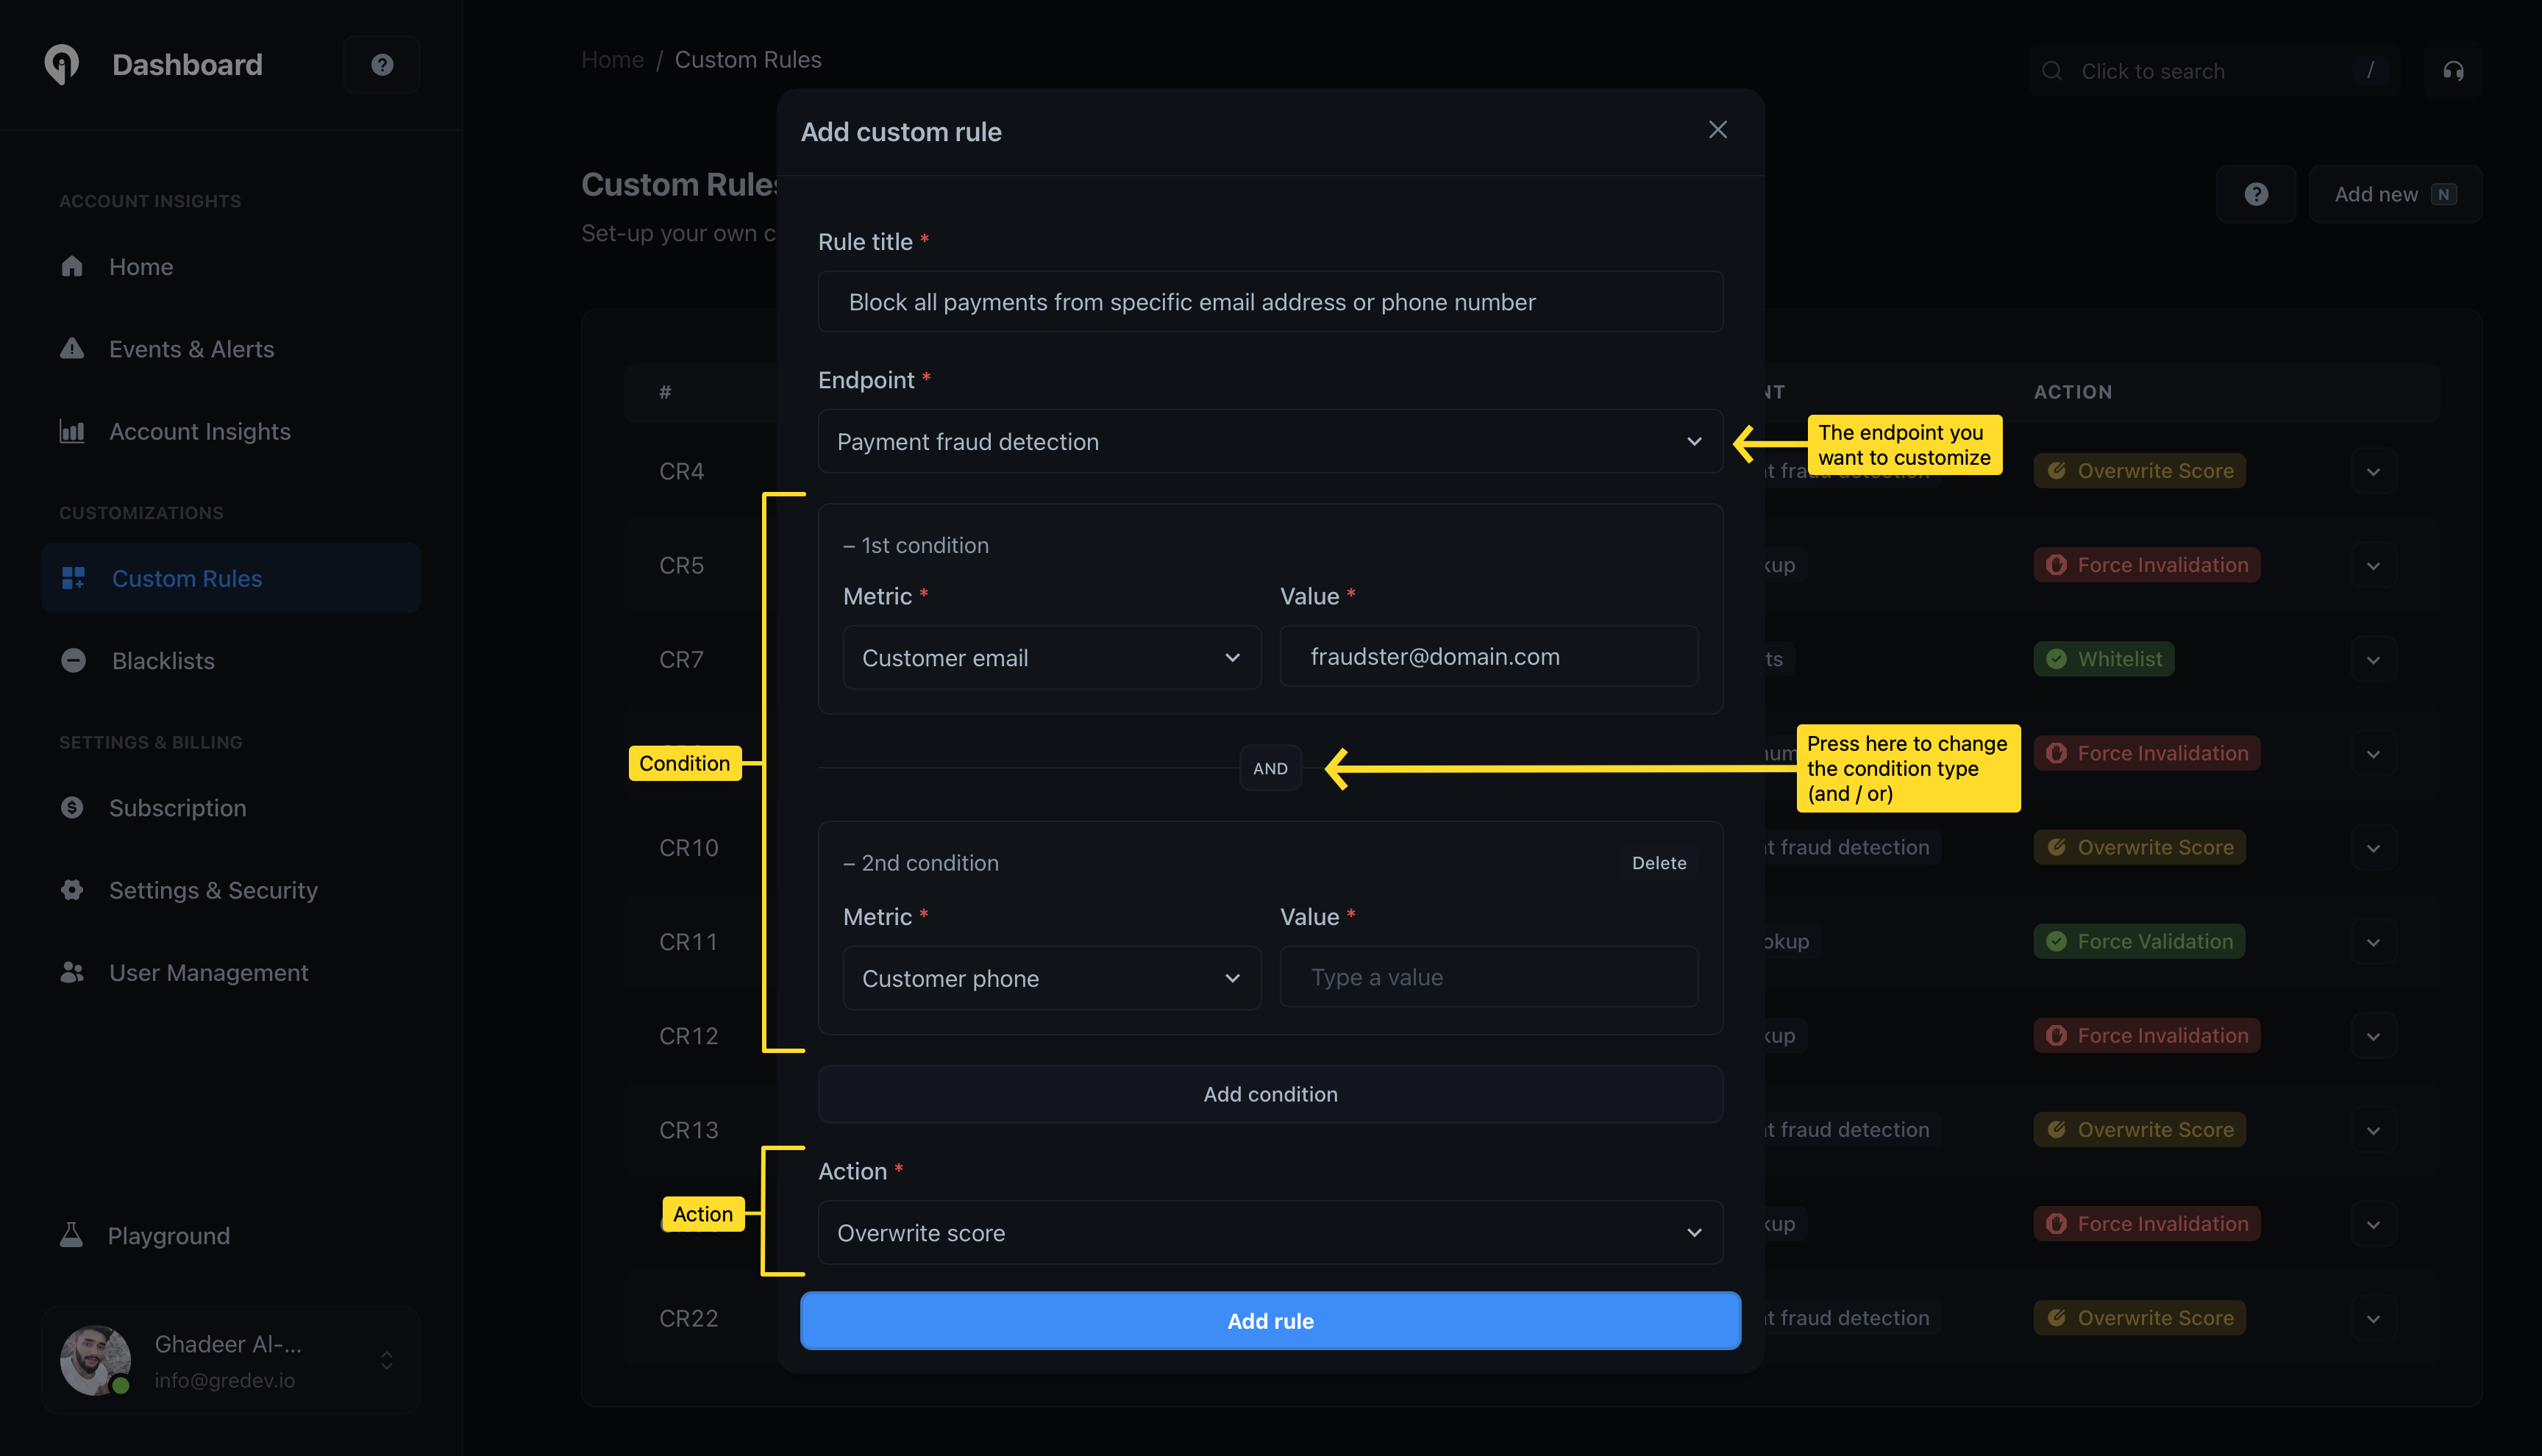
To add a custom rule, follow these steps:First Step
Go to the Custom Rules page from
the account dashboard.
Second Step
Click on the ‘Add Rule’ button from the top right corner of the page to
create a new custom rule.
Third Step
Give it a title that describes the rule. This will help you identify the
rule later, and when the custom rule is applied to an API request, it will
be returned in the API response along with the rule ID.
Sample response with custom rule
When a custom rule is applied to an API request, the custom rule ID will be returned in the API response. Here is an example of a response with a custom rule:Definitions of custom rule actions
Custom rules can be defined with the following actions:IP geolocation
IP geolocation
This includes both the
IP geolocation and IP lookup endpoints.- Add to blacklist: Marks the IP address as blacklisted. It adds a
blacklistedproperty with the value oftrueunder thesecurityobject in the API response. - Add to whitelist: Marks the IP address as whitelisted. It adds a
blacklistedproperty with the value offalseunder thesecurityobject in the API response.
IP reputation
IP reputation
- Add to blacklist: Marks the IP address as blacklisted. It adds a
blacklistedproperty with the value oftrueunder thethreatsobject in the API response. - Add to whitelist: Marks the IP address as whitelisted. It adds a
blacklistedproperty with the value offalseunder thethreatsobject in the API response.
Payment fraud endpoint
Payment fraud endpoint
- Overwrite score: Overwrites the
scoreproperty value with the speicifed score value in the custom rule.
Email scoring endpoint
Email scoring endpoint
- Overwrite score: Overwrites the
scoreproperty value with the speicifed score value in the custom rule. - Mark as valid: Marks the email address as valid. It overwrites the
isValidproperty value totrue. - Mark as invalid: Marks the email address as invalid. It overwrites the
isValidproperty value tofalse.
Phone number scoring endpoint
Phone number scoring endpoint
- Mark as valid: Marks the phone number as valid. It overwrites the
isValidproperty value totrue. - Mark as invalid: Marks the phone number as invalid. It overwrites the
isValidproperty value tofalse.
BIN lookup endpoint
BIN lookup endpoint
- Mark as valid: Marks the BIN as valid. It overwrites the
isValidproperty value totrue. - Mark as invalid: Marks the BIN as invalid. It overwrites the
isValidproperty value tofalse.
IBAN lookup endpoint
IBAN lookup endpoint
- Mark as valid: Marks the IBAN as valid. It overwrites the
isValidproperty value totrue. - Mark as invalid: Marks the IBAN as invalid. It overwrites the
isValidproperty value tofalse.
